How to Crochet for Beginners

As a crochet teacher and designer, I frequently get this question: How do I learn how to crochet as a beginner? If this is you, then I put together this guide to help out complete beginners, and I am excited for you to begin!
If learning to crochet is at the top of your list, then this easy to understand crochet beginner step-by-step guide will help. I hope you enjoy this how to crochet tutorial, and that soon you will be on your way to crocheting anything you want.
Let’s Get Started
First things first, then discuss how you spell Crochet because I have found it spelled incorrectly as croshay, chrochet, crocet and crotche in posts! But the correct way to spell it is crochet. If you do come across a crochet pattern with it spelled the other way, rest assured they are talking about the same thing I am going to teach you about here.
Now, let’s jump right into the part where you learn how to crochet! Scroll down to find out all the basics about crocheting.
What’s In Our Learn to Crochet Guide
Below, we’ll explain different parts of crochet basics, including what a crochet hook is, common crochet abbreviations, simple crochet stitches, easy crochet techniques and even how to spell crochet (you’d be surprised how people spell it).
- Crochet Hooks
- Yarn
- Crochet Stitches
- Crochet Abbreviations
- Weaving in Yarn Ends
- Gauge in Crochet
- Joining Yarn / Changing Colors in Crochet
- How to Keep Track of Rows and Stitches
When I put together this guide, I wanted to make sure that even as an absolute beginner learning to crochet for the first time, it would be easy to understand. I promise crochet is not difficult to learn, and it’s easy to pick up quickly.
What Is Crochet?
Crochet is the art of creating fabric by looping yarn with a crochet hook. Sounds simple, right? Well, it is… I promise! Learning to crochet takes time, so take it slow, remember that you will more than likely make mistakes, (but that’s ok) and be sure to read all the sections below to get started.
What Materials Or Tools Do I Need to Crochet?
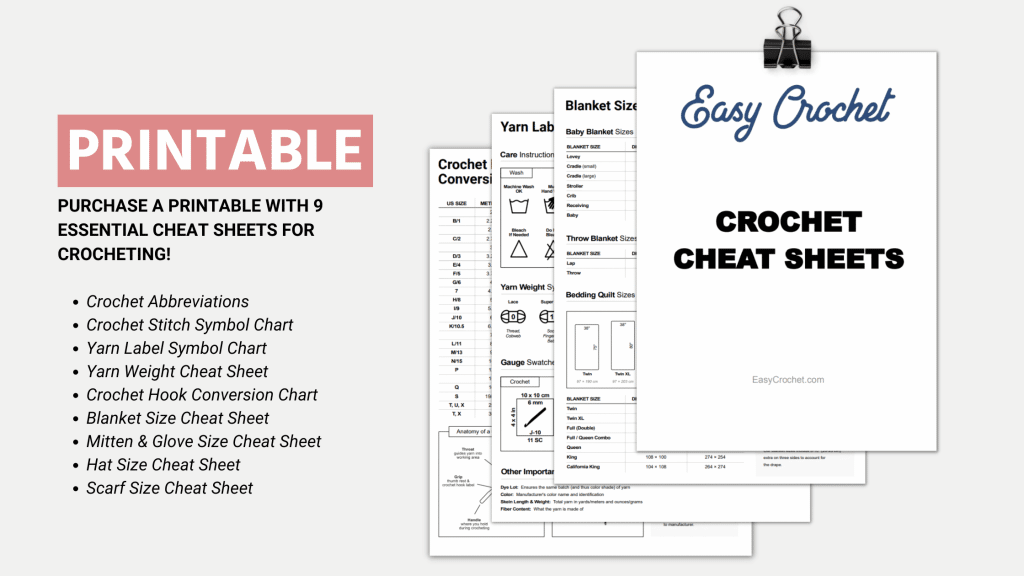
While, you’ll really only need just two basic crochet supplies as a beginner to get started, we also have a full list of our recommended products like scissors, stitch markers, yarn needles and more.
You should have these supplies on hand if you’re new to crocheting….
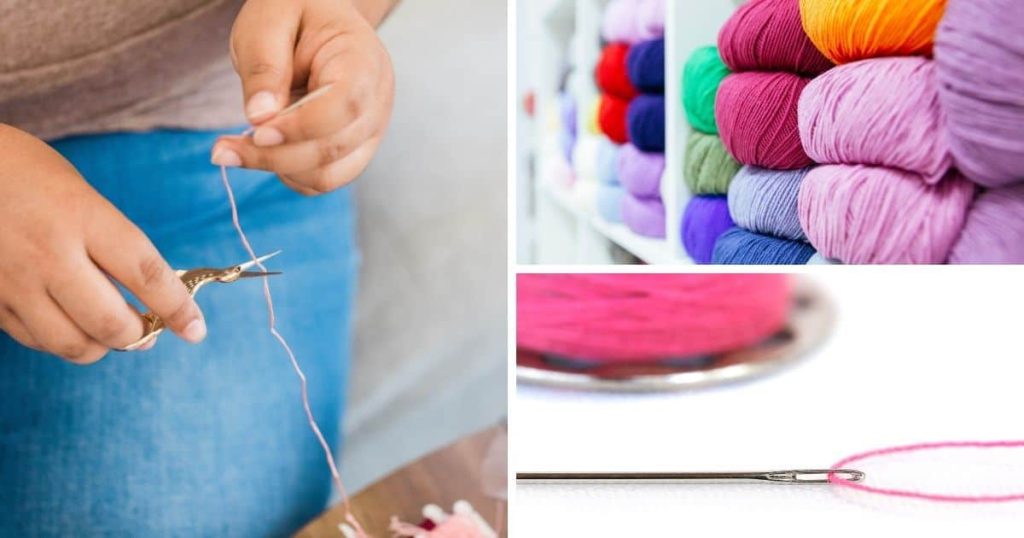
- Yarn: Yarn comes in many weights (how thick it is) and yardages. Certain projects use specific weights of yarn, but others – like blankets – can use just about any weight. You can buy yarn online or in-store, but I always prefer to buy it online. Online, you have a much wider selection and can choose from just about any brand there is.
- Crochet Hook: Crochet hooks come in many sizes. The most common, however, is anywhere between a 3 mm and 15 mm size. There are sizes smaller and larger than those, but are only used for very specific use cases. Crochet hooks are generally used with specific yarn weights as well. For example, medium #4 weight yarn should be used with either a 5.5 mm or 6.5 mm hook.
- Scissors: A great pair of stork scissors will get the job done, and these should be considered your crochet only scissors, so don’t let anyone else use them for anything else.
- Stitch markers: These are great for marking your stitches in projects and keeping track of rows.
- Tapestry needle: These will help you to weave in all the loose yarn ends at the end of your project. They can be sometimes referred to as yarn needles.
With all the different types of yarns and hooks, the selections can be a bit overwhelming. However, luckily for you, just about every crochet pattern gives you the specifics of what you’ll need.
Don’t worry… the crochet pattern will tell you the exact yarn weight, type of yarn, and the preferred hook size. Then, with the right yarn and hook, you’ll be on track to begin making your first scarf, hat, blanket, or beginner-friendly project you pick.
But first, let’s elaborate on the crochet hook and yarn before we get into more details about crocheting.
What Is a Crochet Hook?
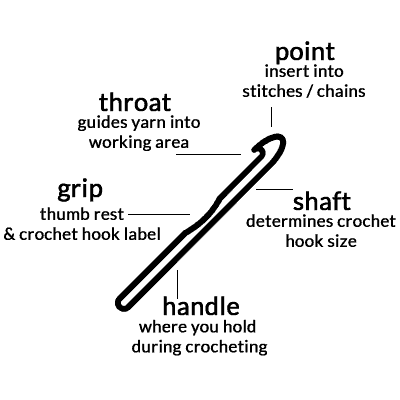
A crochet hook is a handheld tool used to form crochet stitches. The different parts of a crochet hook are listed in this image and include the point, throat, grip, shaft, and handle.
It is important to familiarize yourself with the hook so when you pick up a hook for the first time, you will understand it and its parts before starting crochet and beginning your first pattern.
Crochet Hook Sizes
There are over thirty different sizes of crochet hooks, and crochet patterns will usually require a specific hook size.
Crochet hooks are identified by either their US or Metric names. For example, a 5.5 mm metric size hook is also called a I-9 size hook in the US.
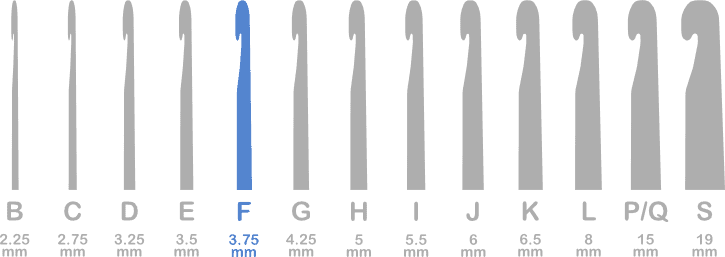
Easy Crochet has conveniently classified all our patterns into which hook size is used. Here are the hook sizes we have crochet patterns for:
- 2.25 mm (B-1)
- 2.75 mm (C-2)
- 3.5 mm (E-4)
- 3.25 mm (D-3)
- 3.75 mm (F-5)
- 4 mm (G-6)
- 4.5 mm (7)
- 5 mm (H-8)
- 5.5 mm (I-9)
- 6 mm (J-10)
- 6.5 mm (K-10.5)
- 7 mm
- 8 mm (L-11)
- 9 mm (M/N-13)
- 10 mm (N/P-15)
- 15 mm (P/Q)
- 16 mm (Q)
- 40 mm
Crochet hooks not only come in different sizes, but also different materials and shapes. From ergonomic hooks, to steel or Tunisian hooks, each type of hook has a specific use. Making sure you get the right one is essential!
I recommend starting with a Medium (#4) weight yarn and a 5.5 mm (I-9) Crochet Hook to begin your crochet journey.
How to Hold a Crochet Hook
The two most common ways to hold a crochet hook are a pencil grip and the knife hold method.
- Pencil Grip: Use your thumb and index finger to pinch or hold the grip of the hook (see illustration above) like you would a pencil.
- Knife Hold: As the name implies, you will hold the hook like you would a knife, placing your thumb on the thumb rest or grip.
There are different ways to hold the hook, but the most important thing is to choose one that works best for you.
The rule of thumb is to hold your crochet hook with your dominant hand and the working yarn with the non-dominant hand. You can find videos on YouTube that will help go through this process step by step.
Yarn in Crochet
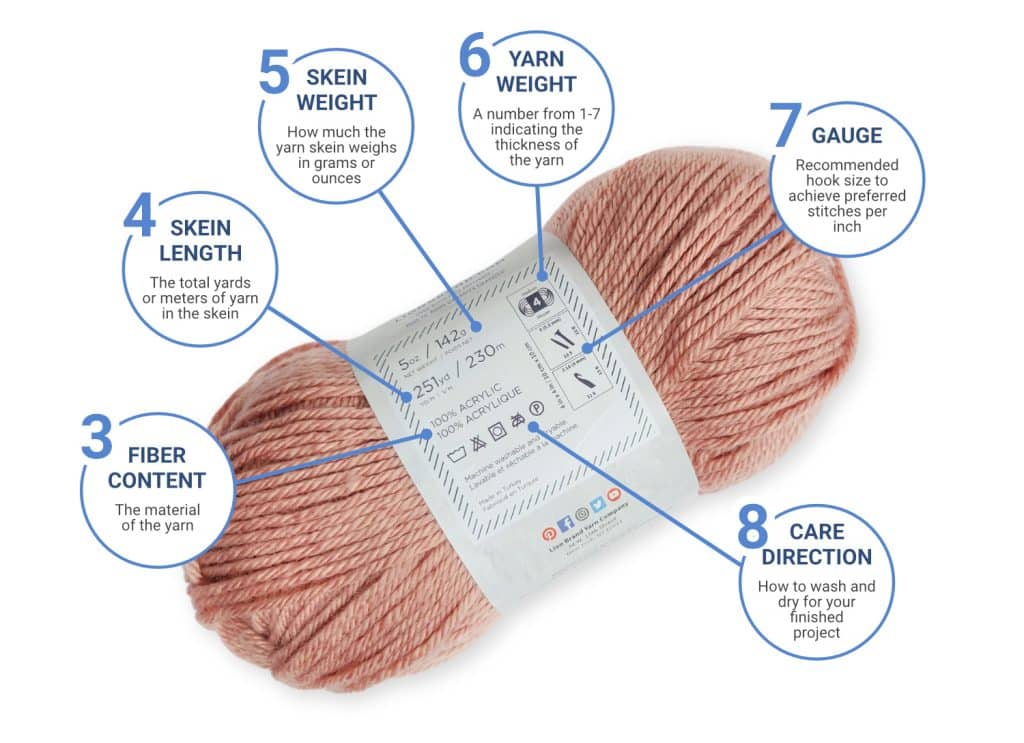
Yarns are available in many fibers, lengths, and weights. You can tell a specific yarn’s qualities by reading its label. Yarn thickness is used to determine the weight of the yarn, which can be categorized into numerical weights of 0 to 7.
The weight of the yarn will also determine what size crochet hook you will use, too! To make it easy, most yarn companies include all this information on the yarn label of each skein of yarn. So if you are ever unsure what weight of yarn you have or what hook you need to use, just check the label.
Yarn Weight
Yarn comes in a variety of different weights, and the higher the number, the thicker the yarn. Here are all of our crochet patterns broken down by the weight of yarn that they use:
- Weight 1 – Super Fine
- Weight 2 – Fine
- Weight 3 – Light
- Weight 4 – Medium
- Weight 5 – Bulky
- Weight 6 – Super Bulky
- Weight 7 – Jumbo
There are many different types of yarn, each made of a different fiber. Some yarns are 100% acrylic, wool, or cotton, while some are blends of each. Every fiber does not work for each type of project. For example, wool that should be used on a sweater should not be used to make a blanket.
My personal favorite yarns to crochet with is a medium weight four yarns (aka worsted weight yarn) such as Vanna’s Choice by Lion Brand, Brava Worsted by We Crochet or any cotton yarn too.
Both of the yarns mentioned are 100% acrylic yarn, inexpensive and work perfectly to crochet blankets with! Take a peek at Vanna’s Choice below!

How to Hold Yarn in Crochet
There are a couple of different ways to hold yarn in crochet.
- The first way is to wind the yarn around your little finger, under the two middle fingers and over your index finger of your left hand, starting with the yarn tail end of the yarn. If you are left-handed, you will use your right hand and follow the steps above.
- The second way to hold yarn is to hold it between the index finger and middle finger as you are working. This is the method I use as a crocheter and started with many years ago.
Whatever method you decide to use, just pick the one that works easiest for you as a crocheter. Crocheting doesn’t have to be difficult, so just do what works best for you in crochet.
Next, let’s move on to basic crochet stitches and techniques which are important to know as a beginner crocheter.
Beginner Crochet Stitches & Techniques
The chain and single crochet stitches are two of the most common and basic stitches that every beginning crocheter needs to know before trying to tackle making a project from a crochet pattern.
Below, You’ll learn how to start crochet projects by studying beginner crochet stitches. I’ll also explain basic techniques of more crochet stitches like the slip stitch, half double crochet and double crochet stitch too! Once you learn all about the different stitches below, you will be well on your way to beginning crocheting!
Beginners Crochet Basic Stitches
Learn more about each beginner-friendly simple crochet stitch below with our easy instructions. Once you get the hang of these common crochet stitches, then you can move on to more advanced stitches in your crochet projects.
#1. Chain Stitch (ch)
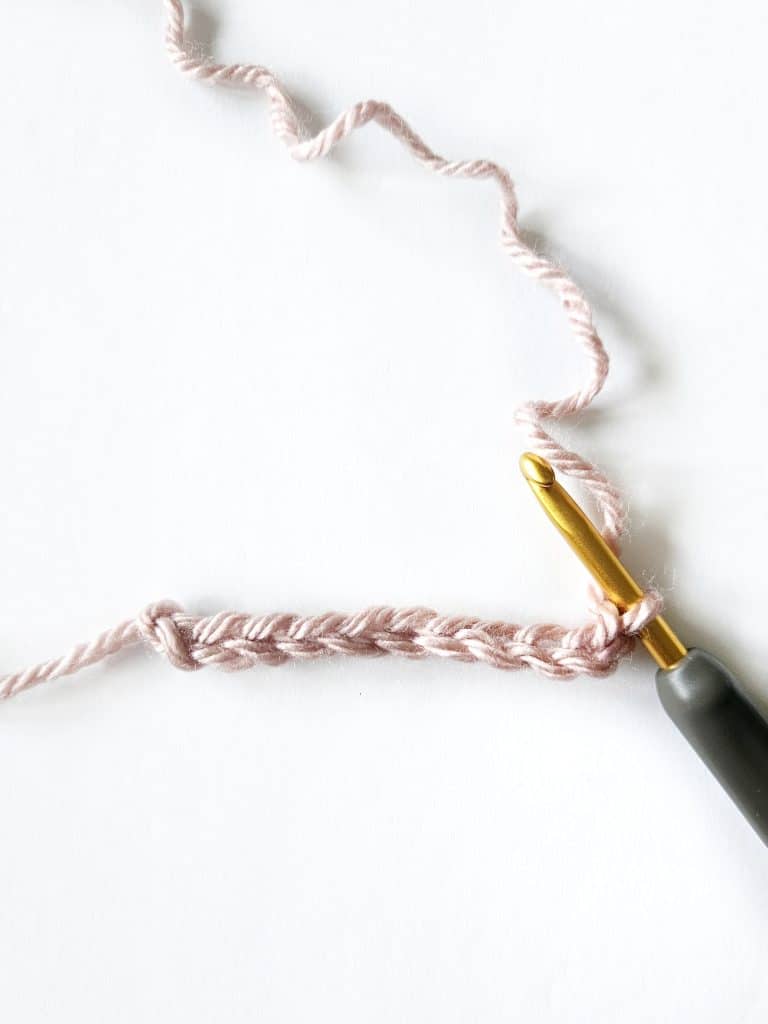
A chain stitch, is a simple crochet stitch that often forms the foundation of what crochet stitches are worked into during most crochet projects. View our video tutorial on chain stitches. You will hear this first row sometimes called the foundation chain, which is just a series of chain stitches worked one after another. There is a front loop and back loop of every chain (or stitch) that resembles a V.
The number of chains across in a crochet pattern can determine the length or the width of a crochet project.
- To make your first stitch, start by making a slip knot.
- Insert hook into slip knot point first, bring yarn over the shaft of the hook from back to front and grab it with the throat of the hook.
- Draw hooked yarn through slip knot and onto the hook. This movement will make one ch stitch.
- Repeat steps two and three for the next stitches until you have the desired number of stitches for a pattern. One loop will remain on hook.
When first starting out, I suggest making as many chain stitches as you’d like in a row to get used to crocheting this stitch.
Turning Chains: A turning chain is the chain made at the start of a row (or end of the row) with your hook to bring the yarn up to the height of the next row. The turning chain number will depend on what crochet stitch you are using.
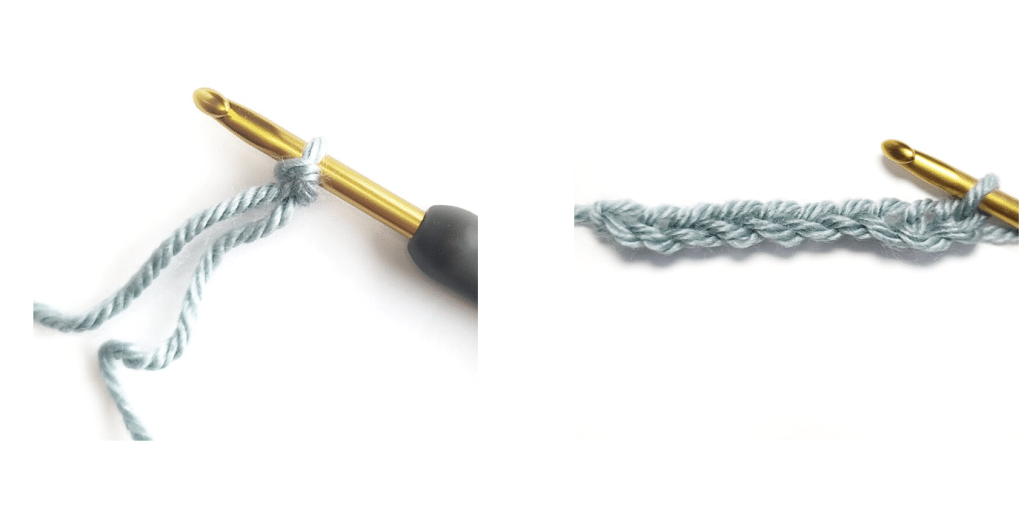
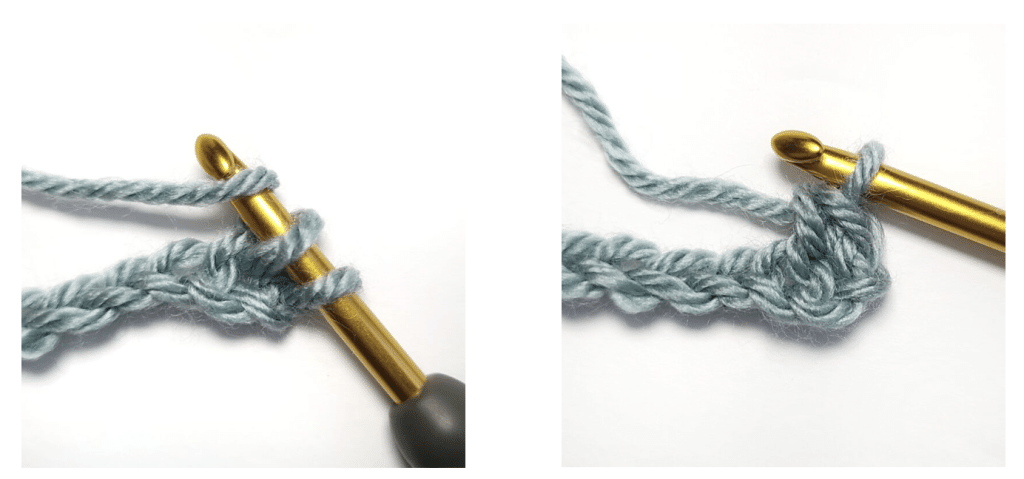
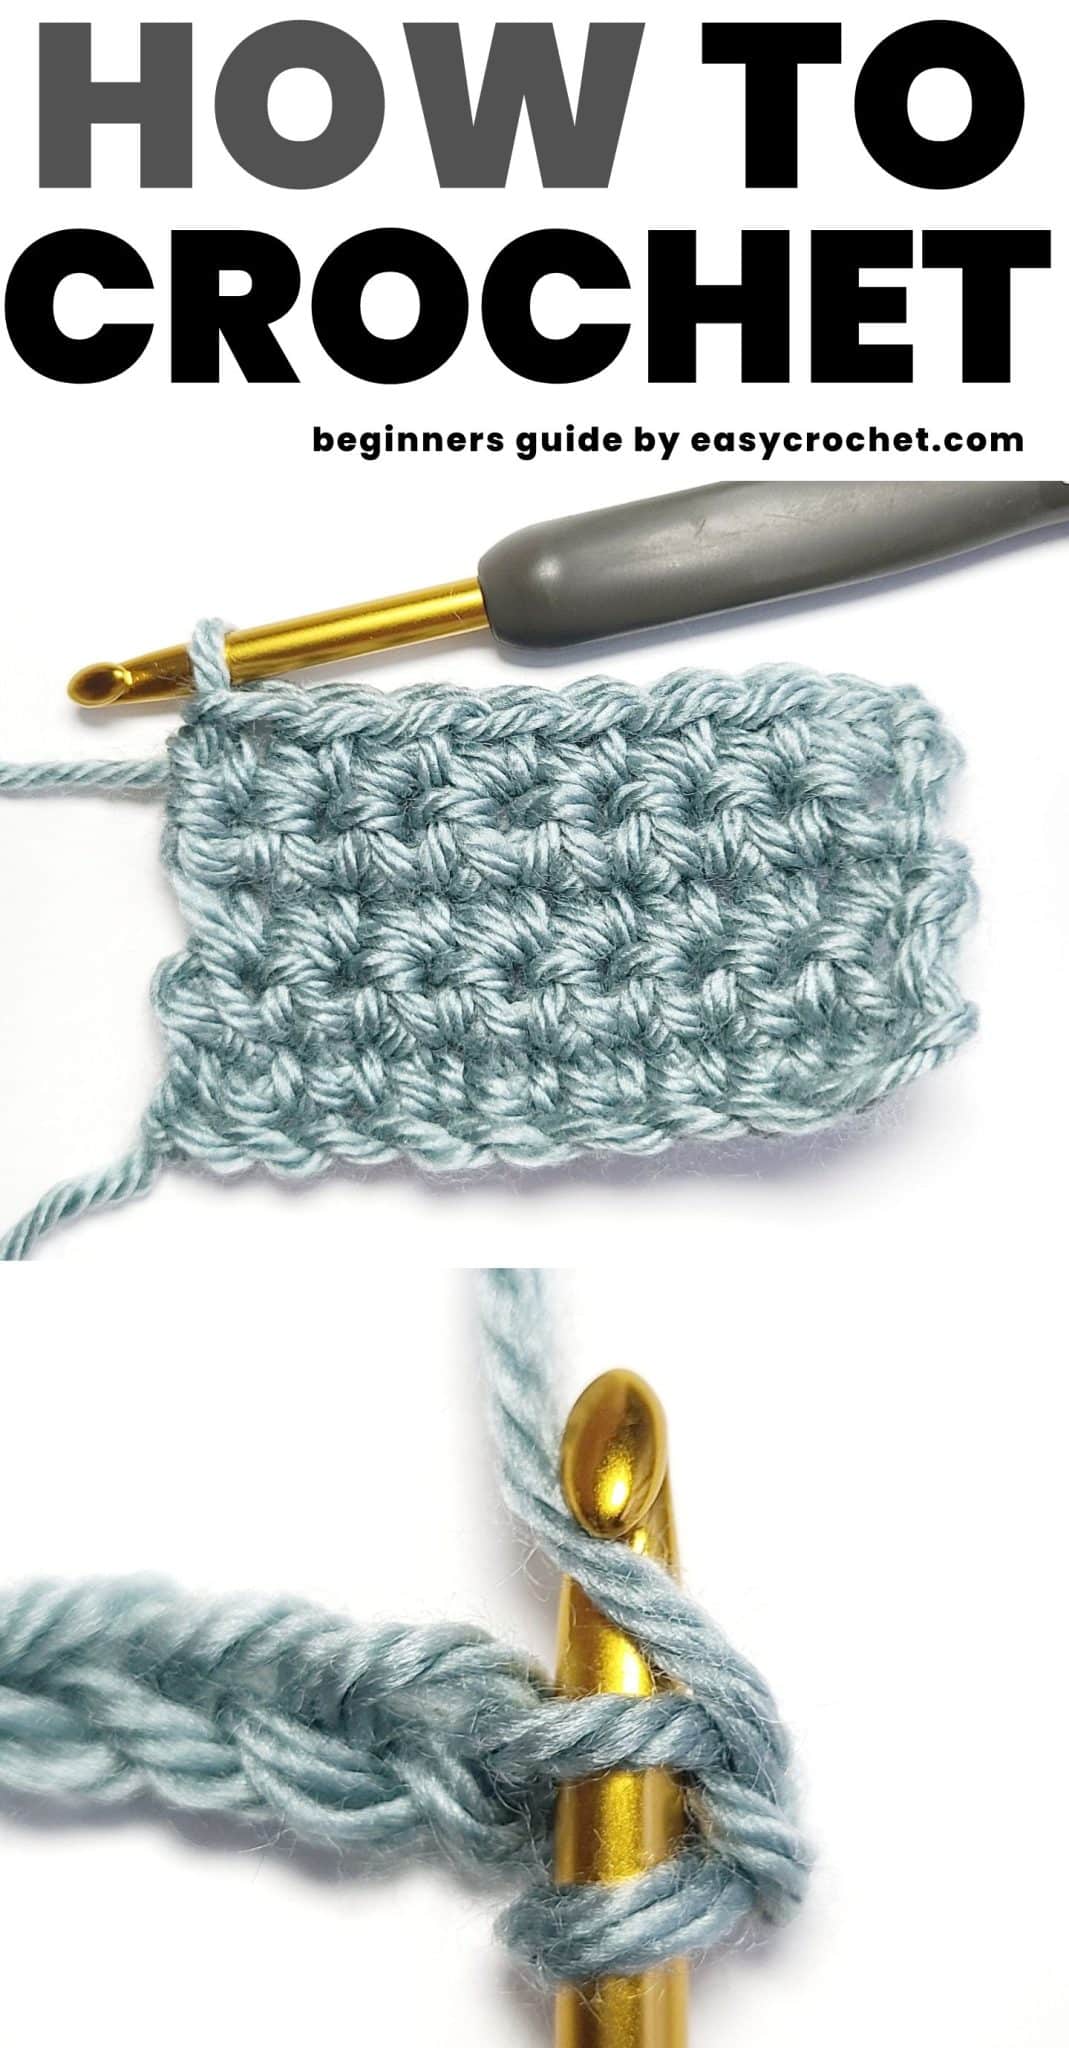
#2. Single Crochet Stitch (sc)
Single crochet stitches are one of the first beginner crochet projects you make! This first project usually consists of rows and rows of single crochet stitches to make a scarf, washcloth, or even a blanket if you are feeling adventurous.
One single crochet stitch after another creates a tighter crochet fabric in projects and is the perfect stitch for beginners for easy crocheting.
- Insert the crochet hook from front to back in the center of the second chain from the hook.
- Bring the yarn over (yo) the hook and pull the yarn back through the chain from back to front (2 loops on hook).
- Yo and pull through both loops on the hook.
- Learn more about the single crochet stitch and how to start making single crochet rows for your next project.
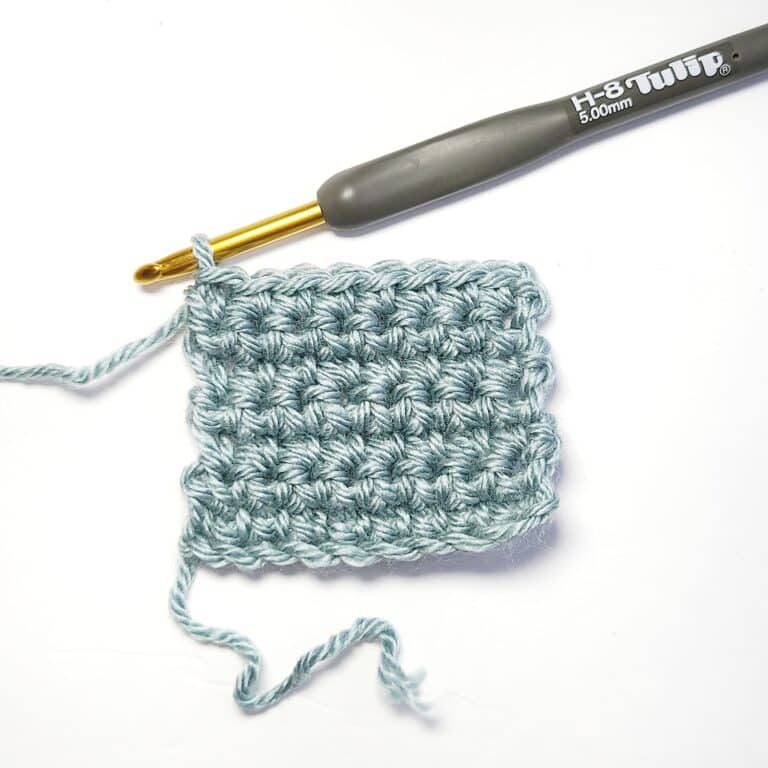
The Steps
Use this single crochet tutorial with step-by-step photos and a video tutorial of this beginner-friendly stitch.
Step 1: Chose your yarn
Step 2: Chose the hook that corresponds to the yarn (that can be found on the yarn label)
Step 3: Hold the hook in your dominant hand (left hand or right hand), Make a slip-knot and chain 10 (or whatever amount you’d like)
Step 4: In the second chain stitch from the hook
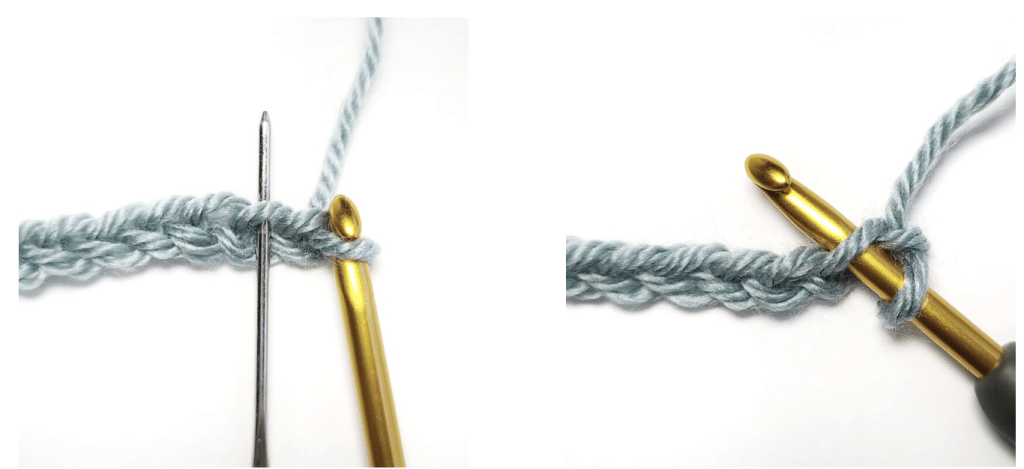
Step 5: Wrap the yarn over the hook, and pull it back through the chain. This will create one loop on the hook. You will now have two loops on the hook.
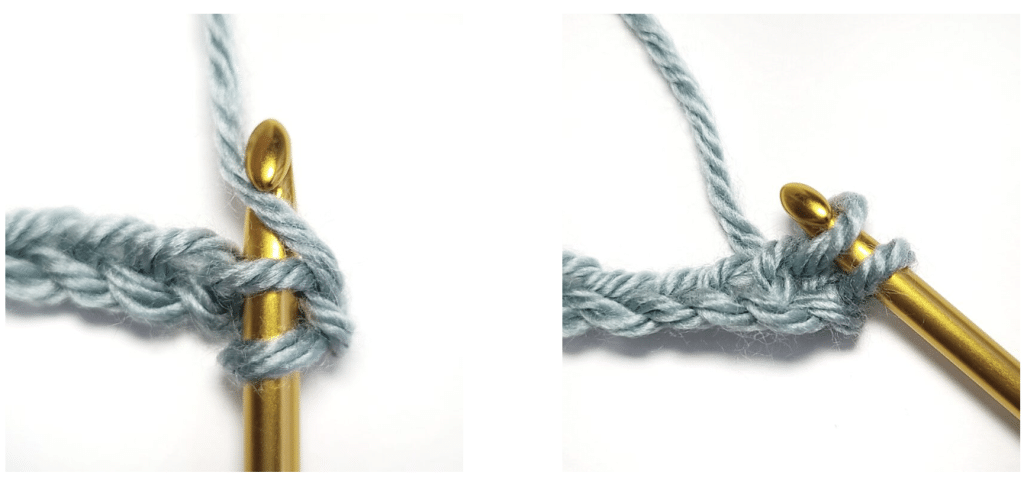
Step 6: Wrap the yarn over the hook again, and pull it through both loops on the hook. You have completed your first single crochet stitch.
Step 7: Single crochet into each chain across, At the end of the row, chain 1 and turn your work aka flip over, Chain 1 and repeat steps 6-8 to complete another row.
Single Crochet
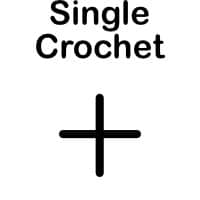
Abbreviation: sc
Difficulty Level: Easy
Learn this stitch →
#3. Slip Stitch (sl st)
A slip stitch is a stitch that used in surface crochet as well as in patterns to create texture and uniqueness.
- Insert hook into the designated stitch
- YO (yarn over) and pull back through the st and through the loop on the hook.
Slip Stitch
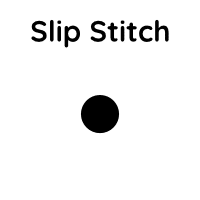
Abbreviation: Sl St
Difficulty Level: Easy
Learn this stitch →
#4. Half Double Crochet Stitch (hdc)
The half double crochet stitch or HDC stitches are a favorite stitch of many since it has some height but is also quick to work up.
- Yo (yarn over) insert the hook from front to back of the designated stitch
- Yo the hook and pick up a loop.
- Yo the hook and pull back through all three loops on the hook.
- You have now completed a half double crochet stitch.
Half Double Crochet
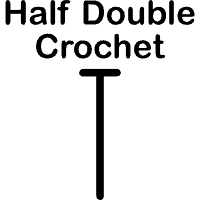
Abbreviation: hdc
Difficulty Level: Easy
Learn this stitch →
#5. Double Crochet Stitch (dc)
Double Crochet stitches are fun to learn because it’s the next step up from a half double crochet. You’ll quickly realize how much quicker it is to finish crochet projects when you are using double crochet stitches over the other types of stitches.
- Wrap the yarn over the hook, insert the hook into the specified st.
- YO the hook again, draw the yarn through the st, so there are 3 loops on the hook
- YO the hook again draw it through 2 loops, so there are 2 loops on the hook
- YO the hook, draw it through the final 2 loops.
Double Crochet
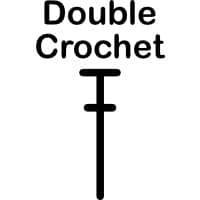
Abbreviation: dc
Difficulty Level: Easy
Learn this stitch →
#6. Triple Crochet Stitch (tr)
The Triple Crochet stitch or Treble Crochet Stitch (aka treble stitch), one of the tallest crochet stitches you can create. This is usually the next stitch you’ll want to learn after the DC stitch.
- Make a chain of a desired length of any #
- Yarn over the hook twice, inert hook in the designated the next stitch (the fifth chain from the hook for the first TR of a project)
- YO, draw through the stitch (four loops on the hook)
- YO, draw yarn through two loops on the hook. (three loops on the hook)
- YO, draw yarn through two loops on the hook (two loops on hook)
- YO, draw yarn through two loops on the hook
Triple Crochet
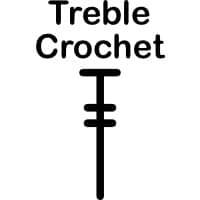
Abbreviation: tr
Difficulty Level: Easy
Learn this stitch →
You made a Triple Crochet Stitch! Now, to continue: YO twice, and repeat steps 2-6 in the next chain or stitch! Enjoy!
More Crochet Tips for Beginners, Crochet Techniques and Skills to Know
To expand your crochet skills even more, I recommend learning about how to read crochet patterns, crochet abbreviations and more below.
How to Read a Crochet Pattern
One of the first things you need to do once you get all the tools of the trade, is to understand how crochet patterns are written, and how you must read them. Most crochet patterns feature an extensive use of abbreviations, and all have a common outline.
Crochet patterns can be written in either American Crochet terms or UK crochet terms. The stitches and techniques below will be shown in American Crochet Terms (or US Standard terms). In the skills to know section, there is a better explanation of these terms.
Crochet Abbreviations in Patterns
Crochet abbreviations are a way to shorten a crochet stitch’s name or certain crochet actions inside crochet patterns. There are even punctuation combinations that are short for repeatable actions.
For example, the single crochet stitch abbreviated will be written as sc or double crochet stitches will be abbreviated as dc.
Many crochet designers (including me on my crochet blog), publishers, and companies will use these standard US abbreviations (or American Crochet Terms) when referring to various crochet stitches and actions.
It is essential to understand what these abbreviations mean because most crochet patterns will only refer to stitches and actions in abbreviated form. You can take a look above at the crochet stitch section to see the abbreviations I used, or click the link above too to learn all about crochet stitch abbreviations.
Weaving in Yarn Ends in Crochet
After you’ve finished all the stitches in your new crochet project, you’re going to have some ends of yarn hanging loose. The next step is to secure and hide them.
Weaving in yarn ends is a method used to secure & hide yarn tails (the snipped off ends) by stitching them back in and through a crochet project.
How to Weave in Ends in Crochet
Here is a quick and easy tutorial on how to weave those pesky ends in below.
- Attach the cut yarn end (or the working yarn) to the yarn needle and weave horizontally across your work.
- Change directions multiple times, and then weave yarn vertically in the opposite direction as many times as you can before cutting off the yarn with scissors close to the project.
The Importance of Gauge in Crochet
Gauge is a measure of how many stitches and rows fit a length of a crocheted piece. This crocheted piece is usually 4 inches (or about 10 cm), and it is used to indicate the size of each stitch.
If I can recommend nothing else, please remember that getting your gauge right is significant!
If you get more stitches than the pattern’s gauge, that means your crochet is too tight, If you get fewer stitches than the pattern, your crochet is too loose. Understanding how your personal tension impacts gauge is critical.
Expert Tip: Make sure the gauge is followed for a perfectly shaped project.
Joining Yarn in Crochet
Joining yarn is the method of entering a new ball or skein of yarn when you’ve crocheted to the end of your current thread.
You can see our tutorial on how to change colors in crochet, which will help you when you want to not only change colors, or you run out of yarn in a project.
How to Keep Track of Stitches in Crochet
The best way to keep track of crochet stitches and rows in crochet projects is by using a stitch marker or (sm) abbreviated. A stitch marker is a small tool that is used in crochet and knitting to help keep the place of a stitch while working up a design.
Stitch markers can be made of metal, plastic, or even left over yarn. Anything that can be used to mark the place of a stitch can be considered a stitch marker.
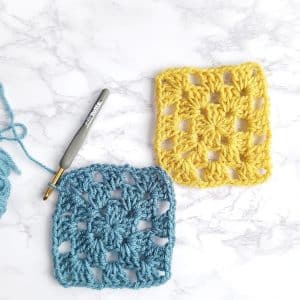
Good First Crocheting Project for Beginners
A beginner granny square is a great project for a newer crochet to make. It uses double crochet stitches in clusters to make the square. It also can use a magic circle aka magic ring to start the square, so it has a seamless circle to start the project with.
Some of the Most Common Questions About Crochet Asked by a Beginner
Is it Easier to Knit or Crochet?
Most people find knitting easier, but some people find crochet easier to understand. Here are some general points to consider:
Knitting:
- Uses two needles to create stitches.
- Basic stitch: knit stitch.
- Can be slower but allows for intricate patterns.
- Fixing mistakes can be more challenging.
Crochet:
- Uses a single hook to create stitches.
- Basic stitches: single crochet, double crochet.
- Usually works up faster and is great for bulkier projects.
- Mistakes can be easier to correct.
Tip: If you’re a beginner and unsure which one to start with, you can try both and see which technique you feel more comfortable with.
Is Crochet Easy for Kids To Learn?
Yes, crochet can be relatively easy for kids to learn, and many children enjoy the craft. The simplicity of crochet lies in the fact that it uses only one tool (a crochet hook) and basic stitches like single crochet or double crochet. These stitches are easy to grasp, and kids can quickly see progress in their projects.
What Crochet Stitch is the Easiest for Beginners?
For beginners, the single crochet stitch is often the easiest crochet stitch to learn. It’s a basic stitch that forms a dense, sturdy fabric and serves as the foundation for more complex stitches.
Remember, practice makes perfect! Crocheting may take a little patience at first, but with practice, you’ll become more comfortable with the stitches and be able to tackle more complex patterns. Enjoy the process and have fun with your crochet projects!
Related: Single Crochet Stitch Projects
Crochet Beginner Guides + A Free Easy Crochet Pattern
Take a look below to find free crochet patterns, guides for beginners, easy to follow tutorials and easy crochet stitches that are all perfect for new crocheters who want to learn even more!
- Double the Fun: A Guide to Holding Two Yarn Skeins Together
- The Easy Way to Add and Use Crochet Appliqués
- Crochet the Perfect Temperature Blanket Guide (+ Free Patterns)
- Understanding The Right Side vs Wrong Side in Crochet
- Why is My Crochet Blanket Curving And How to Fix It!
- The Many Types of Crochet
After you are familiar with the terms and resources above, then you are ready to make your very own crochet project and apply the new skills you learned like granny squares, simple blankets, crochet hats and more!
Check out or extensive archive with over 400 free crochet patterns, many of which are the easiest skill level. These free patterns and free crochet projects are broken up by yarn weight, yarn type, brand, skill level and more!
Even More Beginner Crochet Tutorials
If you took in all the information above, then you are probably wanting to try even more patterns. These easy beginner crochet projects below are perfect to expand your skills even more.
- Crochet Puff Stitch Tutorial with Photos
- Whip Stitch Crochet Seaming Technique
- Half Double Crochet Slip Stitch (hdc slst) for Beginners
- Single Crochet Increase Tutorial (sc inc)
- Creating Seams Using the Mattress Stitch
- Single Crochet Two Together (Single Crochet Decrease)
- How to Crochet a Cable Stitch
- Crochet Moss Stitch Tutorial (Written, Photo and Chart)
- How to Crochet a Granny Stripe in Rows
More Crochet Stitches to Learn
Explore the different crochet stitches below to expand your crochet skills and knowledge.
- 6 Of The Fastest Crochet Stitches to Try Today
- 8 Easy Crochet Stitches for Baby Blankets
- Back & Front Post Double Crochet Stitches
- Beginner’s Tutorial on Making a Slip Knot in Crochet
- Bullion or Roll Stitch Crochet Tutorial
- C2C Crochet (Corner to Corner) for Beginners: Video + Photos
- Creating Seams Using the Mattress Stitch
- Crochet Griddle Stitch Tutorial
- Crochet Loop Stitch Tutorial
- Crochet Moss Stitch Tutorial (Written, Photo and Chart)
More Patterns to Crochet
Below are some other easy crochet projects you can make as well once you learn the basics above. Enoy!
How to Crochet a Granny Square
Beginner Crochet Scarf Pattern
How to Crochet a Throw Blanket for Beginners

This is one of the best instructions I have found for teaching. Wonderful job at writing the steps and pictures. Thanks for being excellent at describing and showing the process. Not everyone has this talent!
I am referring to the summer crochet patterns that are free I would like to print the bag off or any of these do you have a printable format
Thanks Joelle
Hi Joelle,
I offer printable versions for purchase in my pattern and merchandise shop over at https://shop.easycrochet.com/
Krista
Thank you for listing these patterns do you have a printable format for them
Hi Joelle,
I do have some printable patterns available in my maker shop: shop.easycrochet.com
Happy Crocheting!
Krista
I loved it
I will be enjoying crocheting