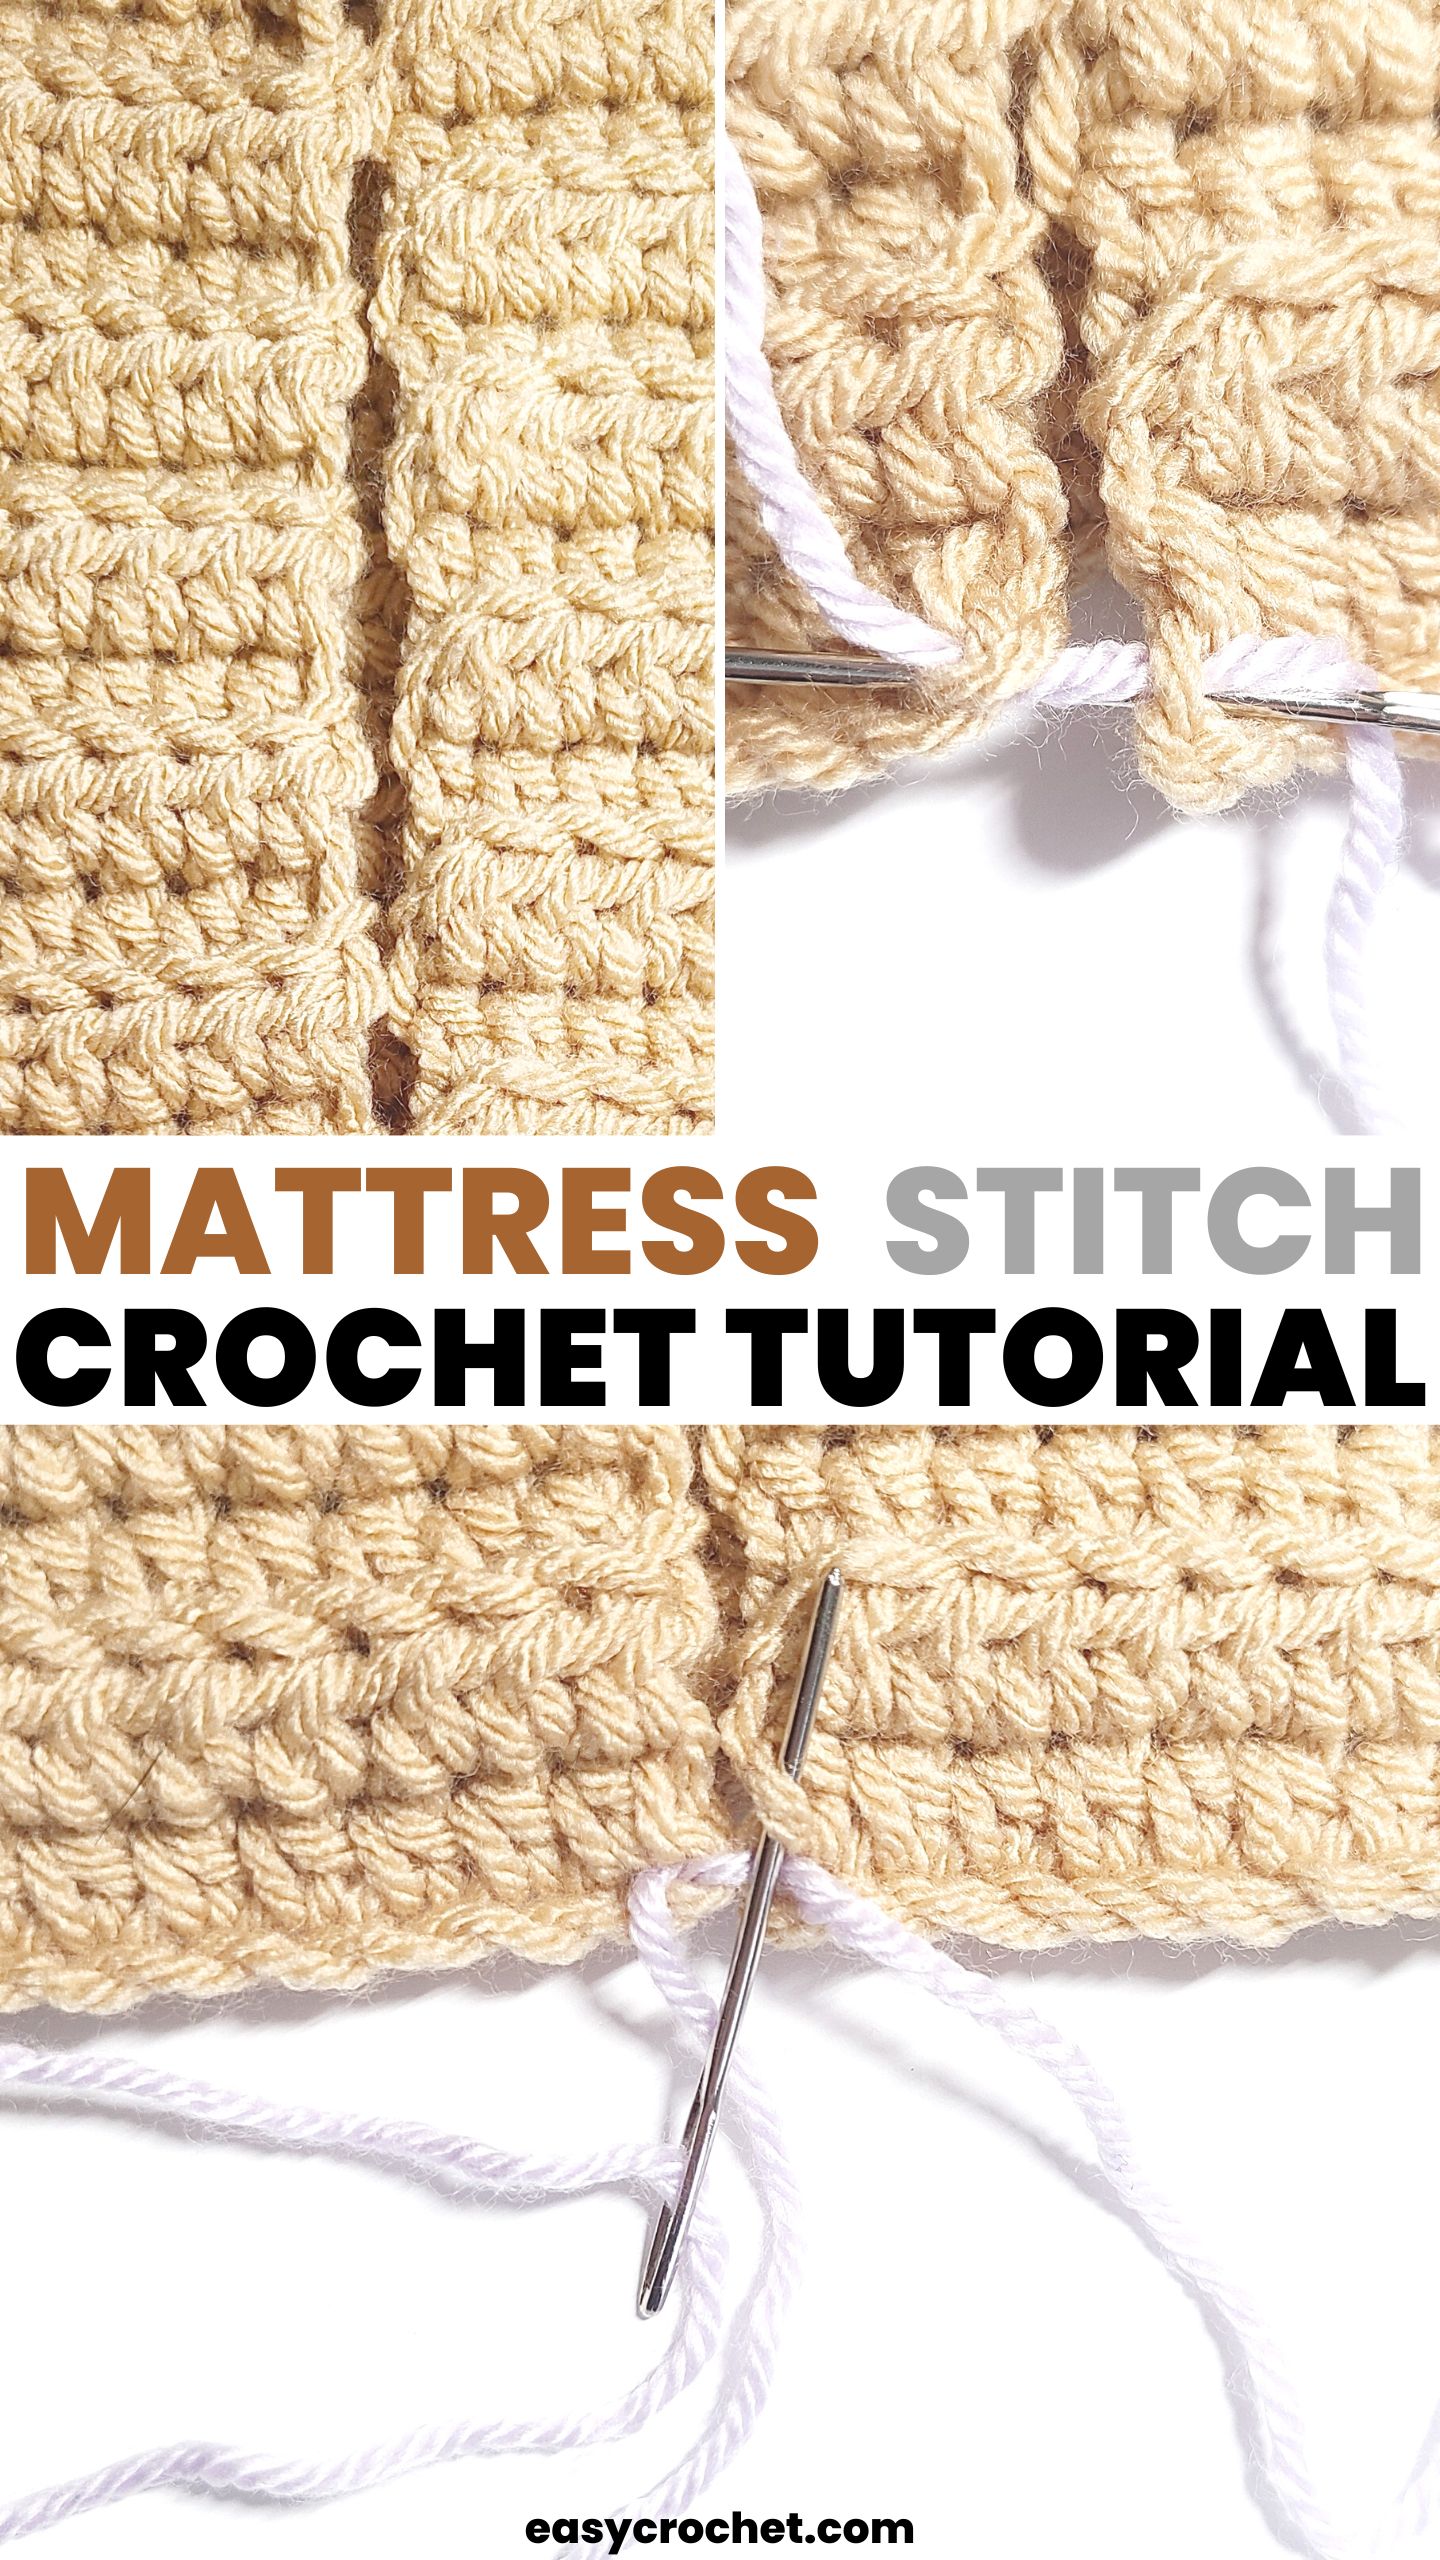
Creating Seams Using the Mattress Stitch
The mattress stitch is a technique used in knitting and crochet to join two pieces of fabric together seamlessly. It produces a neat, invisible seam that is almost impossible to see.
The mattress stitch is generally worked by inserting a yarn needle into the edges of the two pieces of fabric to be joined, then pulling the yarn through to create a series of stitches that hold the pieces together.
This technique can be used to join pieces of crochet horizontally, vertically, or diagonally, depending on the desired outcome. It is a useful for finishing off projects and giving them a professional, polished look.
Below, I show you how to do this simple seam stitch.
What is Seaming in Crochet?
Seaming crochet simply means joining two or more pieces of crochet fabric together. This is frequently done when a project, such as a crochet blanket that is made with granny squares. You seam together all the squares to create a bigger granny square blanket.
Crochet seaming is also important when making crochet clothing, where you create parts of the item separately and then join them together.
There are many methods of joining pieces when crocheting, each of which has its purpose. The more methods you know, the more versatile your project skills will be.
This guide will teach you about seaming crochet with a tapestry needle and yarn needle to make the mattress stitch.
How to Seam Crochet Pieces Together With The Mattress Stitch
This method of joining will connect two pieces of crocheted pieces on the wrong side (usually the back side of a project) so that the seam doesn’t show on the right side.
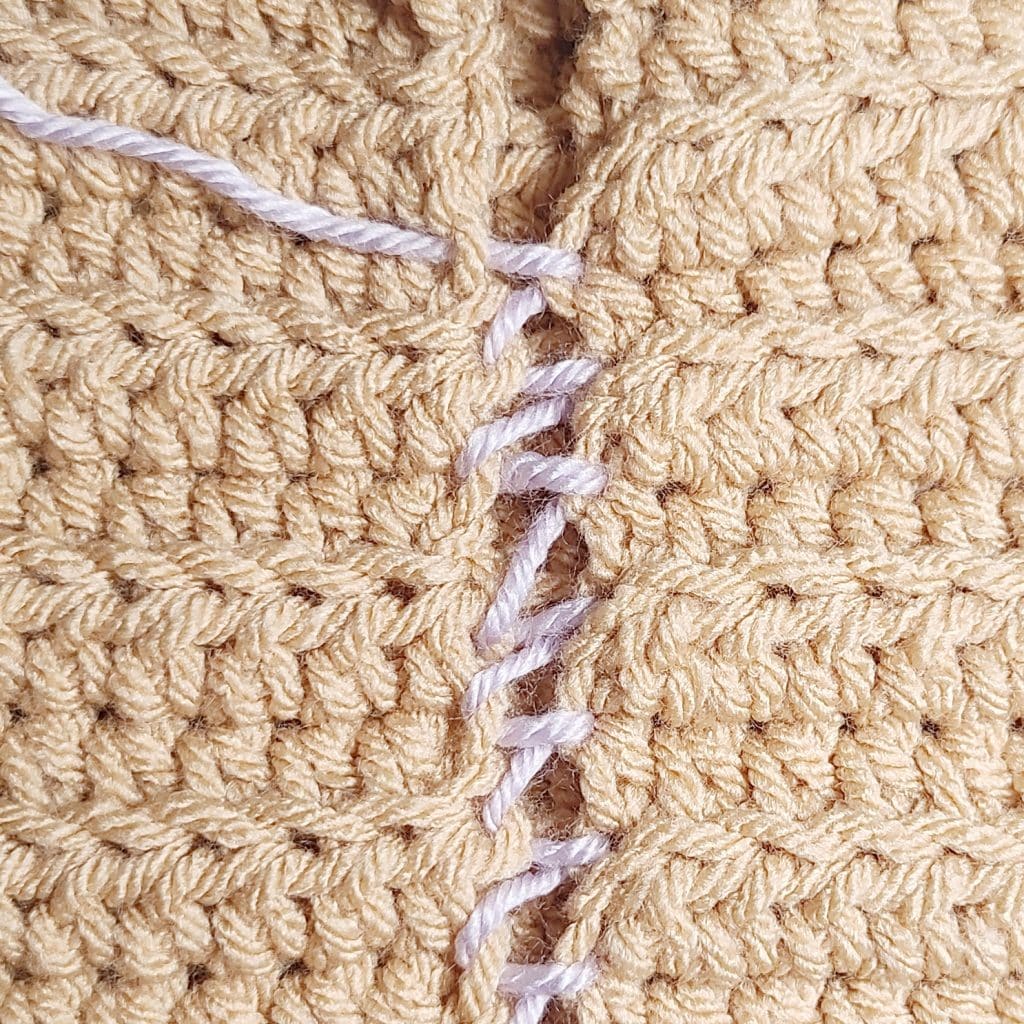
I am using a different color yarn (purple) to highlight how to make a mattress stitch. I hope to make it easier to learn how to sew crochet pieces together with the mattress stitch this way. Enjoy!
Step 1:
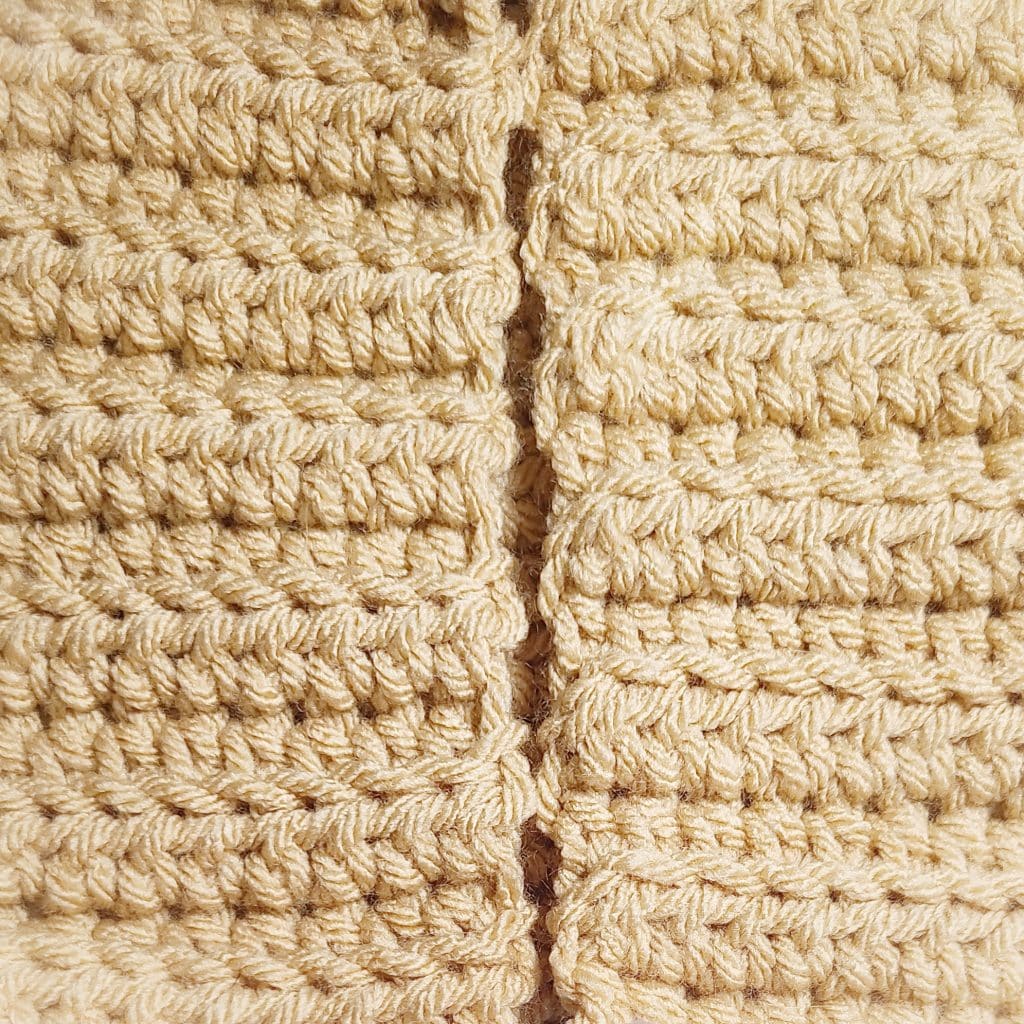
Align the pieces crochet edge to edge, matching the stitches from one up with the stitches from the other.
Step 2:
You will need to cut a length of yarn to use for the seam. A length approximately twice as long as the length of the panel is a good size to aim for.
Thread the yarn needle with the yarn color you want to use. I am using a purple color to highlight the mattress stitch technique better.
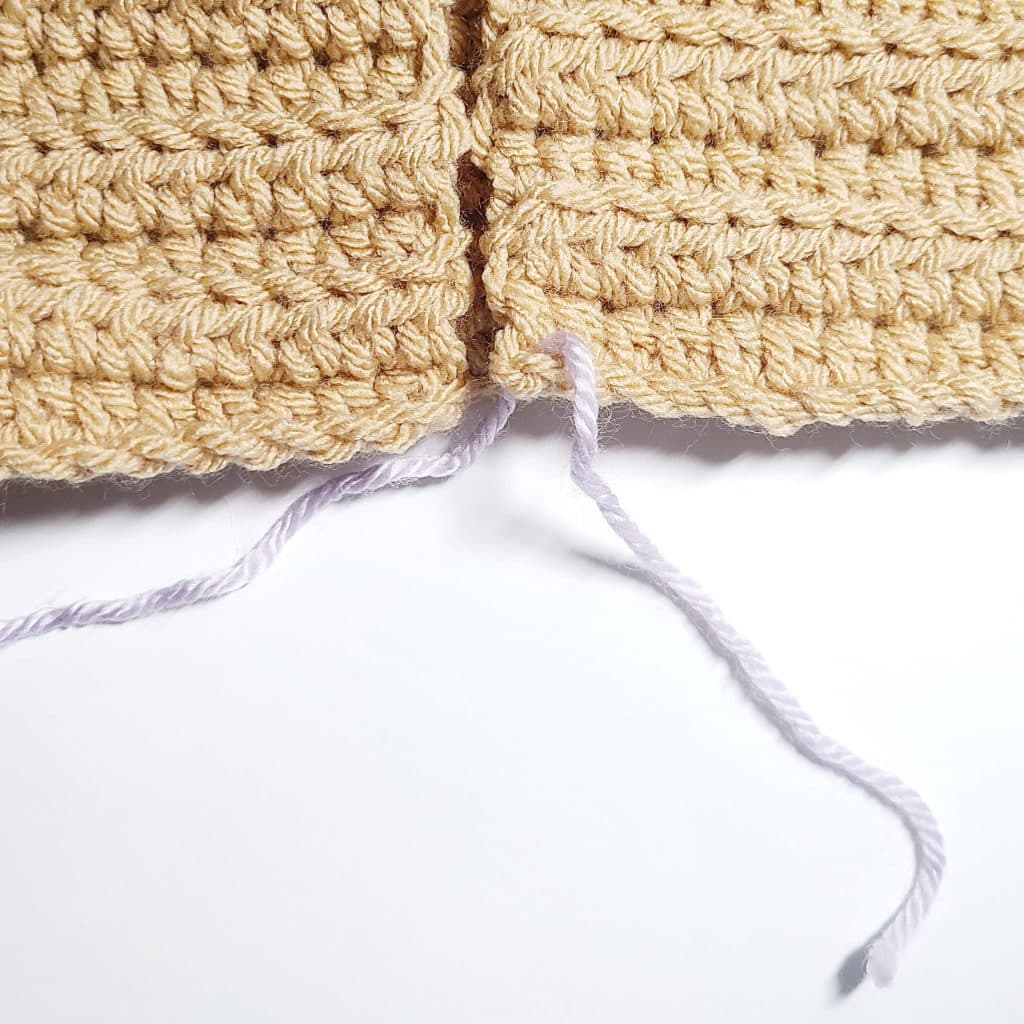
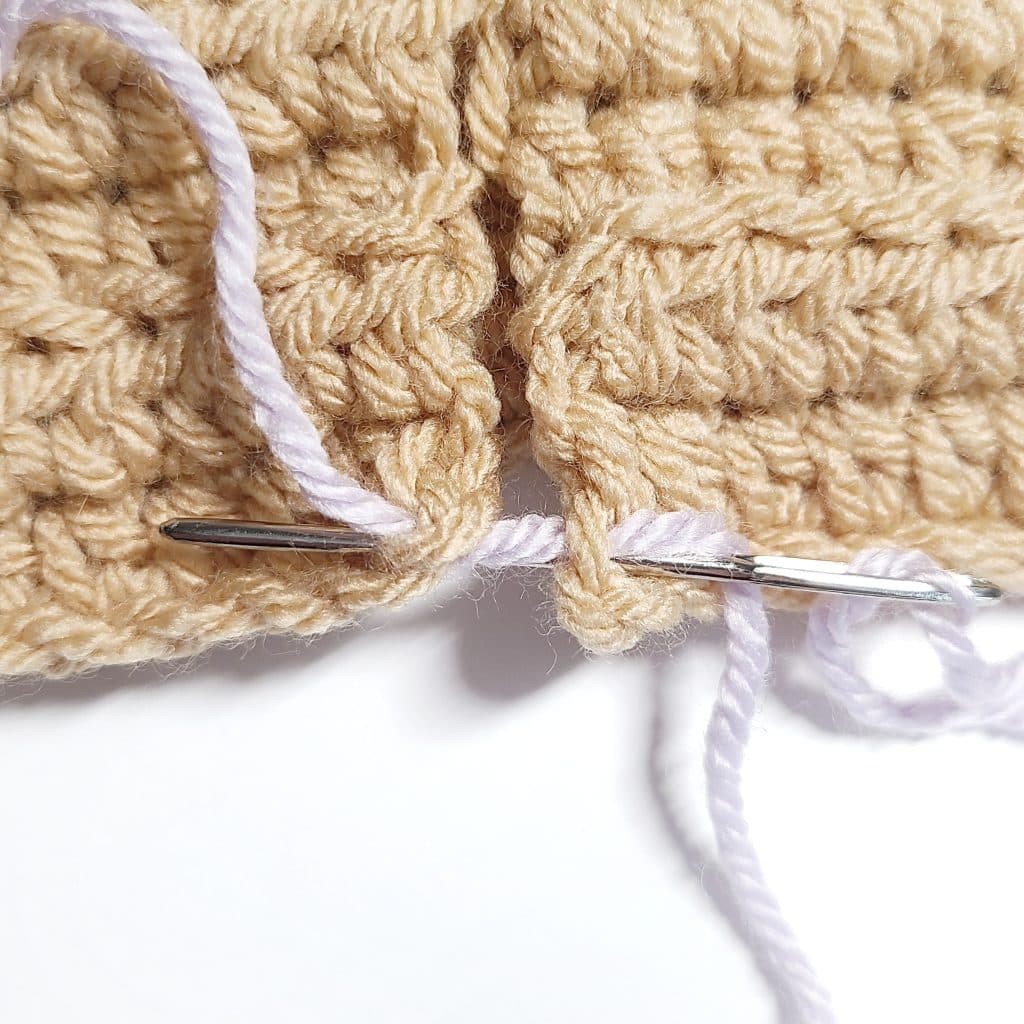
Join the yarn at the bottom corner of one panel (side) as shown below with a yarn needle.
Step 3:
Insert the needle into the next loop directly across from the corner you just worked.
Step 4:
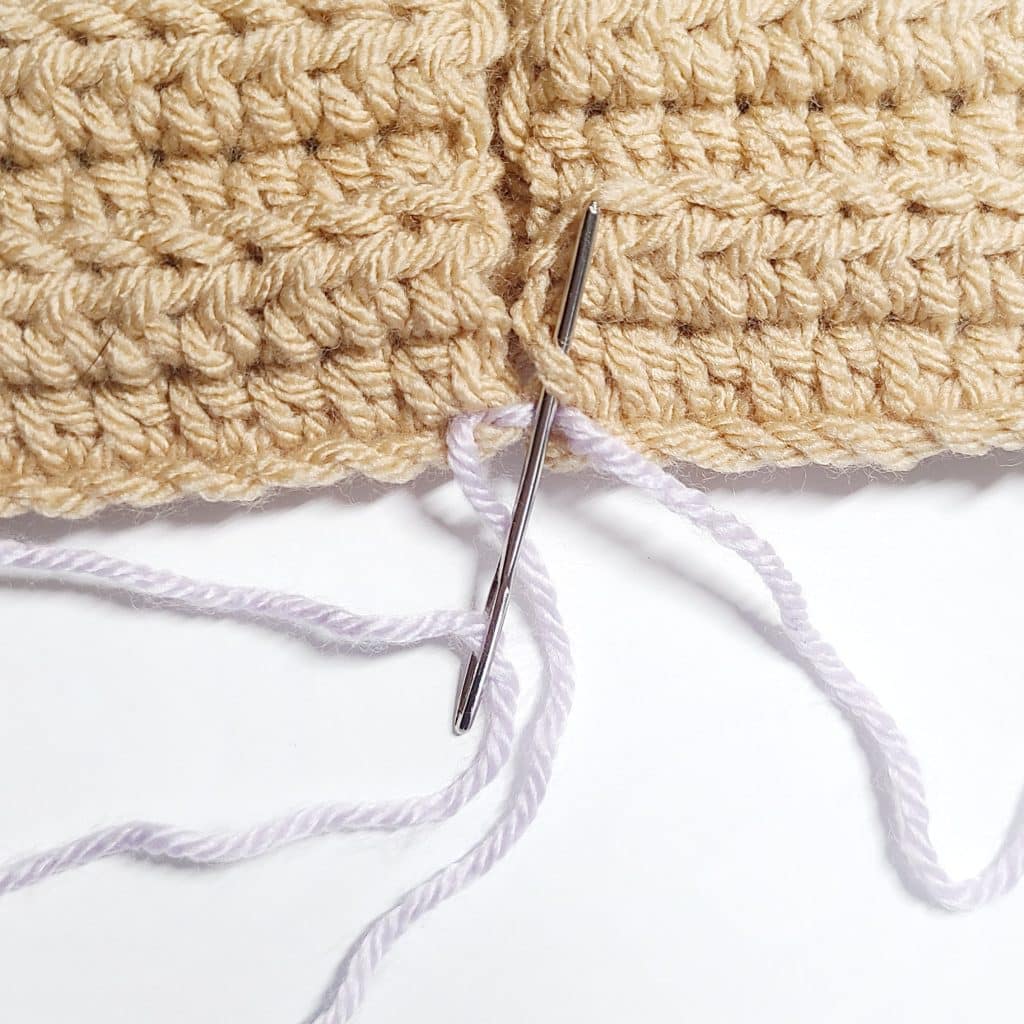
Insert the needle back through both pieces again in the same place to secure the end firmly.
Step 5:
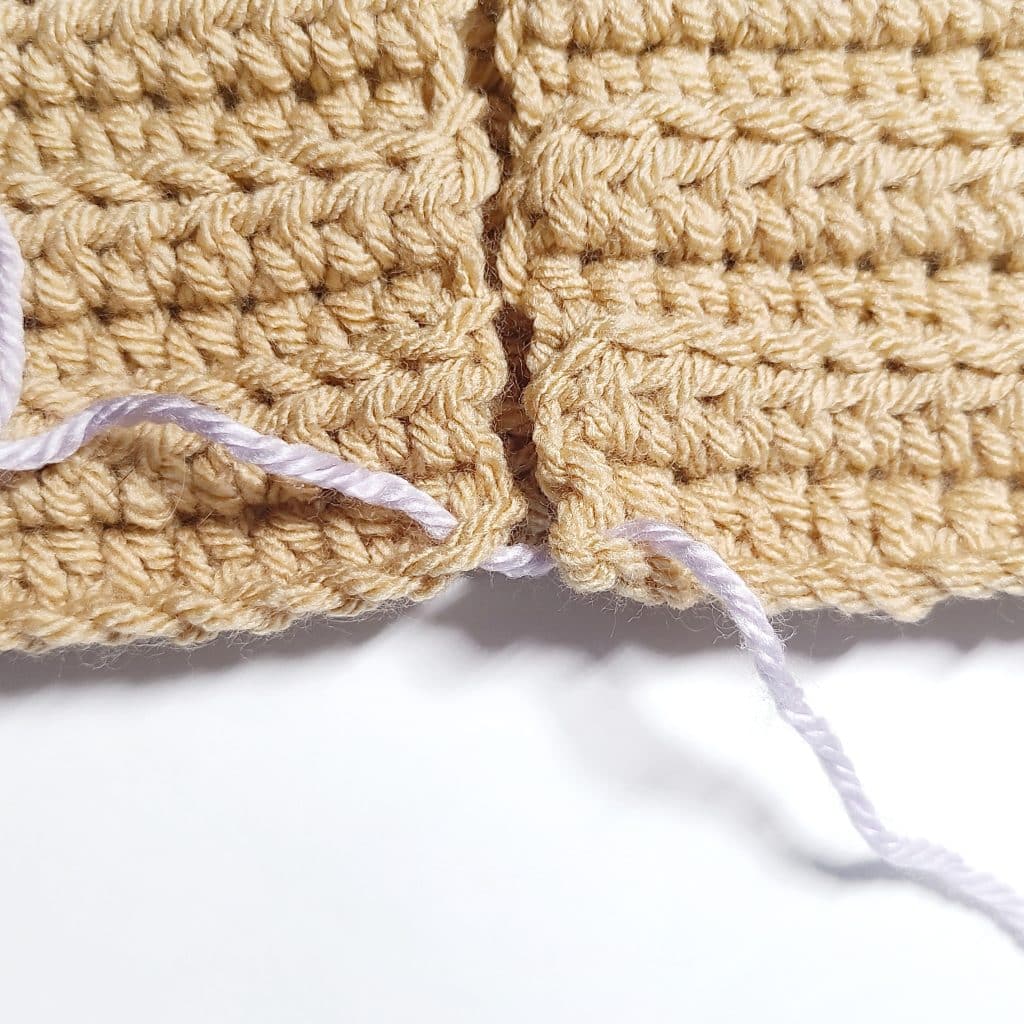
Insert the yarn needle into the next stitch (or turning chain) at the edge of the crochet piece that you began with.
Step 6:
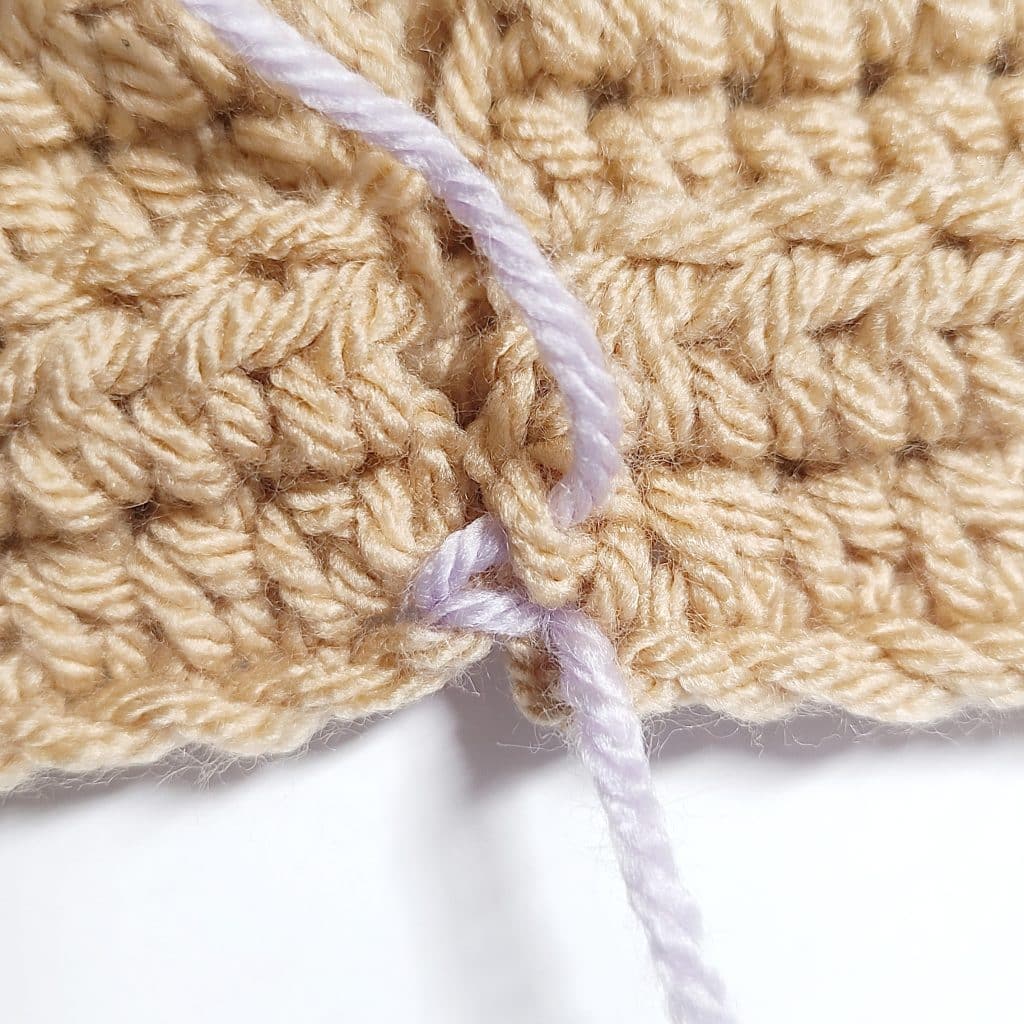
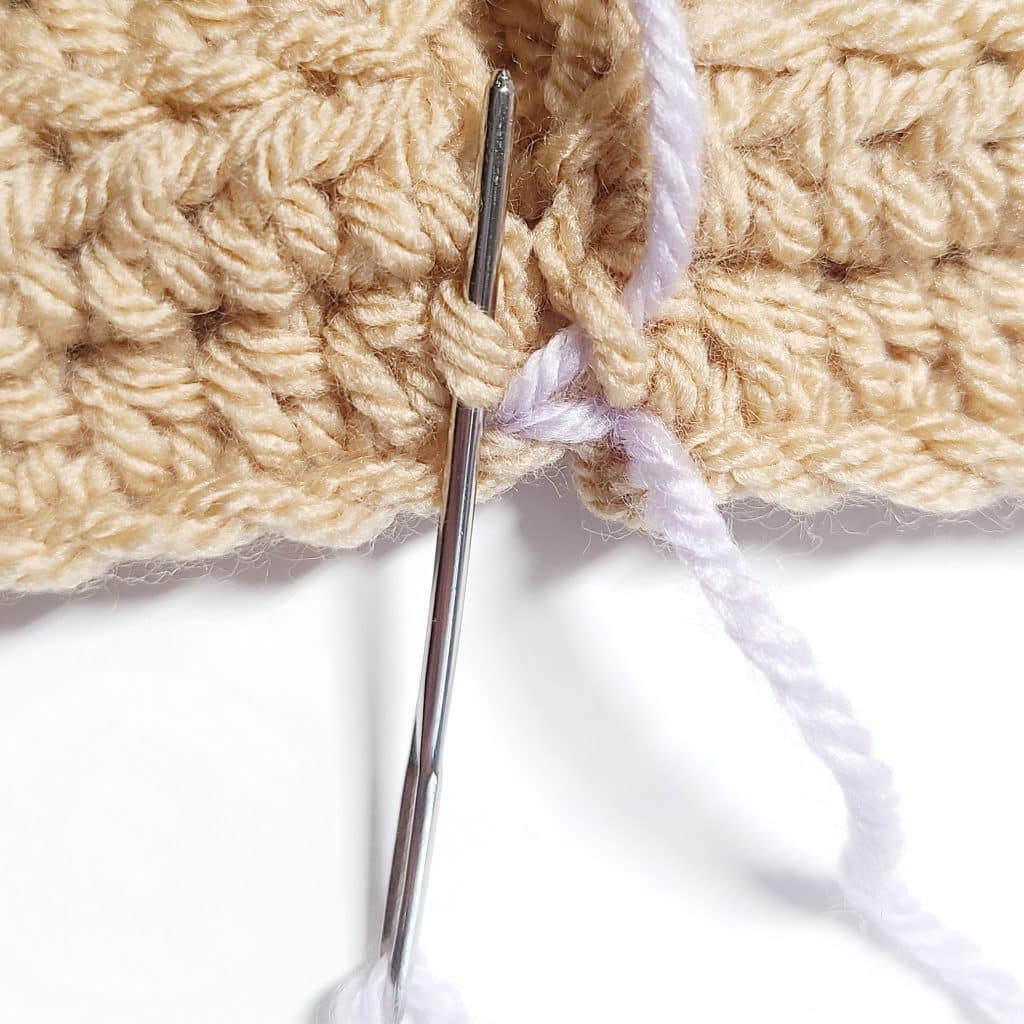
Next, insert the yarn needle into the matching loop (right across from it) that is on the other panel.
Step 7:
Repeat across the entire seam, pulling tightly every few stitches to make the seam yarn is not visible.
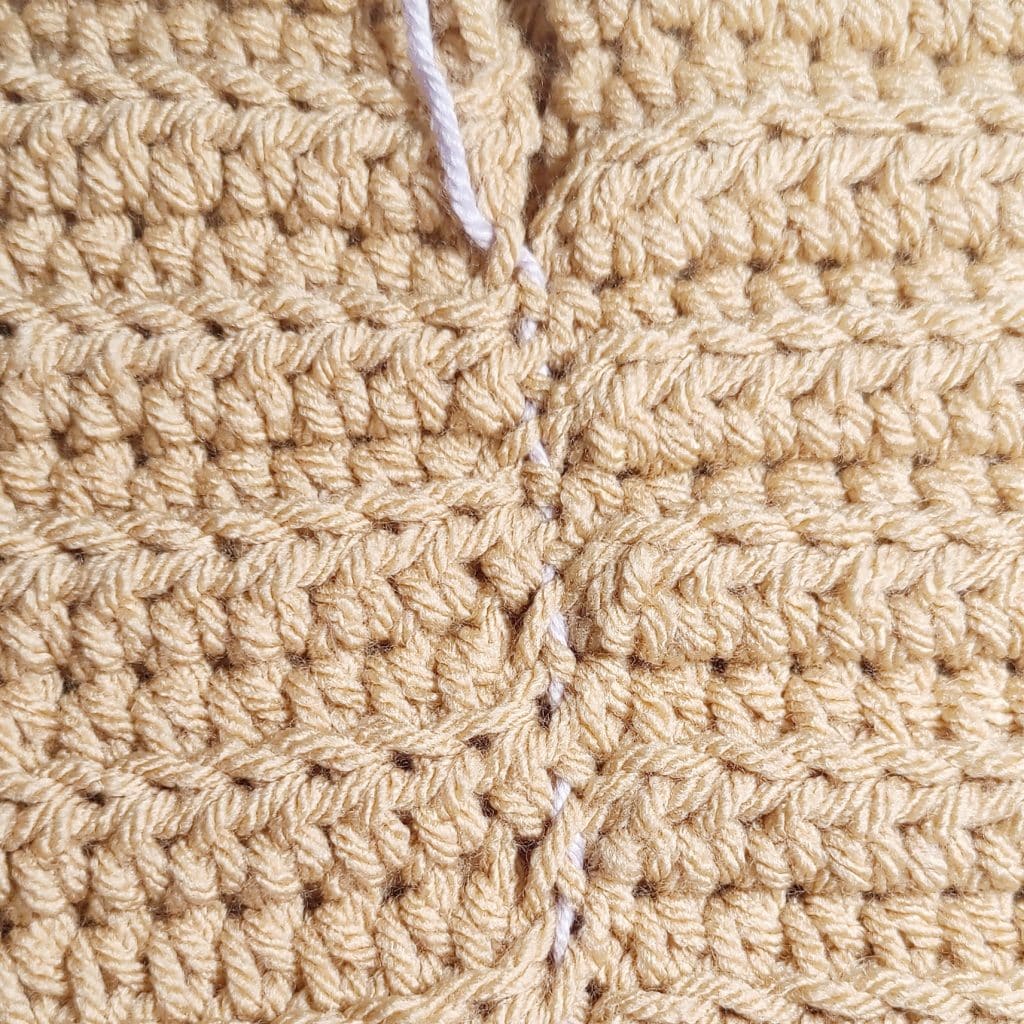
When you use the same type of yarn, the seam will disappear more easily and appear to be seamless.
Tip:
If you are working edges that have a stitched border, you can work through both loops of the edge if you’d like, or just one loop.
Thank you so much for a clear, step by step photo tutorial of the mattress stitch join
(especially the beginning step)!