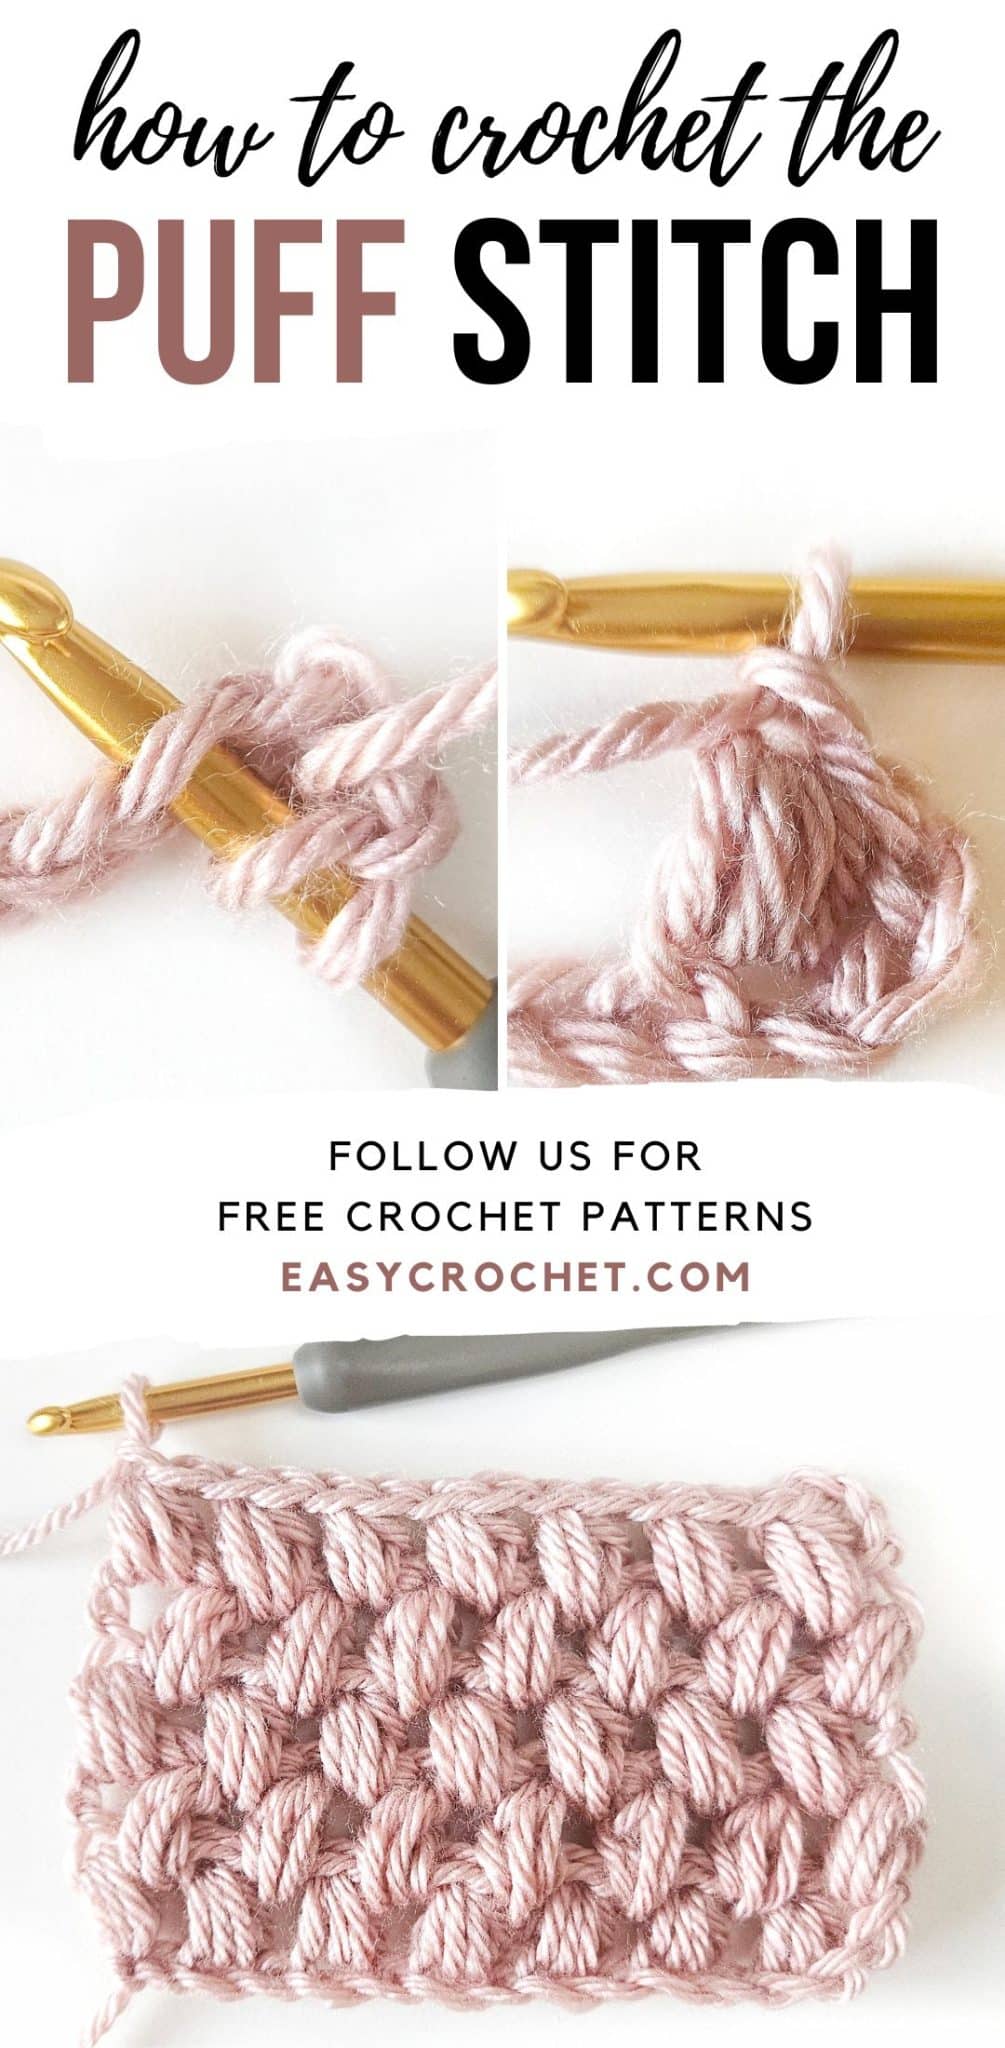
Crochet Puff Stitch Tutorial with Photos
Have you noticed those cute, puffy stitches in crochet projects and wondered how to make them? You’re in the right place! This beginner-friendly guide is all about the puff stitch—a great way to add texture to your crochet projects.
With step-by-step instructions, a written pattern, and a photo tutorial, this guide will make learning the puff stitch simple and fun. Soon, you’ll be adding these lovely stitches to your own creations!
FAQs
- Is the puff stitch hard to do?
- Nope, it’s not that hard! Just takes a bit of practice. Once you get the steps down, it’s a breeze. It is made similarly like a half double crochet, but without finishing it.
- What kind of yarn works best?
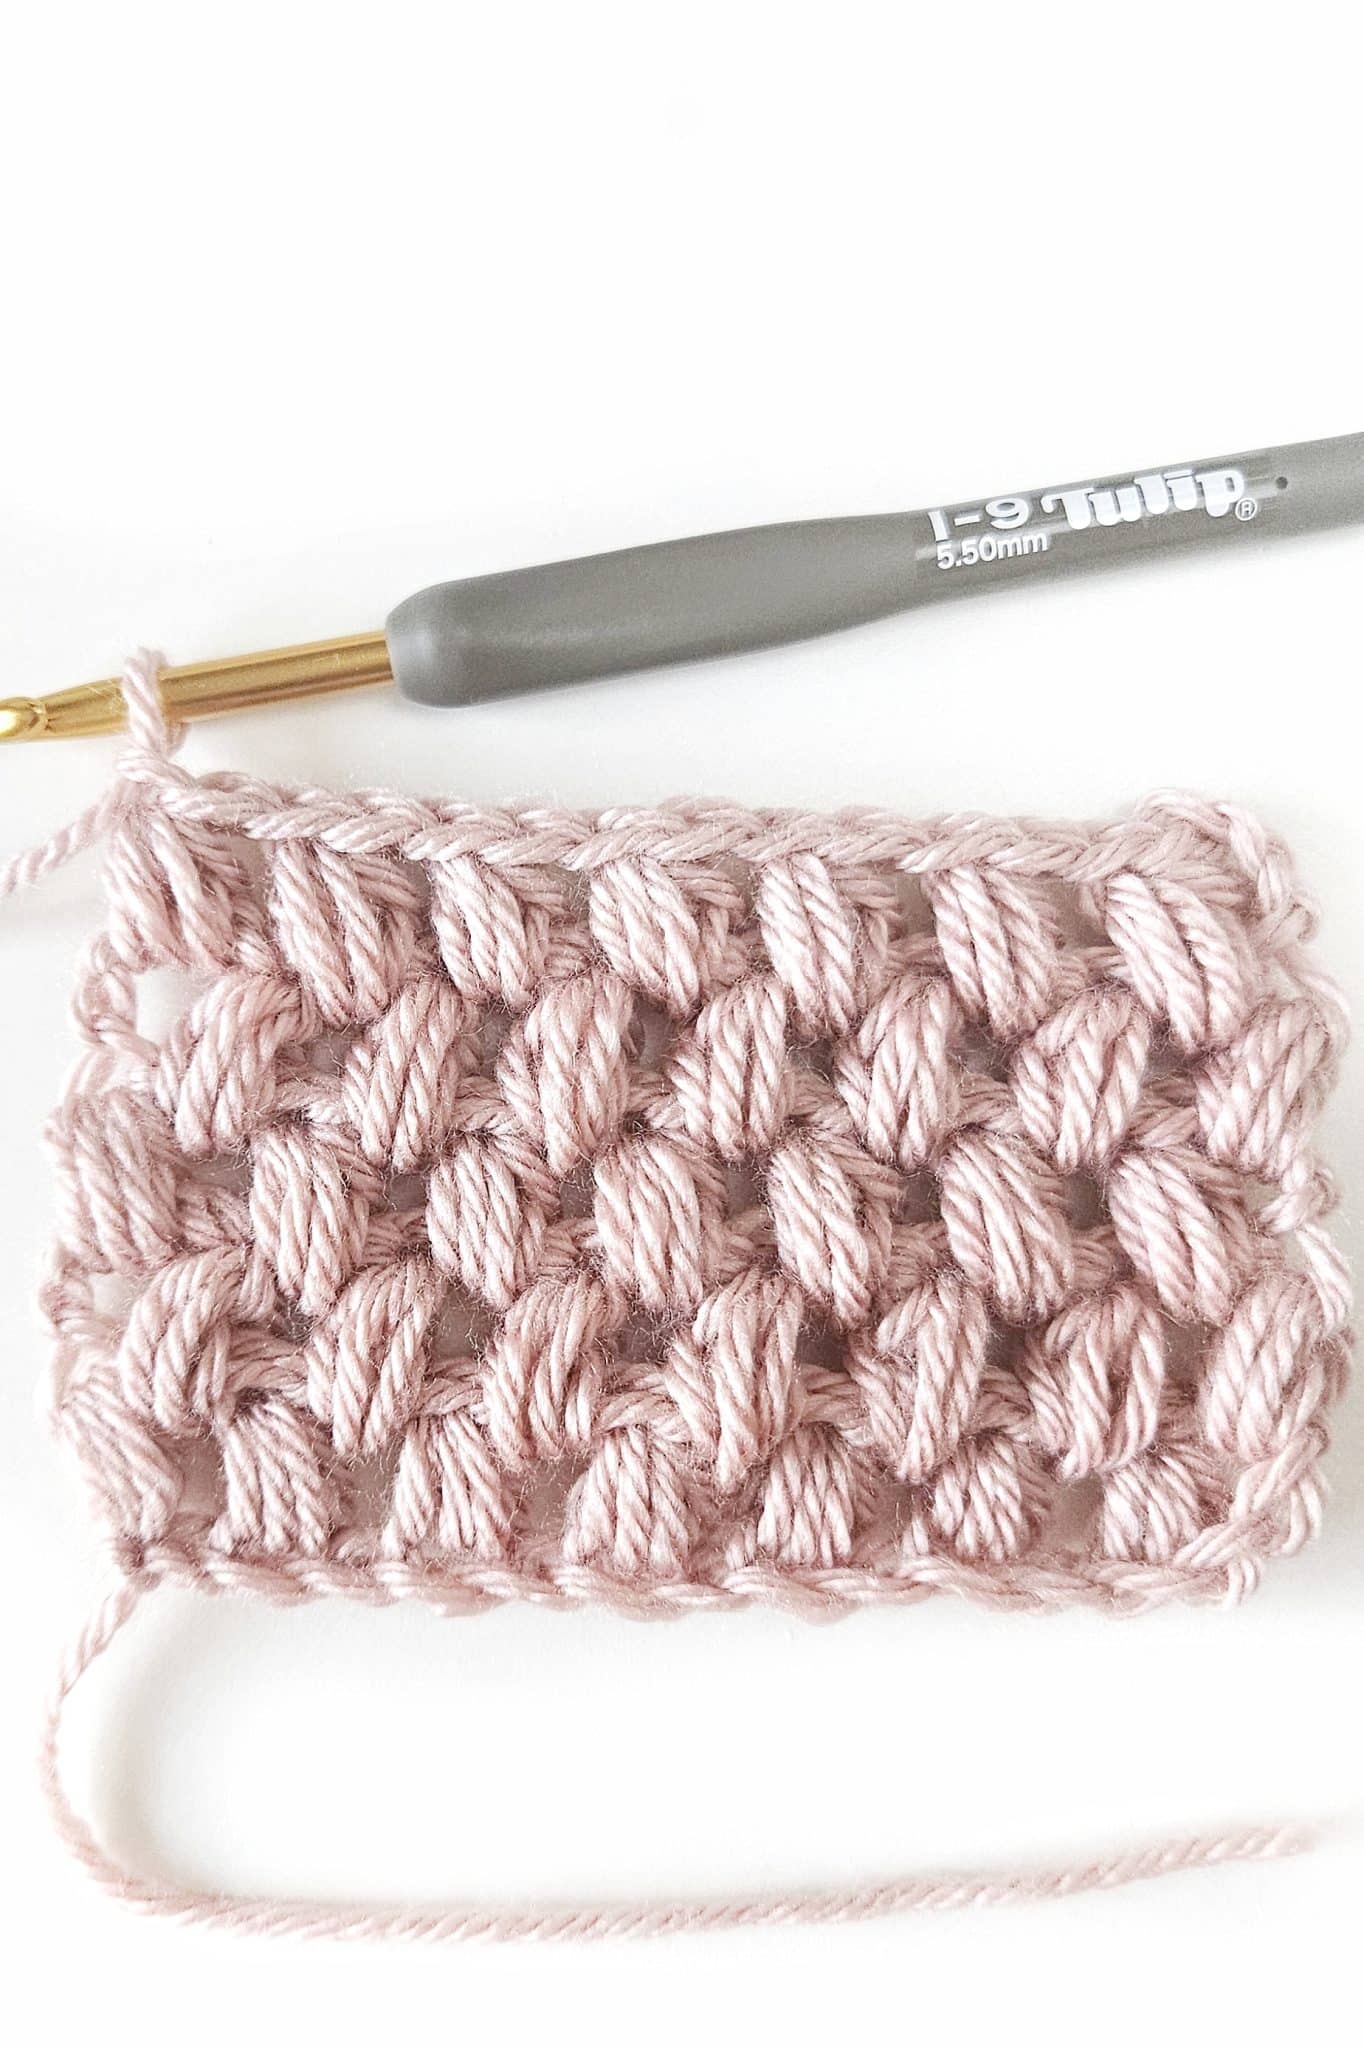
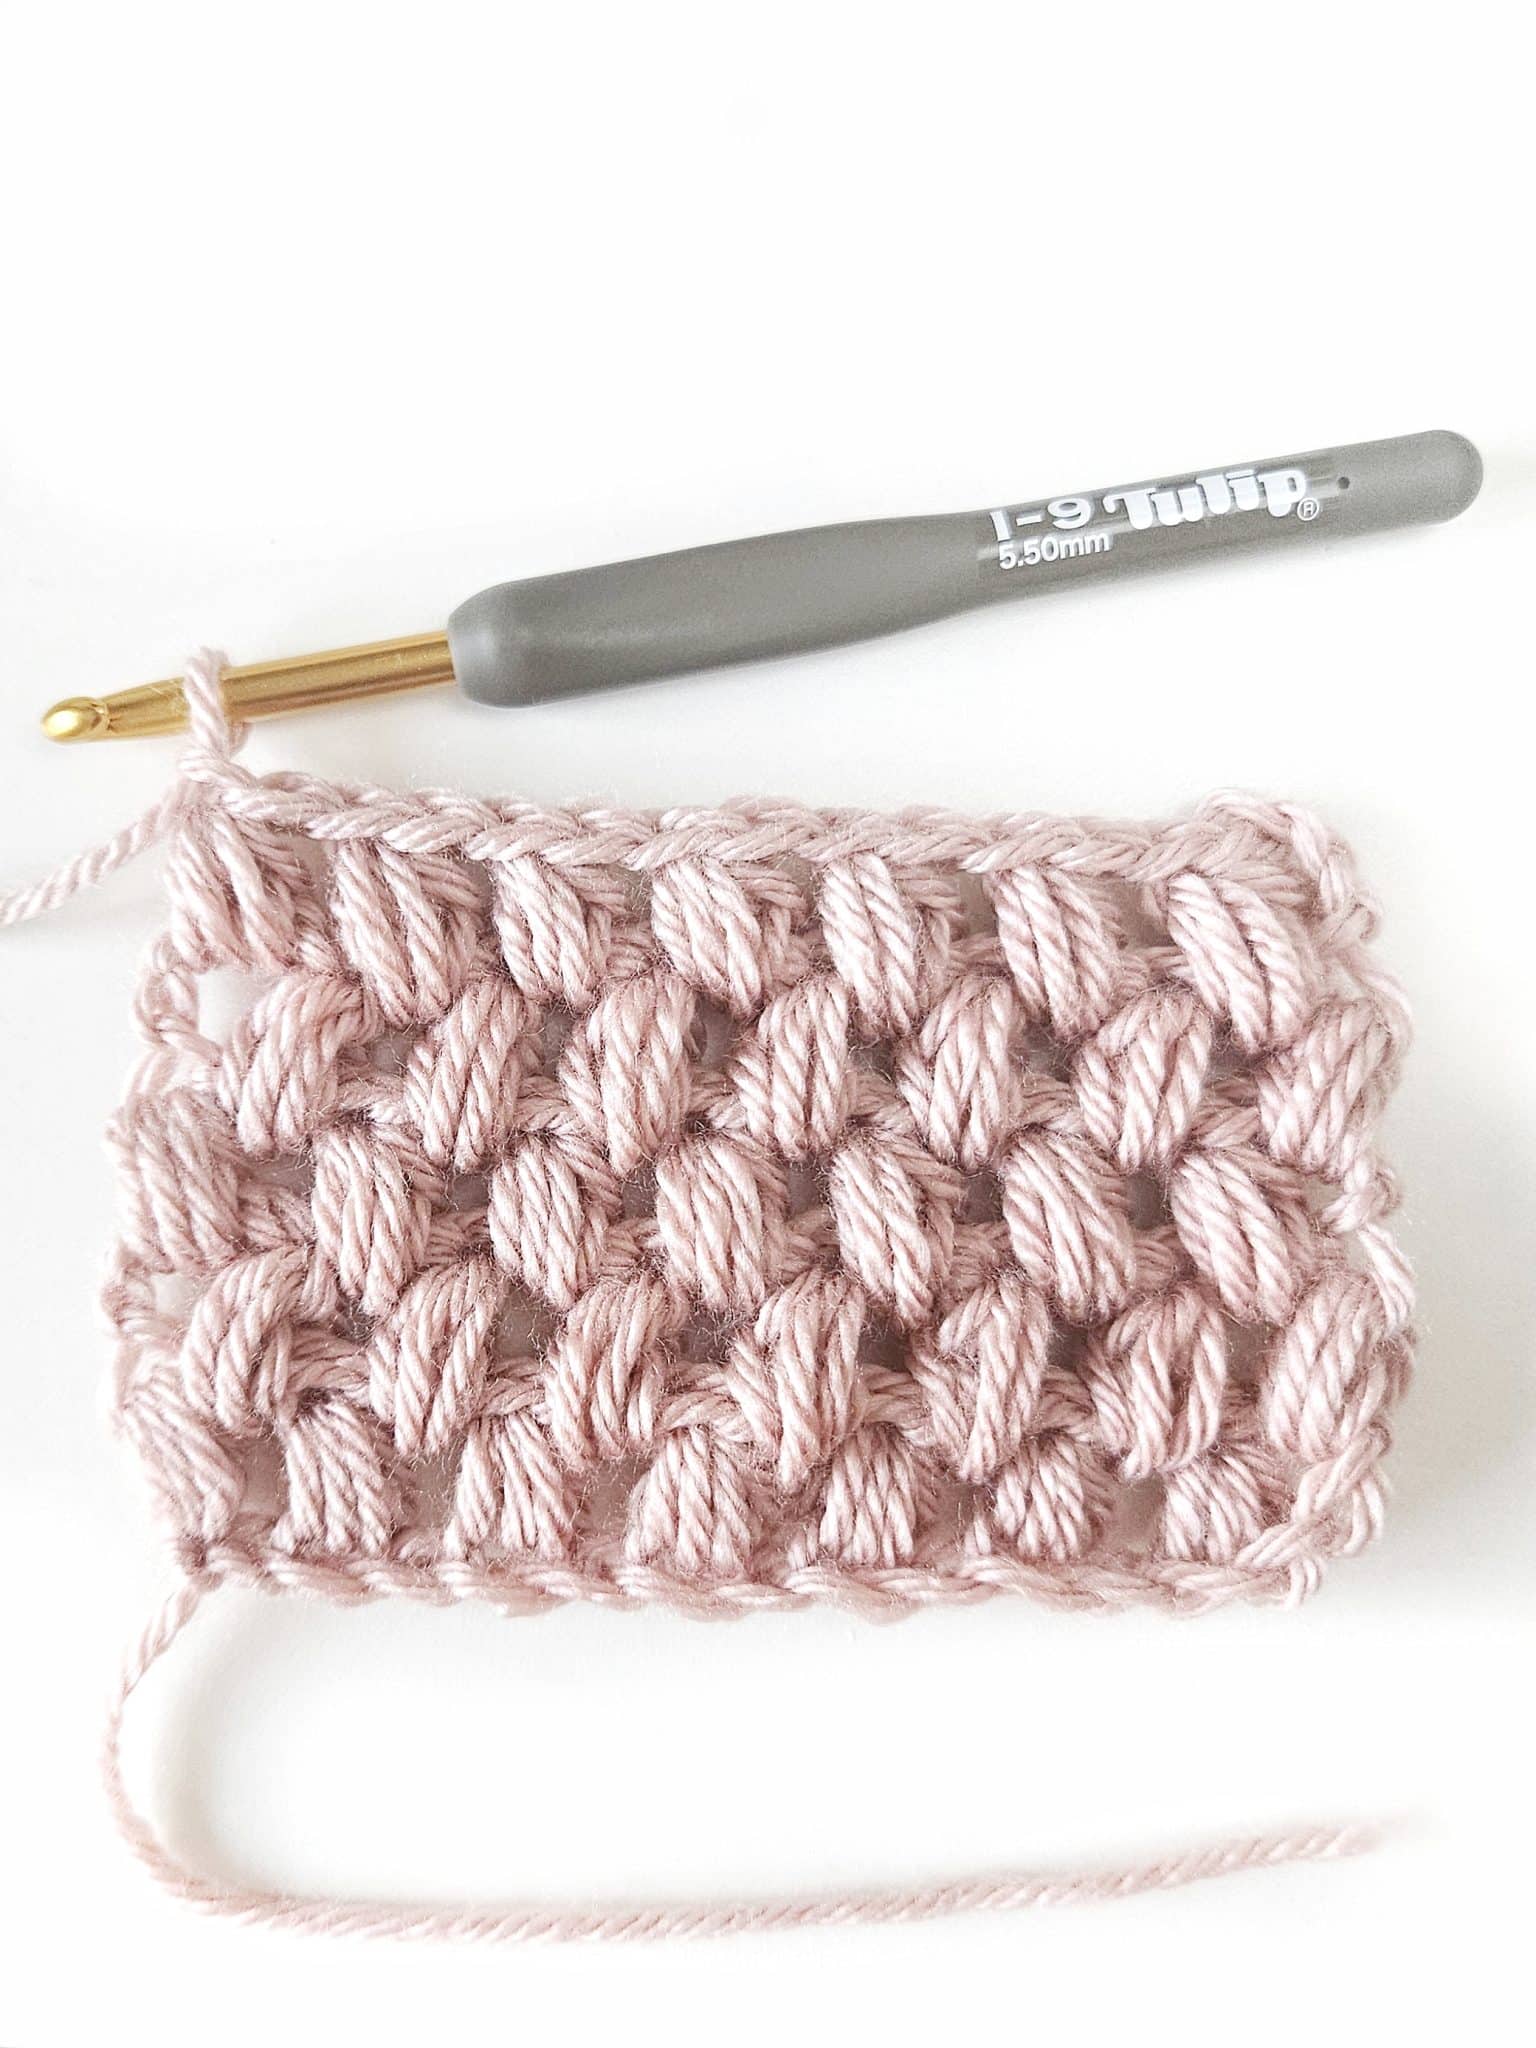
- Any yarn works, I used a four weight yarn for this example, but chunky yarn makes the puff stitch look extra fluffy!
- What is the difference between the popcorn stitch and a puff stitch?
- A popcorn stitch consists of completed double crochets in one stitch vs. the puff stitch, which is a certain number of loops worked in one stitch.
Common Mistakes and Fixes
- Uneven Tension: If your puff stitches look all different, you might have uneven tension. Keep your grip and yarn tension consistent.
- Skipping Loops: Missed a loop? Your puff stitch might look off. Always double-check that you’ve got the right number of loops before finishing the stitch.
How to Crochet a Puff Stitch
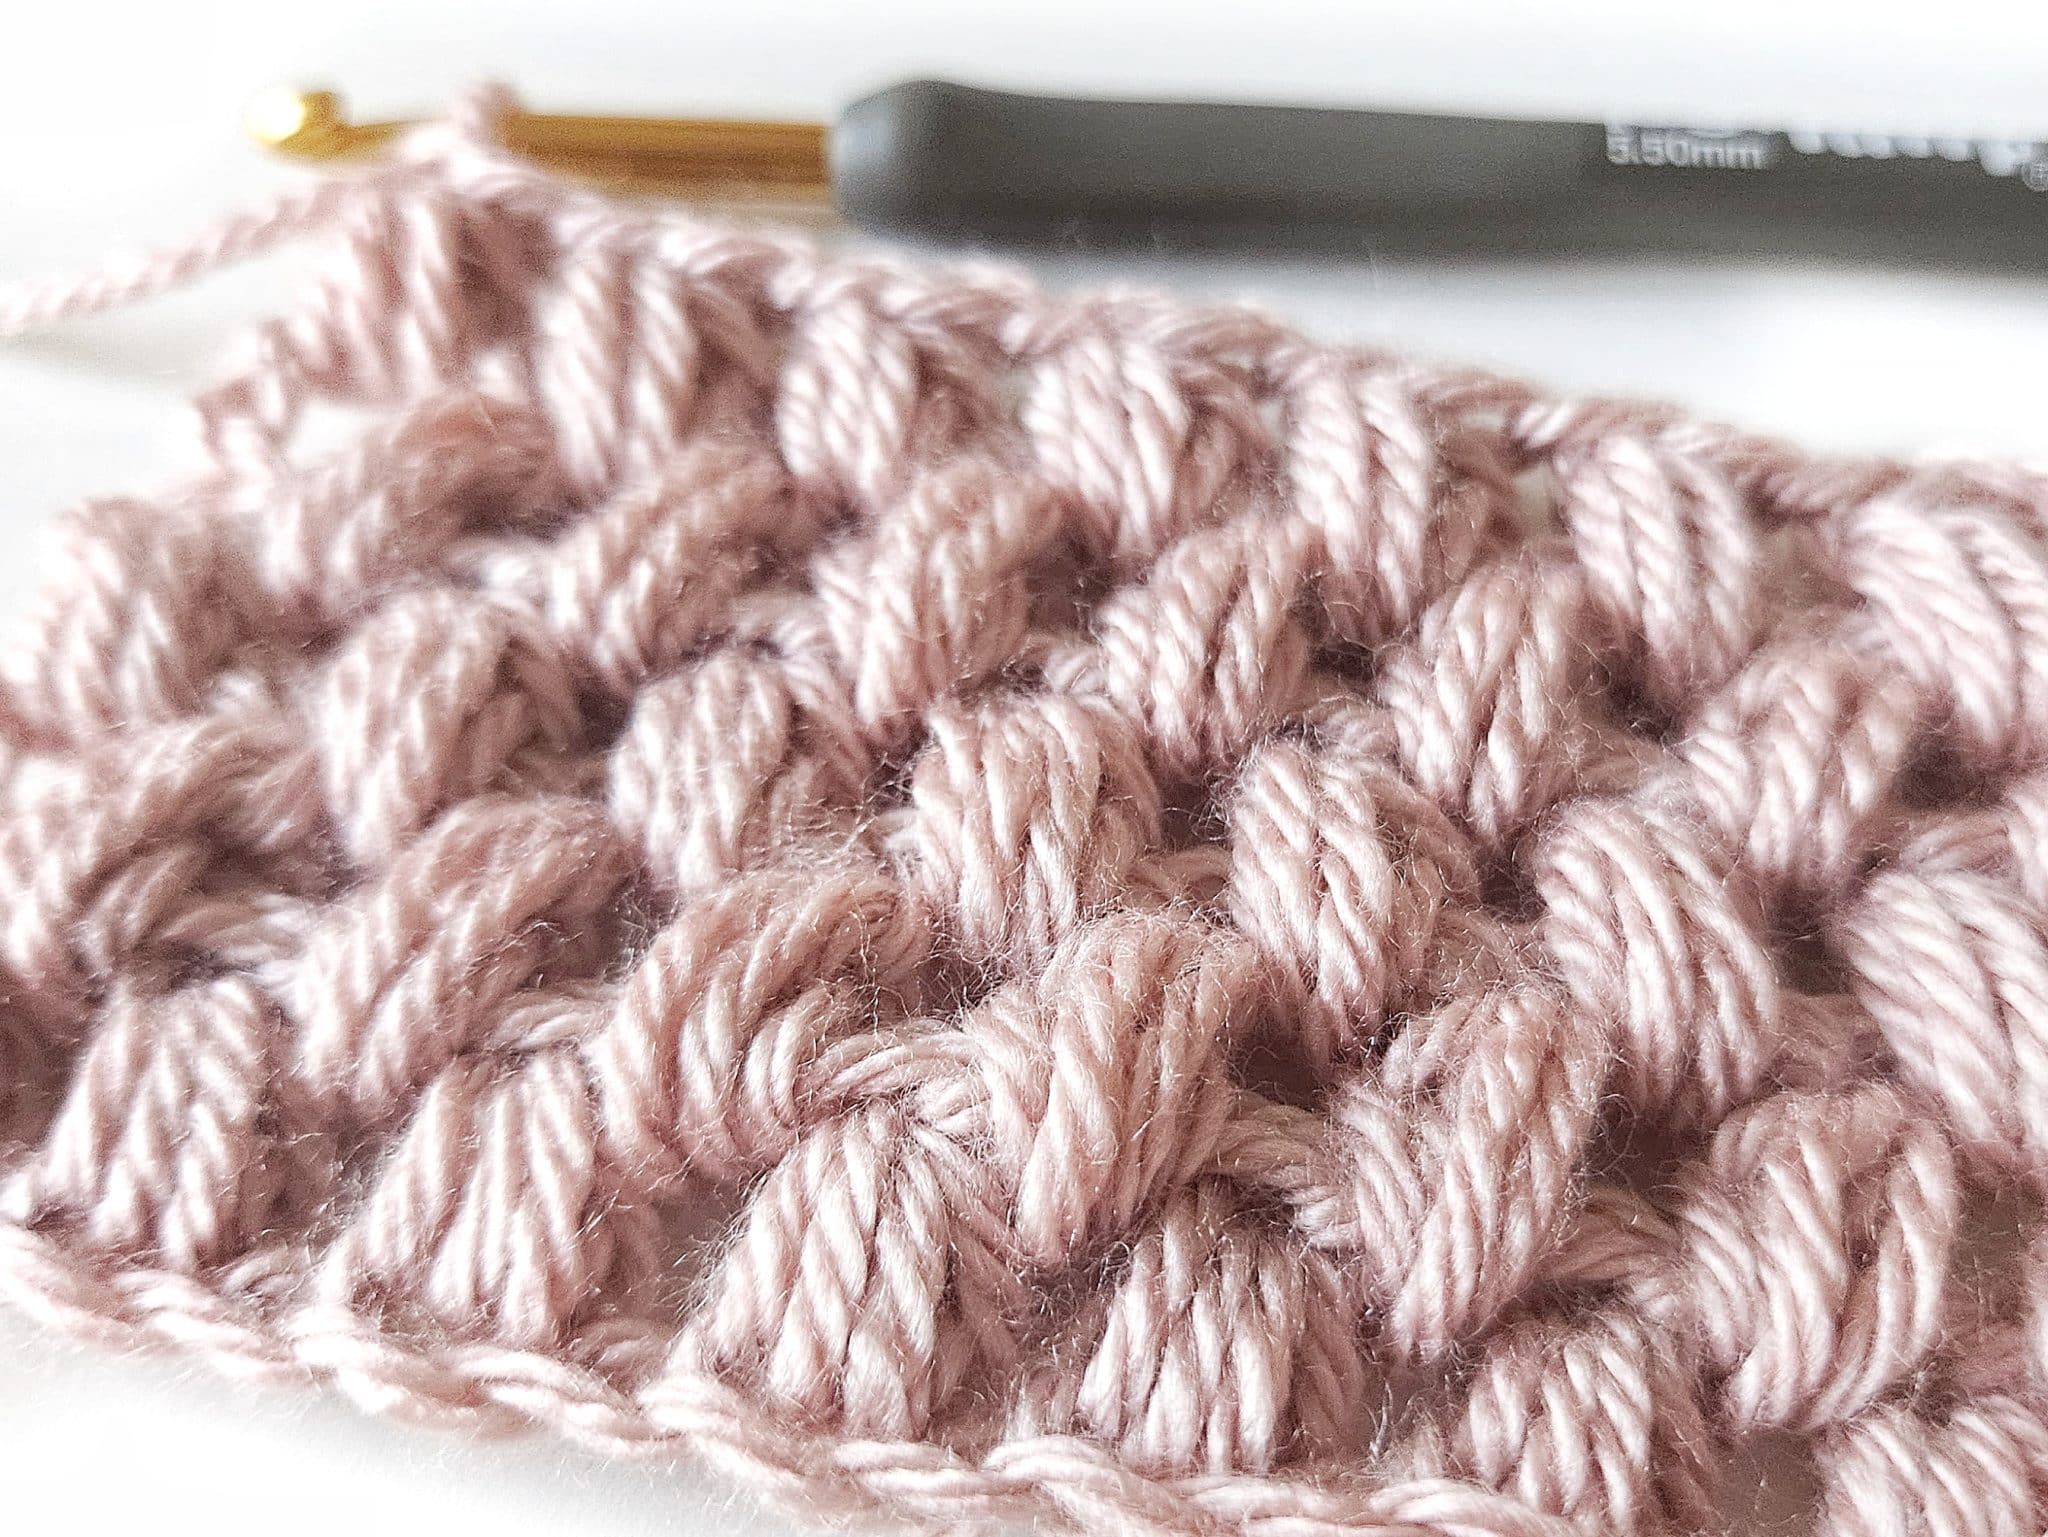
The puff stitch is a fluffy, textured stitch that’s perfect for adding some fluff or oomph to your projects. Today, let’s break it down step-by-step, so you’ll be ready to crochet a puff stitch in rows.
Skill Level: Intermediate
Materials
- Yarn
- I am using Lion Brand Heartland (four weight)
- A crochet hook that corresponds with the yarn you decide to use
- Hint: Check the yarn label to see what hook size is recommended.

Crochet Stitch Abbreviations
- ch = chain
- st(s) = stitch(es)
- yo = yarn over
Notes
- The stitch pattern is written in standard US terms
- Different puff stitches can have varying numbers of loops on the hook—some might have just 5 loops, while others can go up to 11. Always check the pattern you’re working on for the specific number of loops you’ll need.
- This tutorial will end with 7 loops on the hook.
- Use a larger hook size for the foundation chain to prevent your initial row from curling.
The Instructions
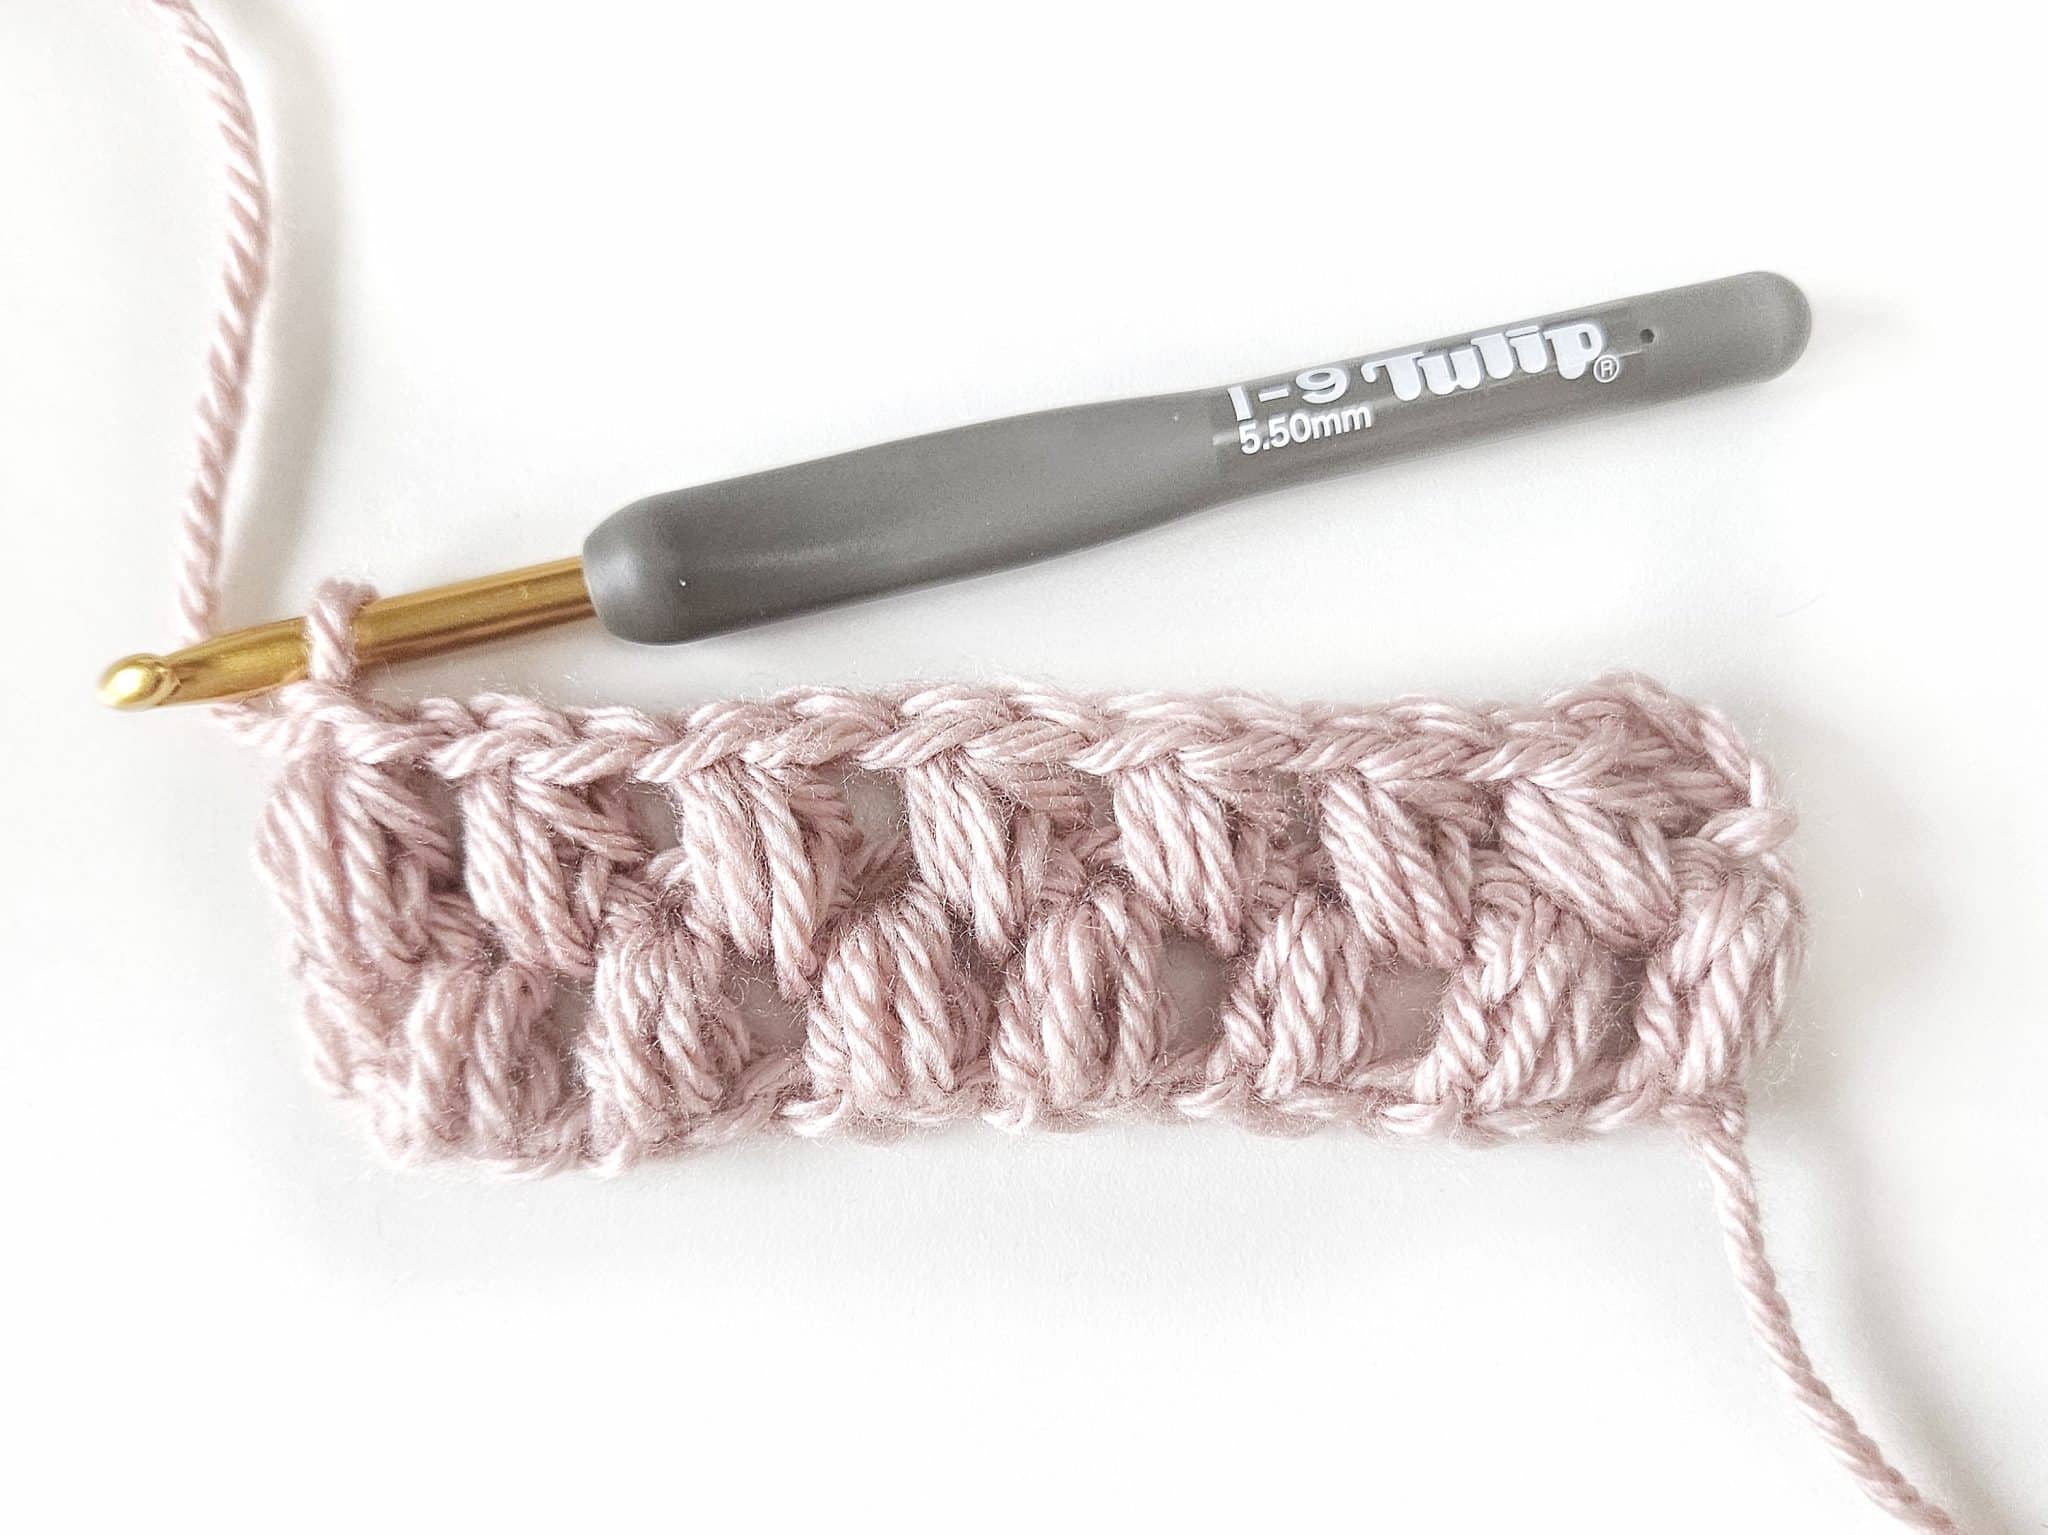
Row 1
Step 1: Start with a foundation ch worked in a multiple of 2 plus 4 sts. My example uses 16.
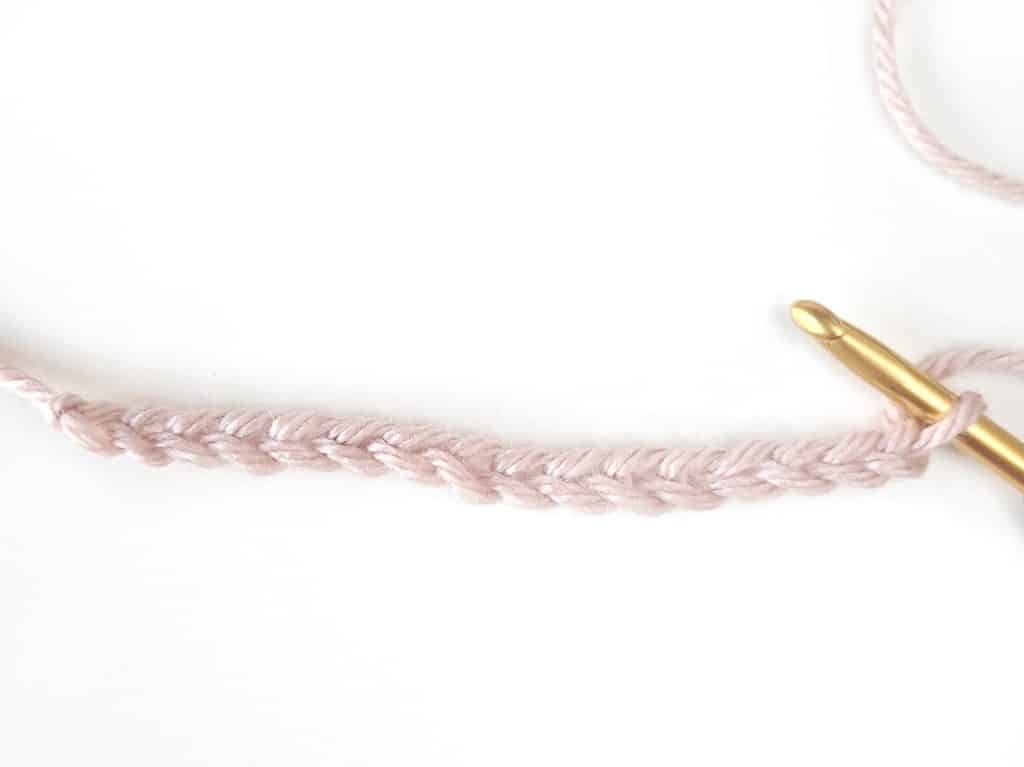
Step 2: yarn over (yo)
Step 3: Insert the hook into the fourth ch from the hook
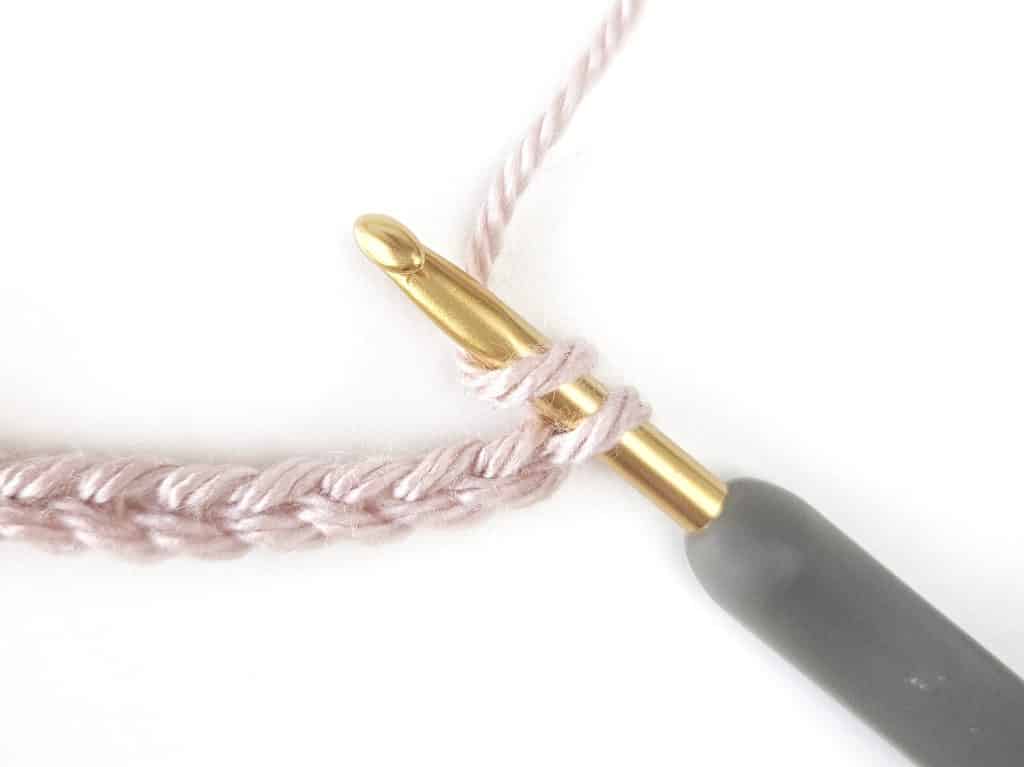
Step 4: yo
Step 5: pull up a loop
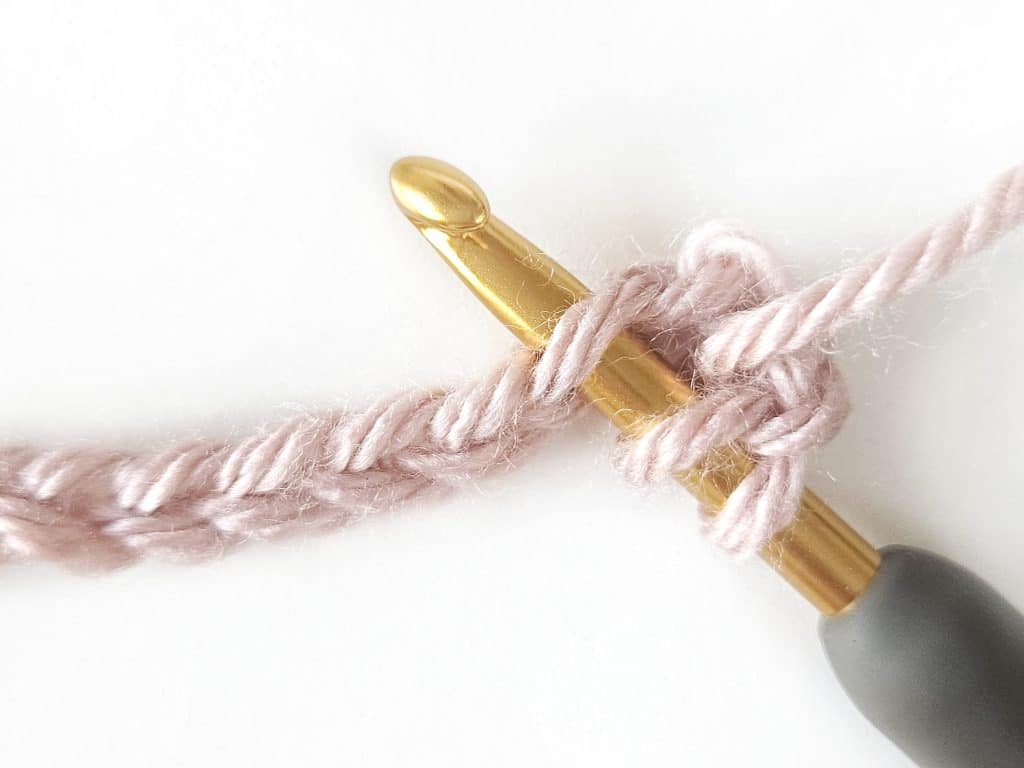
Step 6: *yo, insert the hook into the same st, draw up a loop repeat from * until you have 7 loops on the hook
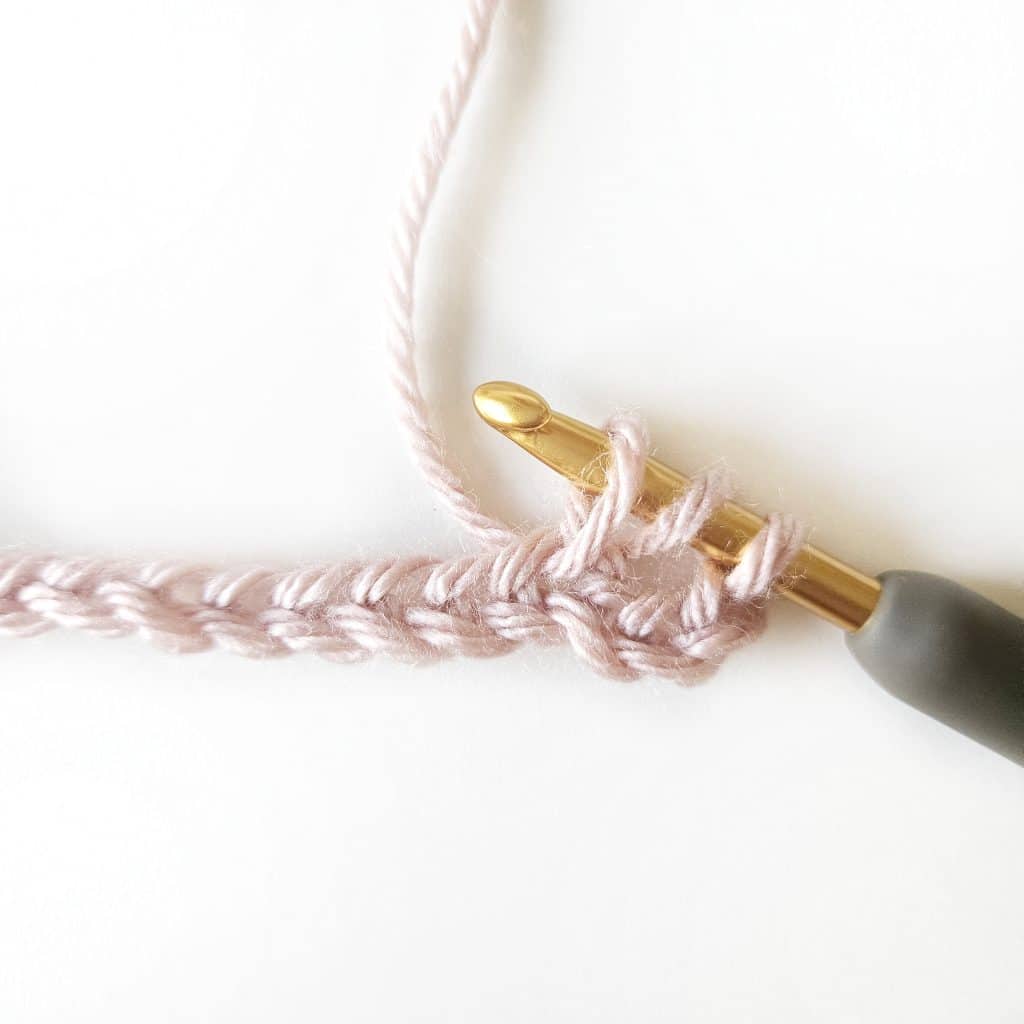
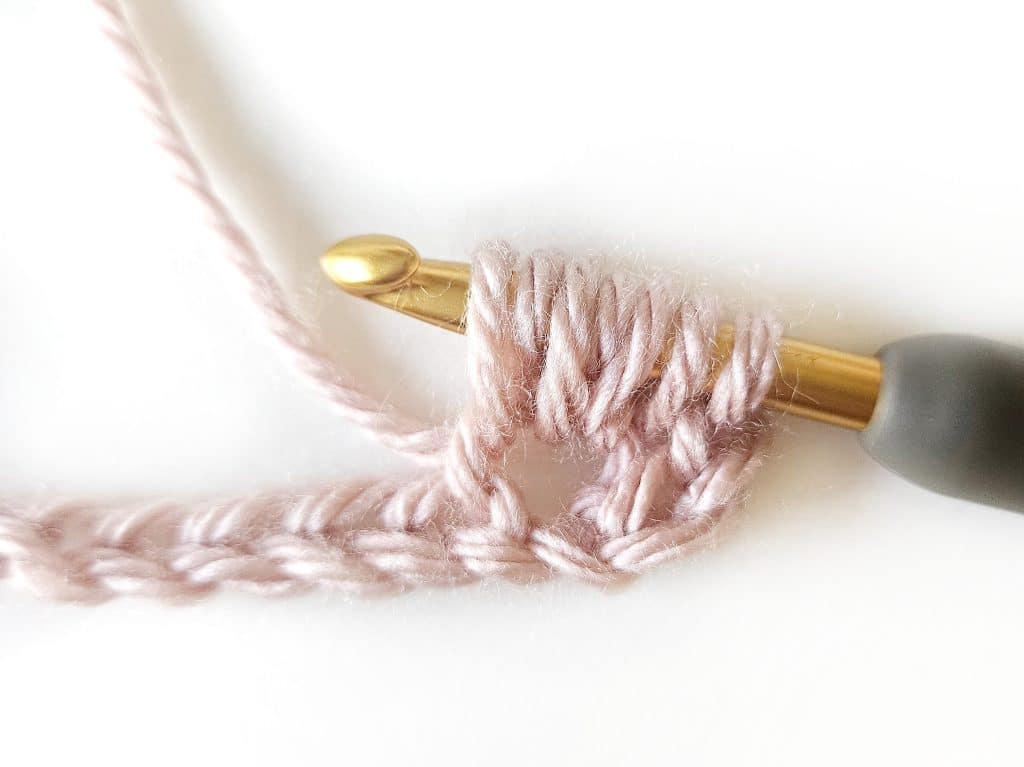
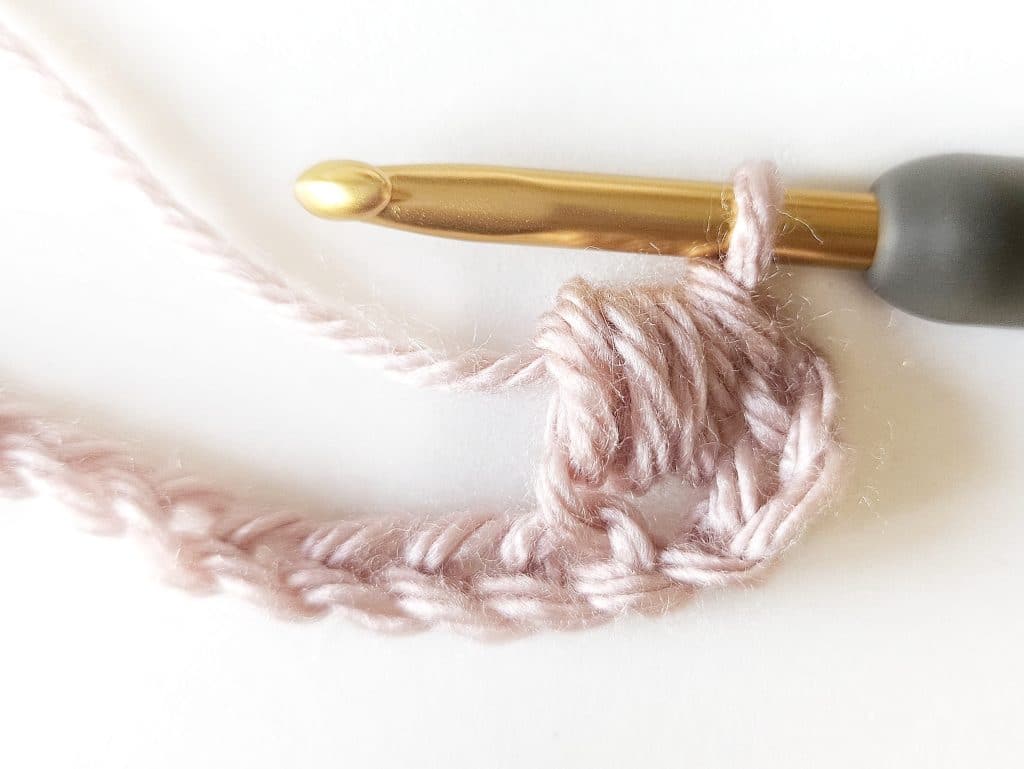
Step 7: yo
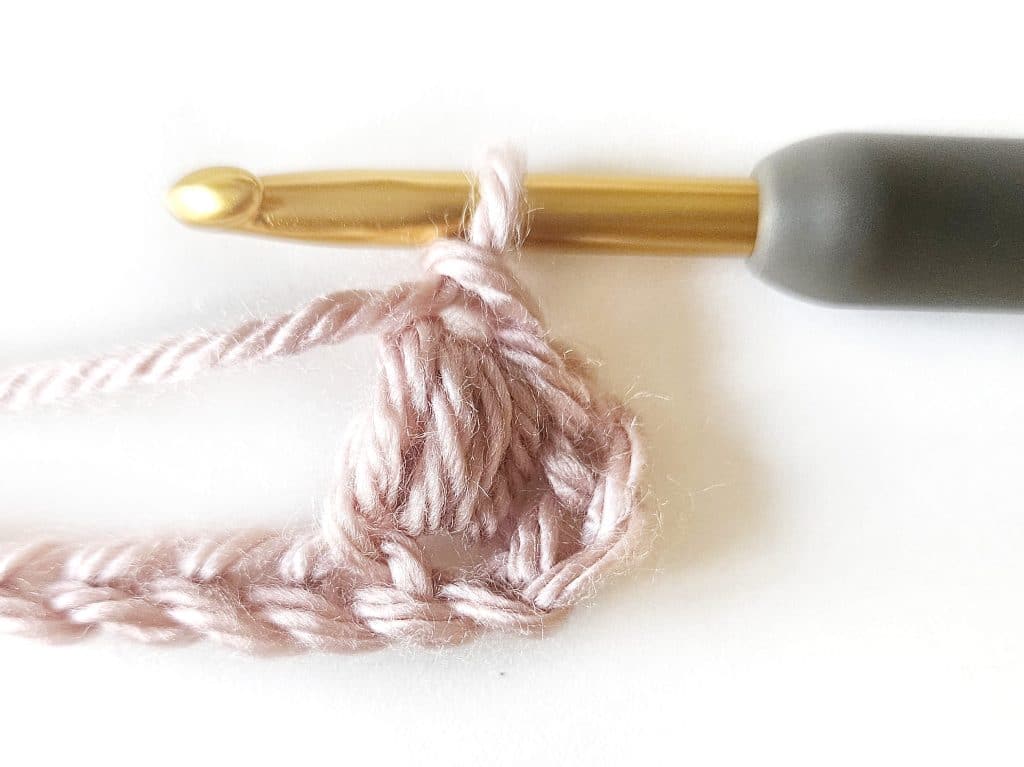
Step 8: raw through all loops on hook
Step 9: ch 1 to close
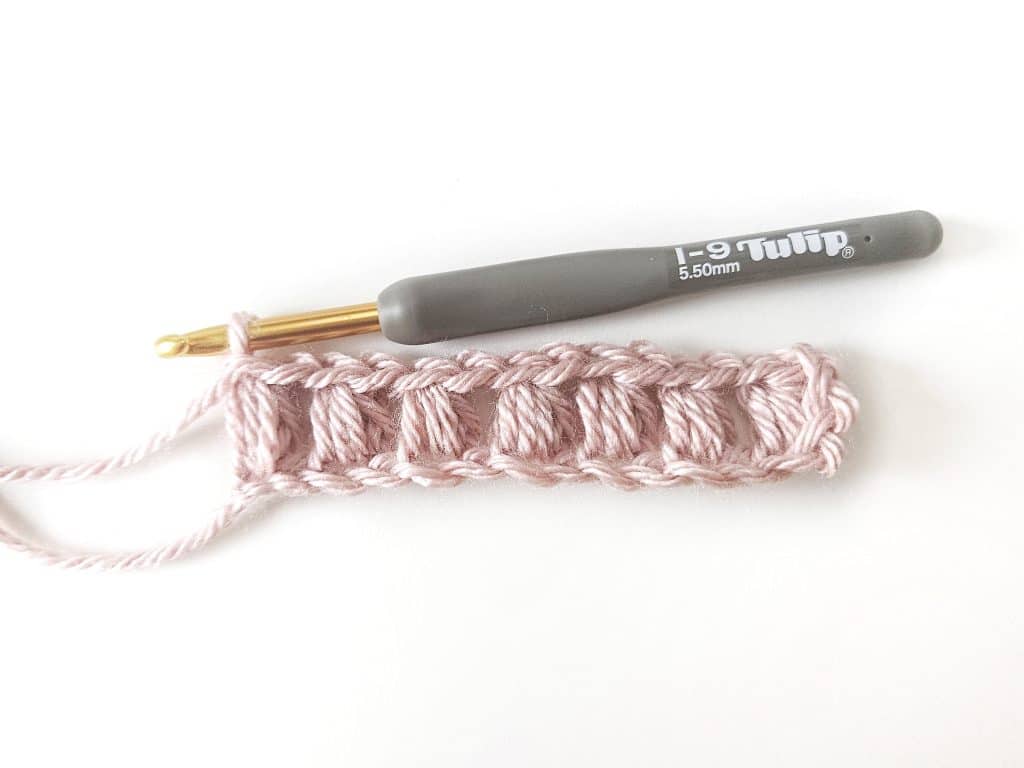
Step 10: to continue across the row, skip a st, yo, insert your hook into the next st and repeat steps 3-7 until the end of the row, ending with a puff stitch.
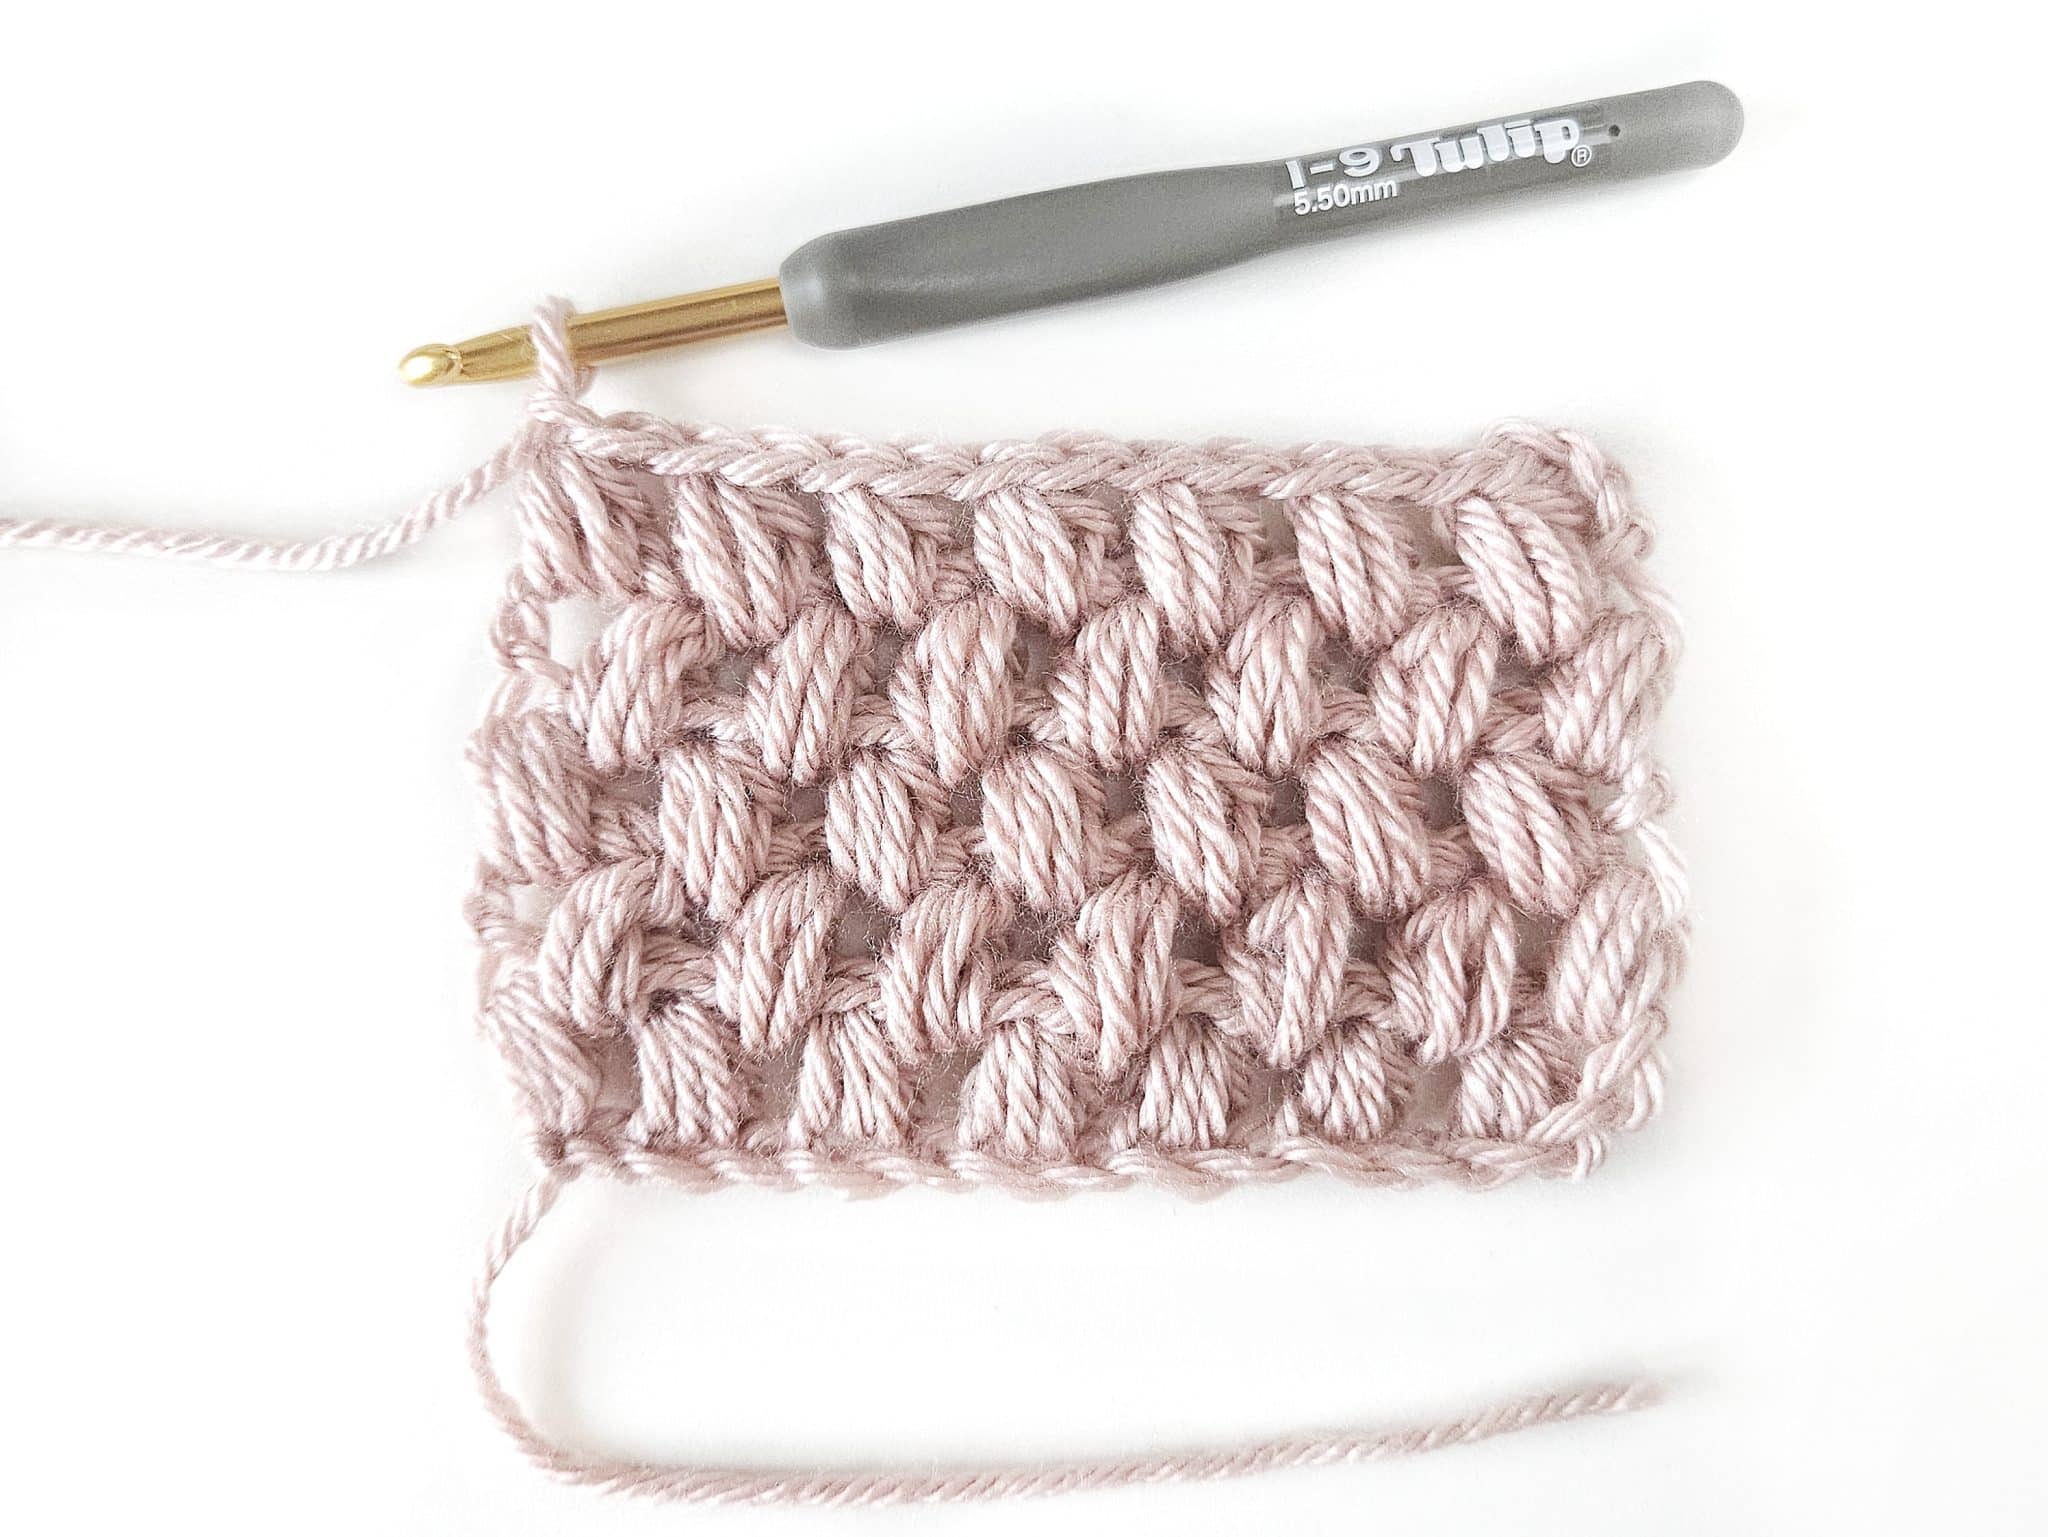
Row 2
Turn your work and ch 3
locate the first ch 1 space from the previous row and work a puff stitch into the space (insert hook into the designated st, yo, pull up a loop, yo, insert the hook into the st again, yo and draw up a loop until you have 7 loops on the hook, yo and draw through all the loops, ch 1 to close)
repeat step 2 across, ending with a puff stitch.
Row 3 to ?: Repeat row 2
Puff Stitches in the Round: A Mini Guide
Using puff stitches in the round is just about the same as working in rows, but there are a few things to keep in mind:
Joining Rounds
When you complete a round of puff stitches, you’ll likely join it with a slip stitch. Make sure to place the slip stitch carefully, so it doesn’t squash your puff.
Increasing and Decreasing
You can still increase or decrease in the round, just like with basic stitches. To increase, simply make two puff stitches into the same stitch. To decrease, make a puff stitch that pulls together two stitches.
Count Your Stitches
In the round, it’s super important to keep track of your stitch count. Losing or adding a stitch can mess up the whole pattern.
More Techniques and Crochet Stitches to Learn
- Crochet Puff Stitch Tutorial with Photos
- Whip Stitch Crochet Seaming Technique
- Half Double Crochet Slip Stitch (hdc slst) for Beginners
- Single Crochet Increase Tutorial (sc inc)
- Creating Seams Using the Mattress Stitch
- Single Crochet Two Together (Single Crochet Decrease)
- How to Crochet a Cable Stitch
- Crochet Moss Stitch Tutorial (Written, Photo and Chart)
- How to Crochet a Granny Stripe in Rows
- How to Make a Crochet Rib Stitch (Photo Tutorial)
Thank you for all your patterns and teachings. You explain all steps so clear and they are easy to follow, resulting in awesome patterns for self or for gifts. Thank you again.
You are welcome Fran!
I am so glad you enjoyed this tutorial.
And thank you for the kind words, it means a lot to me.
-Krista
That’s right!!