Beginner’s Tutorial on Making a Slip Knot in Crochet
Learning how to crochet a slip knot is easy! This step-by-step tutorial will show you two easy ways about how to create a slip knot, which is a basic beginning step of most crochet patterns.
After you master this basic technique, be sure to check out my other crochet stitch guides for even more stitch tutorials, so you can start creating some unique and fun crochet designs.

Slip Knot in Crochet
To successfully crochet a slip knot, you will need a few crochet tools and the slip knot tutorial (shown using two different methods), which is below.
A crochet slip knot is important to learn because it is how you start most crochet projects and is one of the first crochet techniques a beginner should learn.
Materials to Make a Slip Knot
To make a slip knot for crochet, you will only need two crochet supplies, which are yarn and a crochet hook.
Yarn
For this tutorial, I recommend for beginner crocheters to use an easy-to-use yarn such as Vanna’s Choice by Lion Brand or Brava Worsted by Knit Picks. These yarns are both 100% acrylic medium weight yarns that hold up well to use and are simple enough to find in stores.

You can learn more about medium weight yarn, find other patterns using medium weight yarn, and the hook sizes that are recommended for this weight of yarn here on Easy Crochet. Furthermore, this tutorial can be completed with any yarn weight, so you do not have to use the exact one that I did for this tutorial.
Crochet Hook
Any hook brand will work when making a slip knot. To find out what size hook you will need, you will need to look at the yarn you are using. The package or sleeve on most yarns will have a recommended hook size. I am using a medium weight yarn aka four weight, so the following crochet hook sizes will work best:
I prefer to use the Tulip Brand crochet hooks, but any crochet hook or crochet hook set will work perfectly fine!
Let’s Get Started
Now that we’ve gone over the basics of the slip knot in crochet as well as the materials you’ll need, it’s time to learn how to make one!
How to Tie a Slip Knot in Crochet
Skill Level: Basic
How to Make a Slip Knot in Crochet (Two Ways)
I will highlight two ways to make a slip knot in crochet with video tutorials as well as the written tutorials below, since there are a few methods in crochet to form a slip knot.
- The first slip knot method is how to make a Slip Knot on a Crochet Hook
- The second slip knot method is how to make a Slip Knot without a Crochet Hook
When you start a crochet pattern, it will usually begin with a basic slip knot on your hook (my favorite method), but it can also begin without a hook. Be sure to take a look at both methods of creating a knot so that you can begin your crochet projects in the way that is easiest for you. The next step after creating a crochet slip knot is typically to create a foundation chain using the chain stitch.
Use both of the slip knot crochet video tutorial and written pattern (with a photo tutorial) below to learn two easy methods on how to make a slip knot in crochet!
How to Make a Slip Knot on a Crochet Hook
*if you cannot see the videos below, make sure you have your ad-blocker disabled and refresh the page to see the crochet video tutorials. You can also head over to my YouTube channel to view too!
Slip Knot Video
Written Pattern
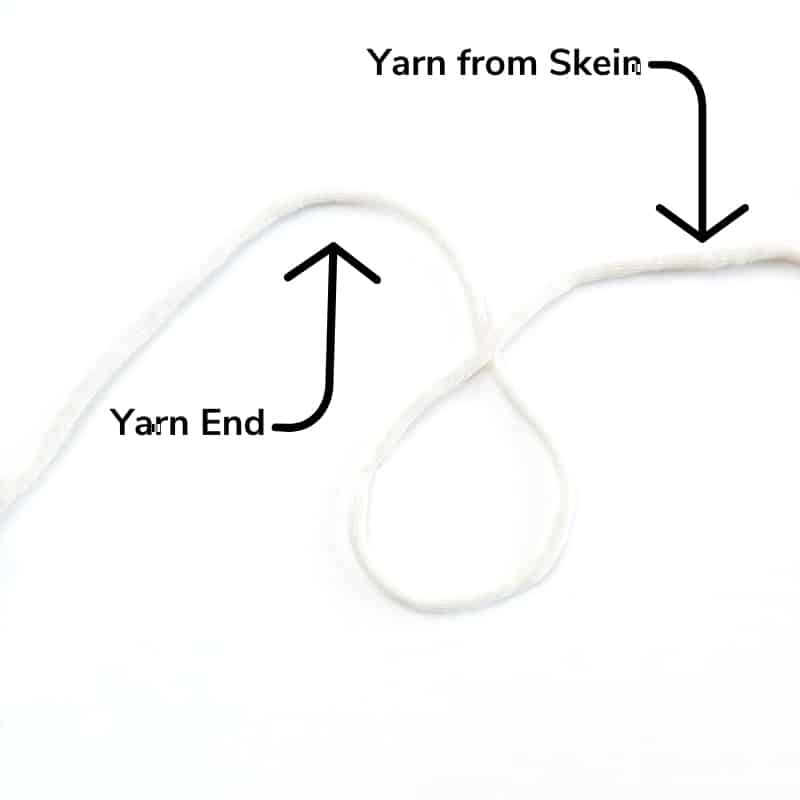
Step 1
The first step begins by crossing the yarn from the ball of yarn (working yarn) over the tail end of the yarn (aka yarn end, yarn tail or tail of the yarn) to form a circle.
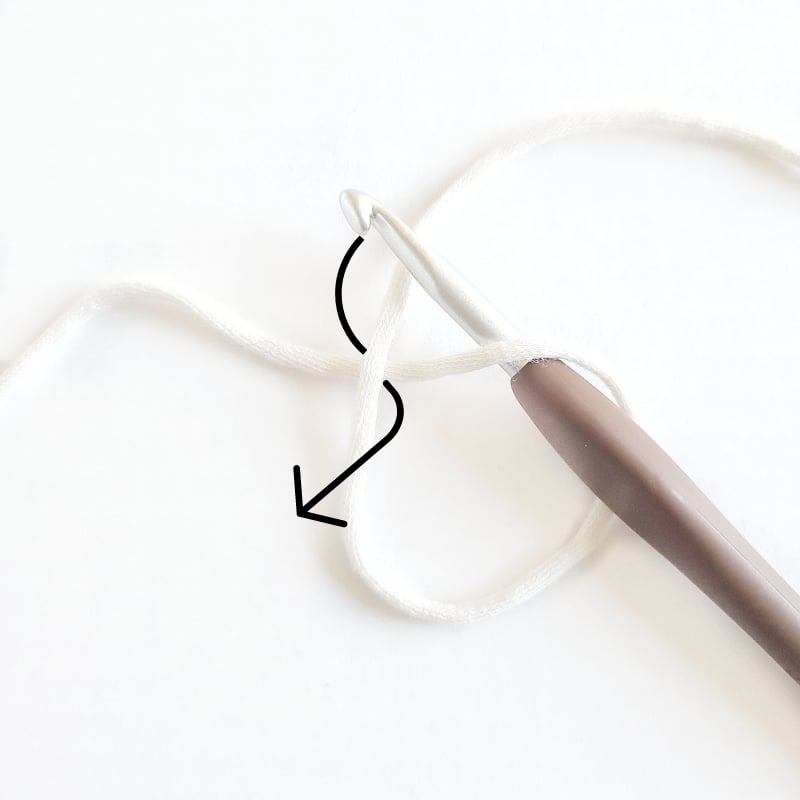
Step 2
Insert hook into the loop of yarn (circle) as shown. Yarn over and pull the yarn from the ball end of yarn down through the circle.
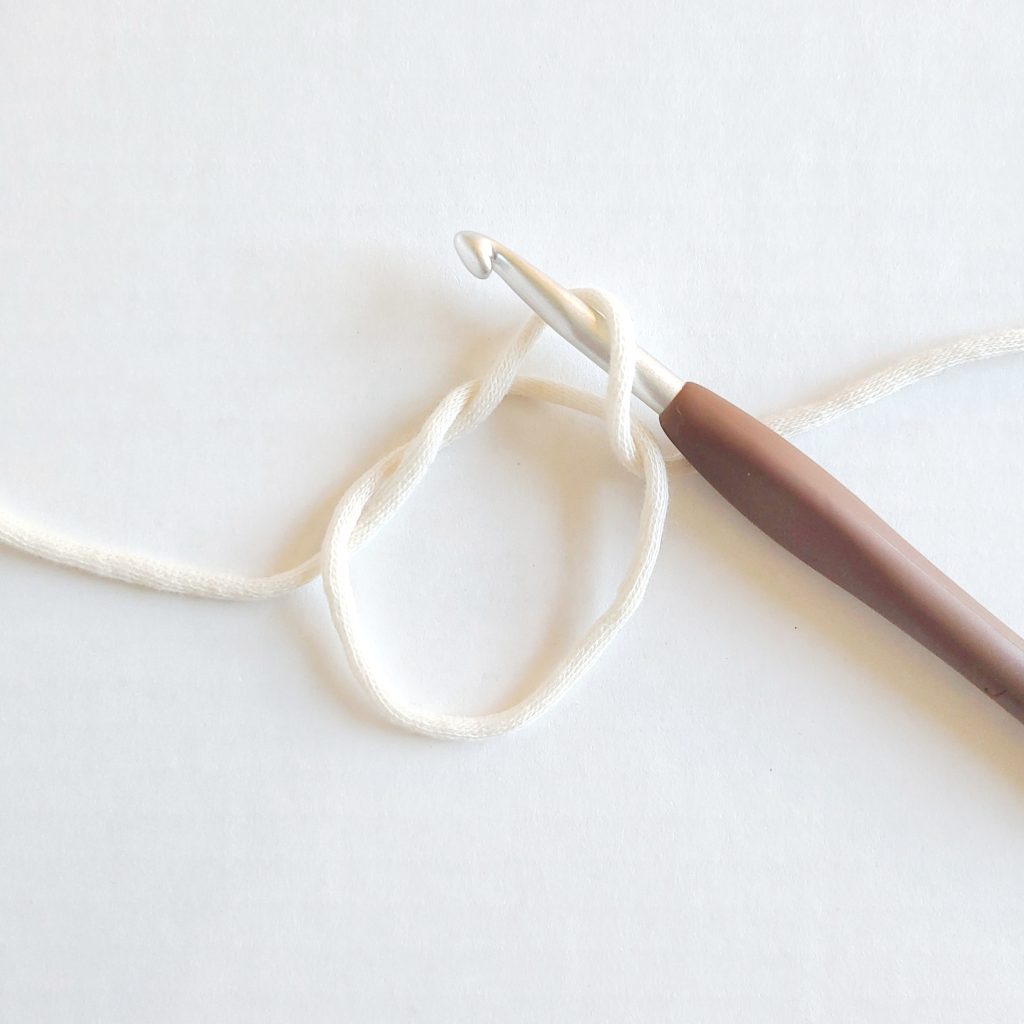
Step 3
Step 2 will form a loop on the hook and a loose slip knot. (Steps 1-3 are also how a magic ring, magic loop or magic circle is started)
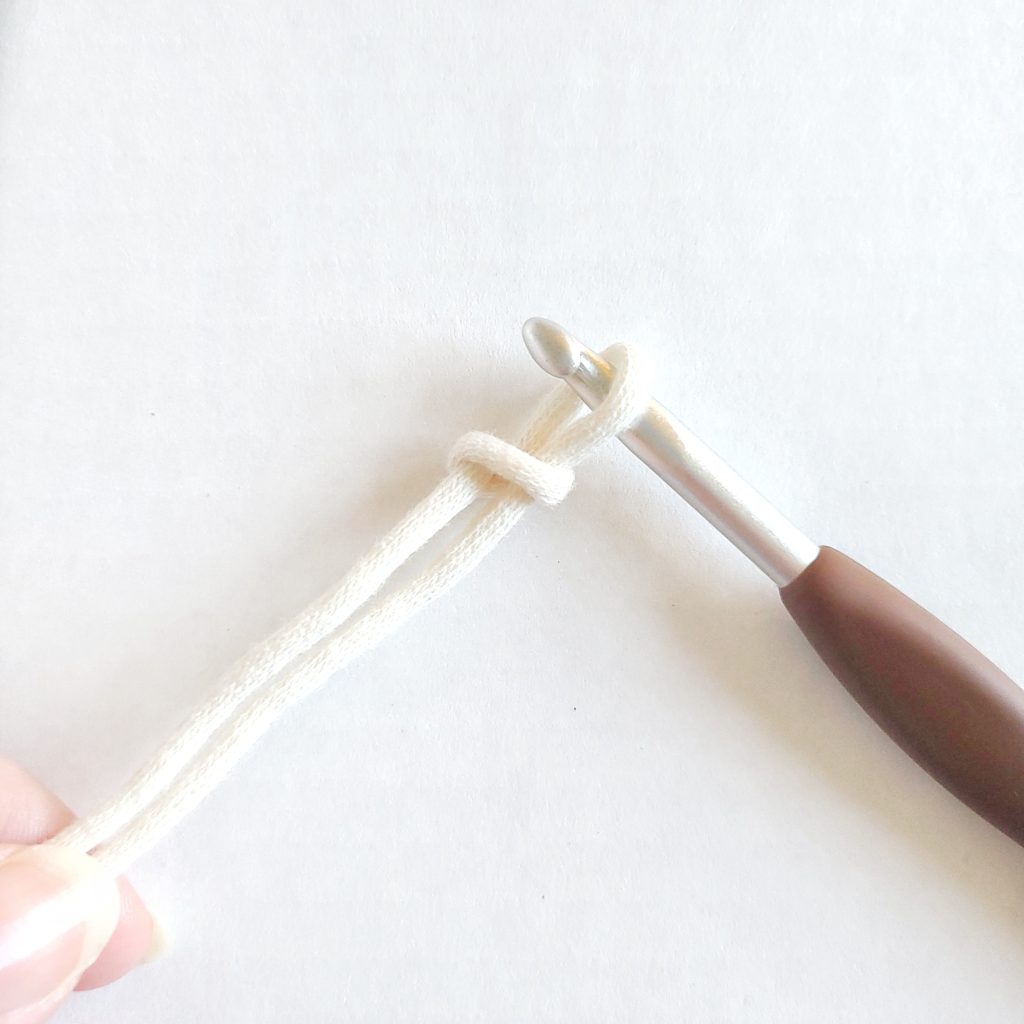
Step 4
Pull both ends of the yarn to tighten the base of the slip knot around the hook
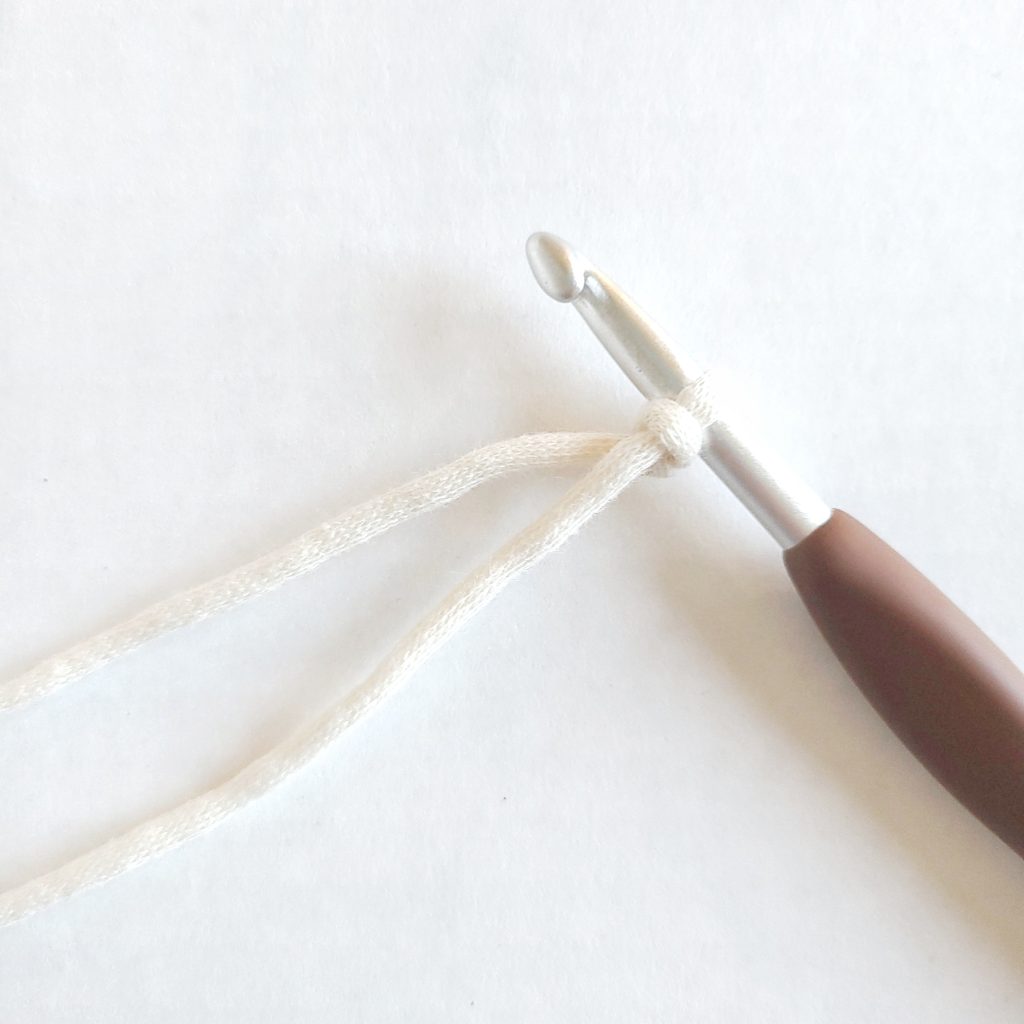
Step 5
You have now learned how to make a slip knot in crochet! It is a good idea to make sure the slip knot is not too tight. It should be a sliding knot, so it can move easily on the crochet hook.
There should be a 4-6″ yarn tail, so it can be woven in with a yarn needle after a crochet project is complete.
The working end of the yarn is where you’d begin a row of chains or stitches, which will form the foundation row of your crochet project.
How to Make a Slip Knot Without a Crochet Hook
Tip: Knowing how to make a crochet slip knot will set you up for success when you learn how to follow your first crochet pattern. The crochet slip knot begins the foundation chain or row of most crochet projects.
A foundation chain would use chain stitch, and a foundation row would use a row of basic crochet stitches, like the single crochet or double crochet.
More Basic Crochet Stitches to Master
As a new crocheter, it is important to get the basic crochet stitches mastered before moving on to more advanced patterns. You will want to know how to chain, slip stitch, single crochet, half double crochet and double crochet.
Try These Free Beginner-Friendly Crochet Patterns Too
Now that you are a pro at crocheting a slip knot, be sure to check out these beginner-friendly and free patterns. If you are still learning how to crochet, take a closer look at my beginner guides or crochet masterclass here on Easy Crochet.

I love this four week class. I am learning a lot. I have not crochet in 40 years. I retired so I want to learn and make blankets for animal shelters.
Hi Margaret,
I am so glad to hear that you are enjoying the class and I am betting the animals will be thrilled with your donations! That is so kind of you. ❤️
Happy Crocheting!
– Krista