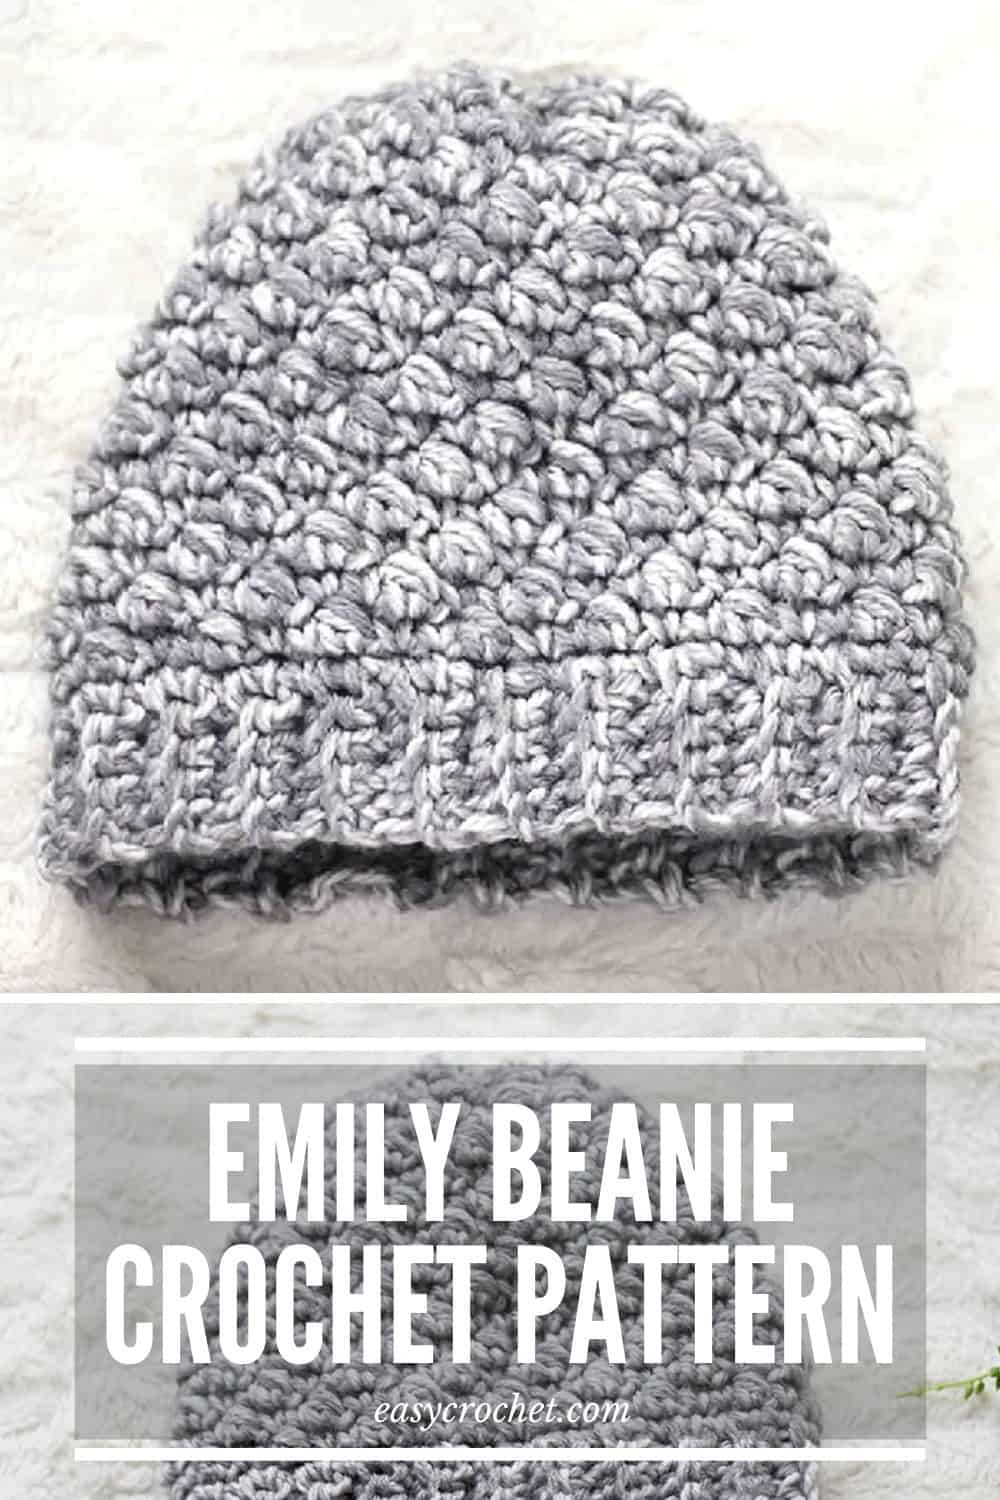
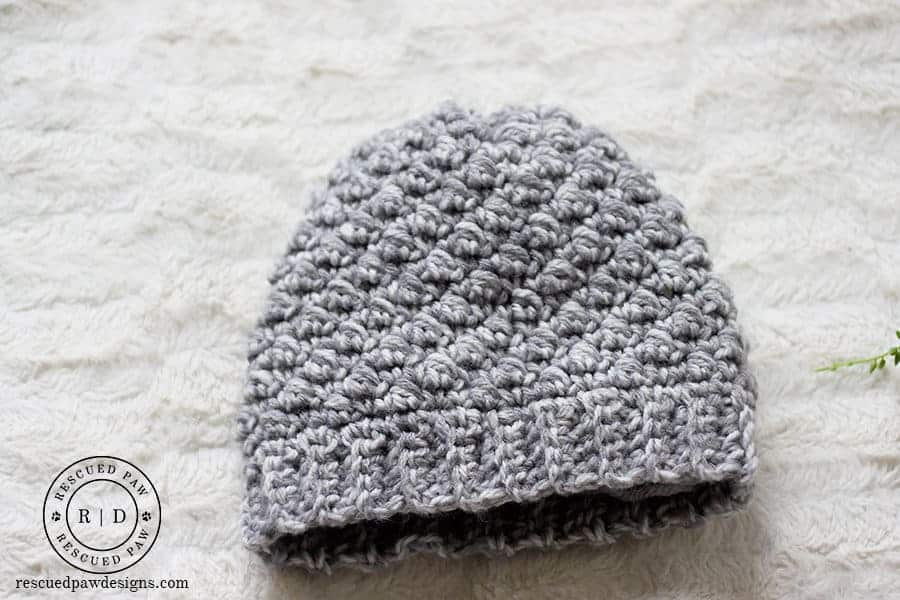
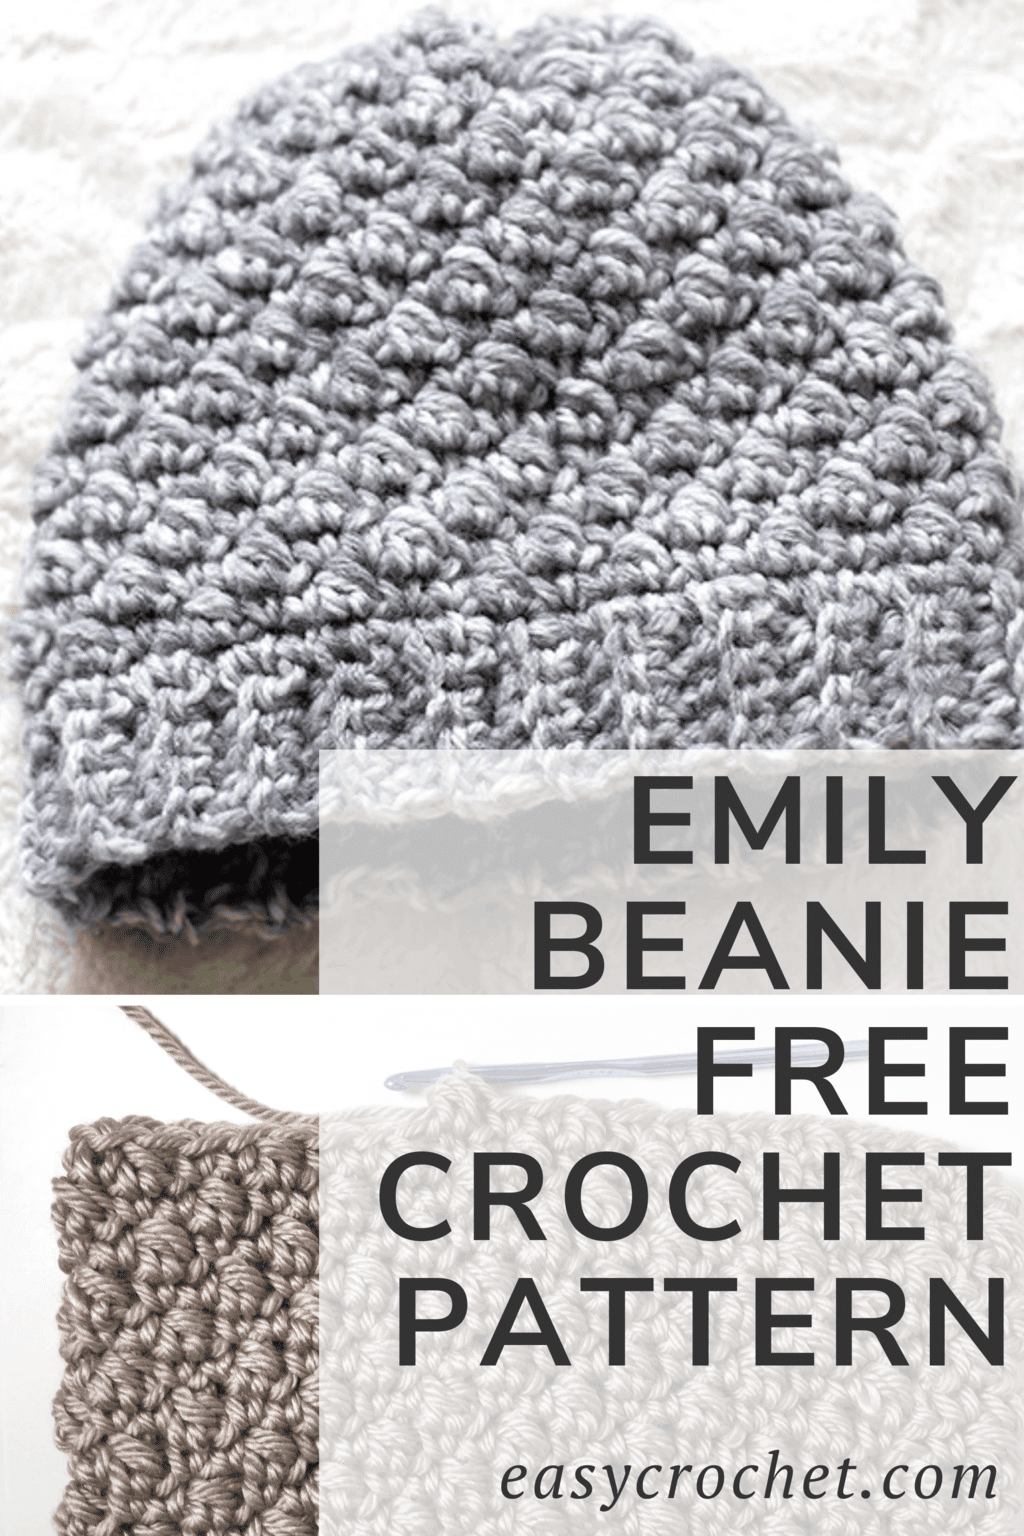
Emily Diagonal Beanie Crochet Hat Pattern
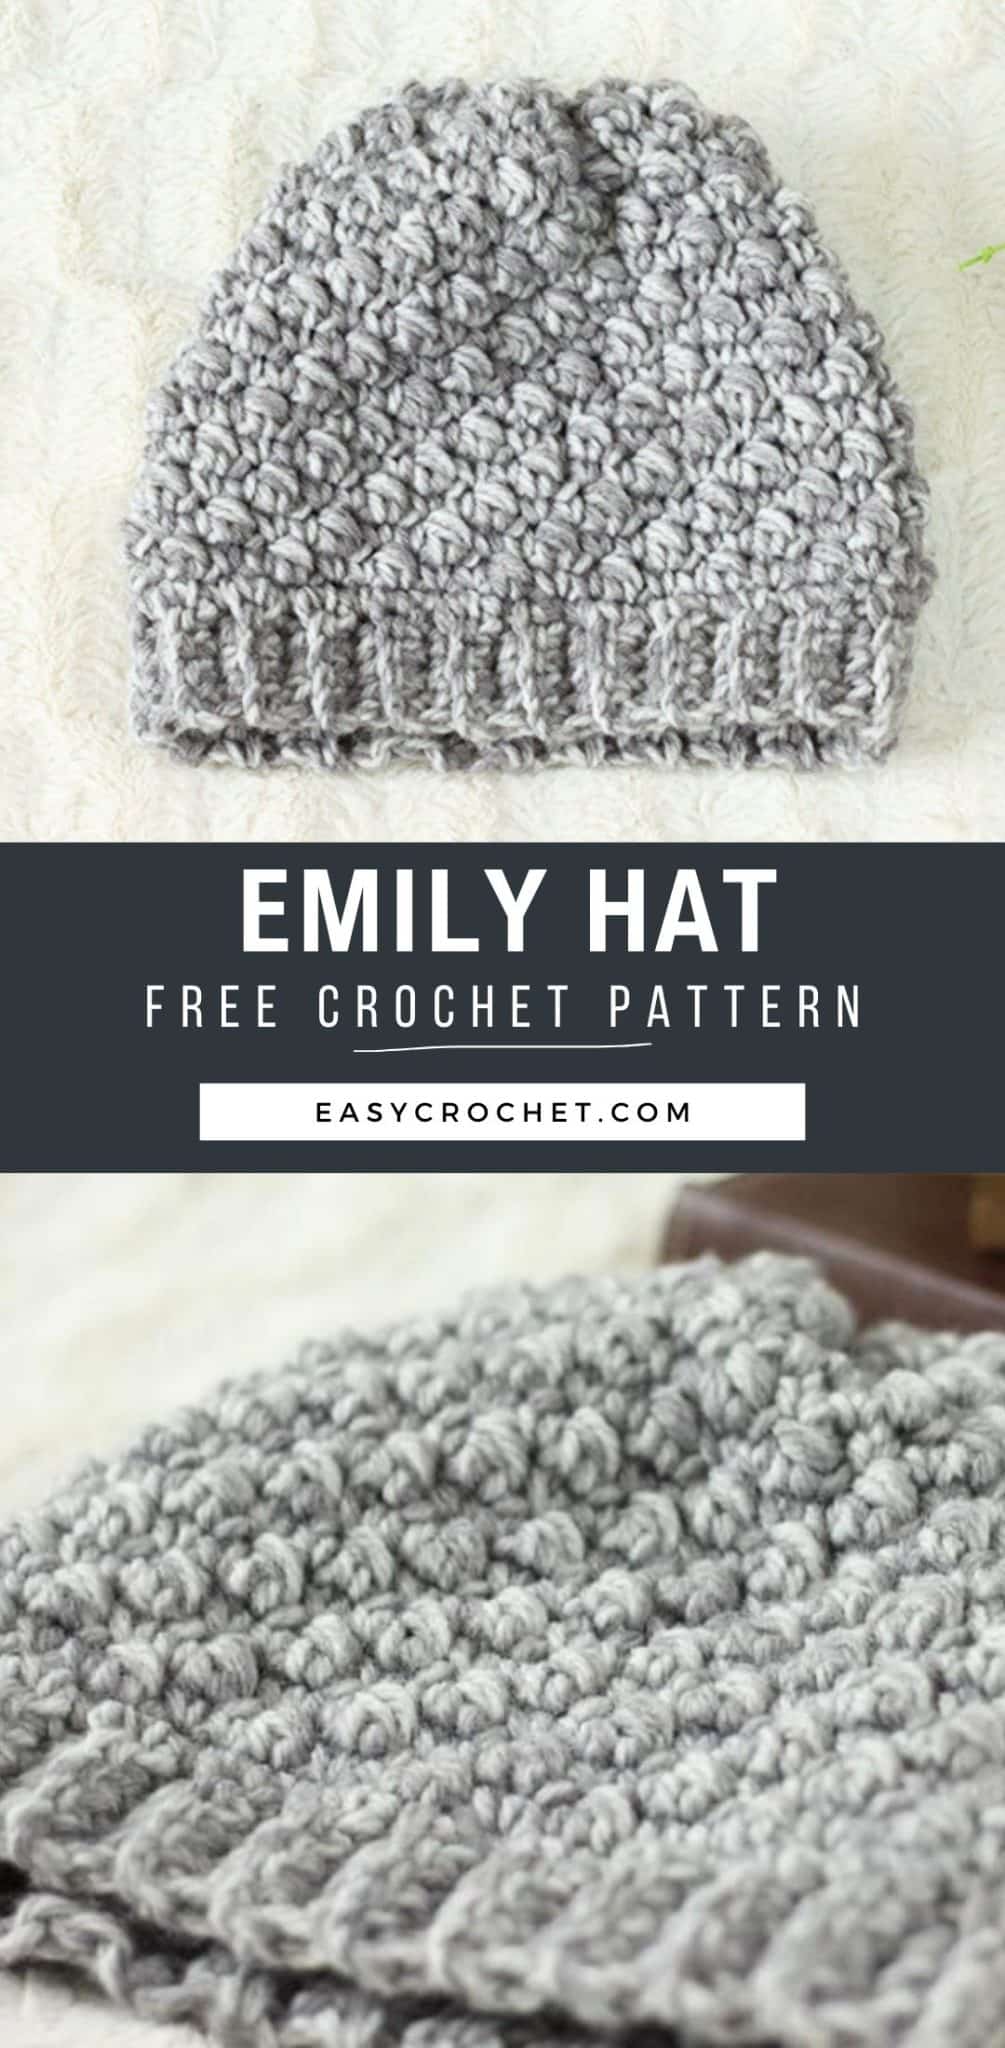
If you are looking for an easy crochet hat design, then the Emily Diagonal Beanie Crochet Pattern might be for you!
With this crochet pattern, you will learn how to make a beanie that would be perfect as a women’s or men’s beanie!
The best part about this hat is that it works up fairly quickly and will keep you cozy warm this fall! Scroll on down to learn how to crochet a beanie today with the free pattern below. Happy Hat Making!
The Yarn That’s Perfect for This Easy Crochet Beanie
While I was designing this diagonal beanie crochet pattern, I knew that I wanted to use Lion Brand Wool-Ease Tonal. I ultimately chose it because of all the exciting shades that were available.
I love all the colors and highly suggest checking them out if you have a spare second! You will not be disappointed! Get Wool-Ease Tonal to start this project asap.
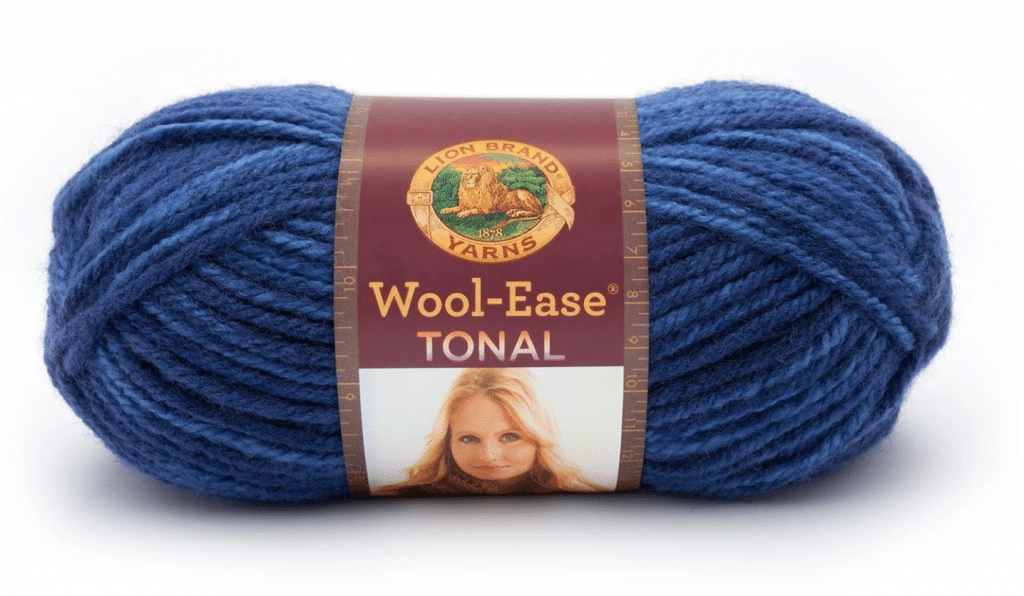
After contemplating for a while, I decided to use the color Gray Marble because it was neutral and would go with almost any outfit. Plus, I love the way the yarn almost looks painted on. A win-win!
Need a substitute yarn? If you can’t find this yarn, Color Made Easy from Lion Brand or Caron Jumbo are both great alternatives.
Quick Crochet Beanie Pattern
This easy crochet hat pattern only took about a total of two hours to make! My designing was mostly interspersed throughout my daughter’s swim practices and school pickup. So, you could get this beanie done in just one evening while Netflix bingeing!
I hope you truly enjoy this easy crochet beanie, and if you require any clarification, please ask me in an email or join the Easy Crochet Facebook group. Have fun!
Free & Easy Crochet Hat Pattern
Skill Level: Intermediate
Materials
- 1 skein of Lion Brand Wool-Ease Tonal Yarn or less than 125 yards of bulky 5 weight yarn
- Size I crochet hook 5.5 mm or whatever hook needed to obtain gauge
- Yarn needle
- Scissors
- (Optional) Clover Pom Maker or Faux Fur Pom
Notes
- Written in standard US terms
- sl st’s and ch 1’s do not count as stitches
Gauge
- If you use a different yarn or yarn weight, results will vary. Gauge is important.
- Gauge for each hat band row is 5 st’s = 2″
- Gauge for the hat is approximately 4 sts for every 2″
- Click here If you are wondering why gauge is so important.
Finished Size
The finished size is an 18″ circumference not stretched and a 9″ height.
The hat WILL stretch, so I like to make it about 2″ smaller than the recommended 20″ size that is usually made.
The finished size will fit most teens to adult women when the correct gauge is followed.
Crochet Abbreviations
- ch = chain
- sl st = slip stitch
- sc = single crochet
- hdc = half double crochet
- sphdc = special half double crochet
- st(s)= stitch(es)
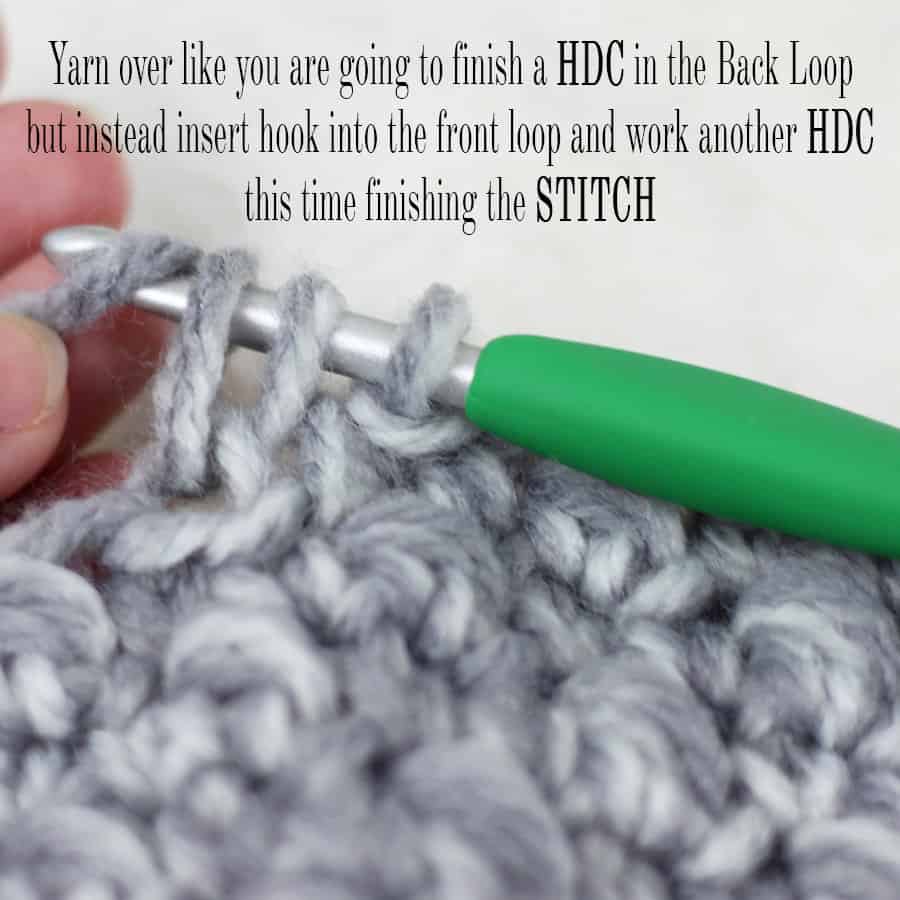
SPHDC = Video Tutorial
*if you have an ad blocker, it may prevent the video player from showing
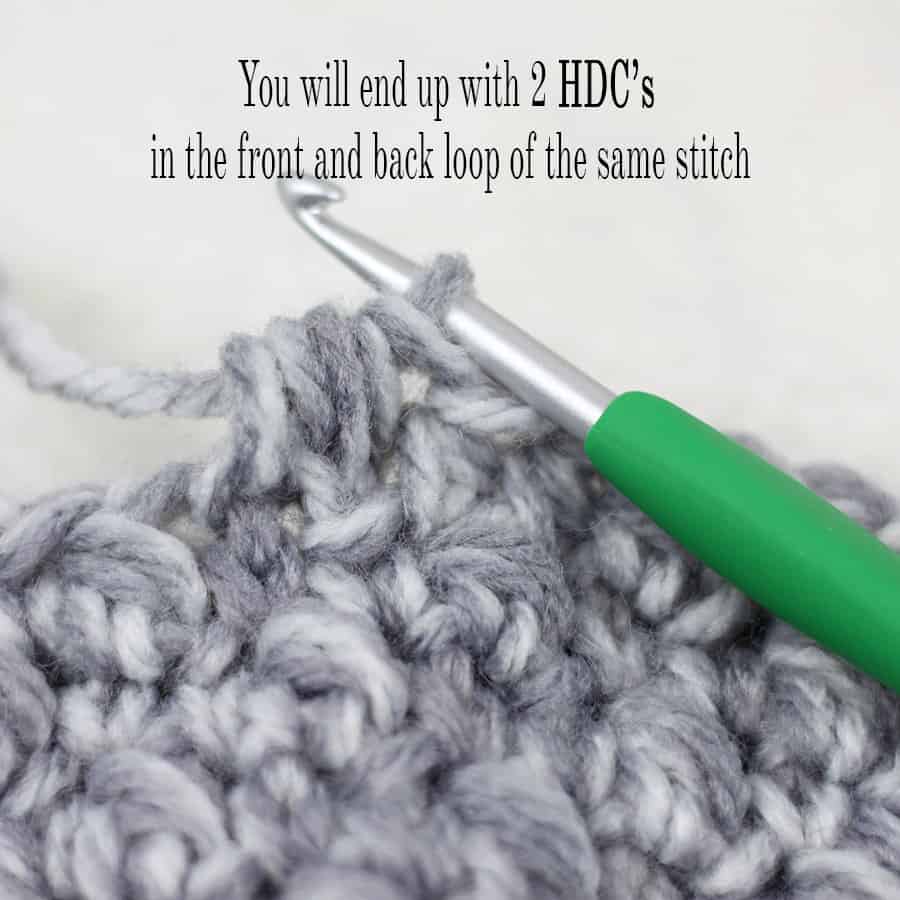
SPHDC = Written Tutorial
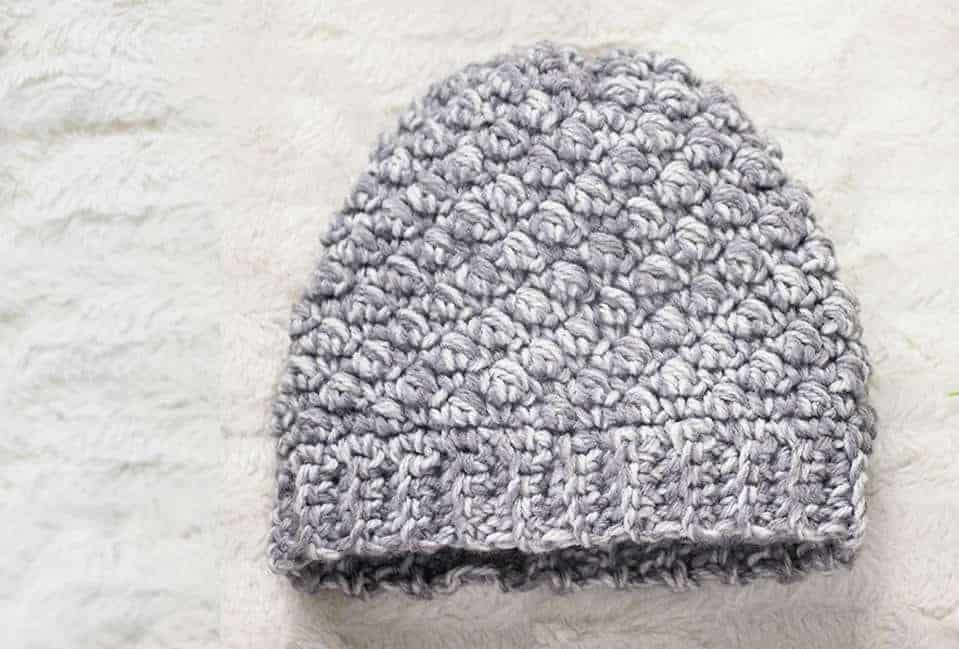
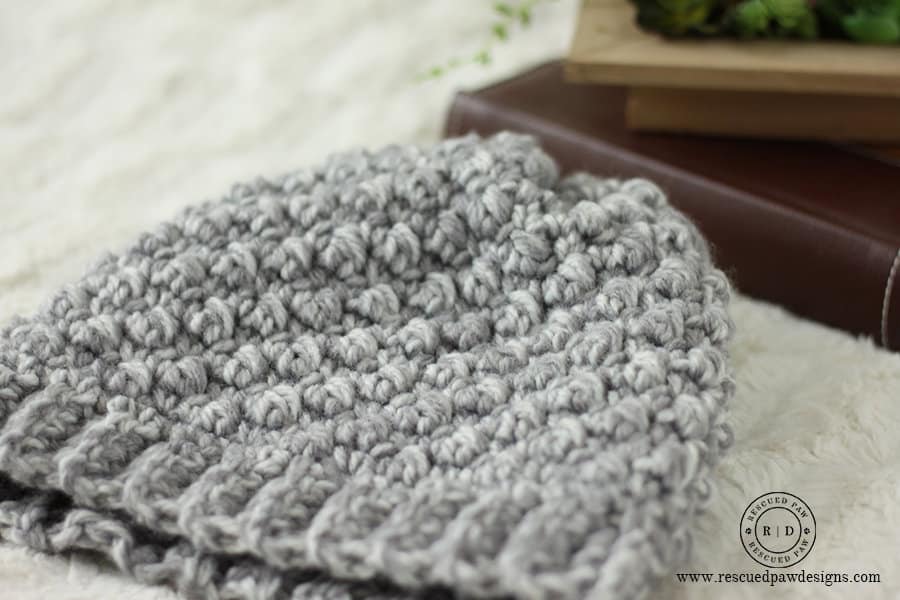
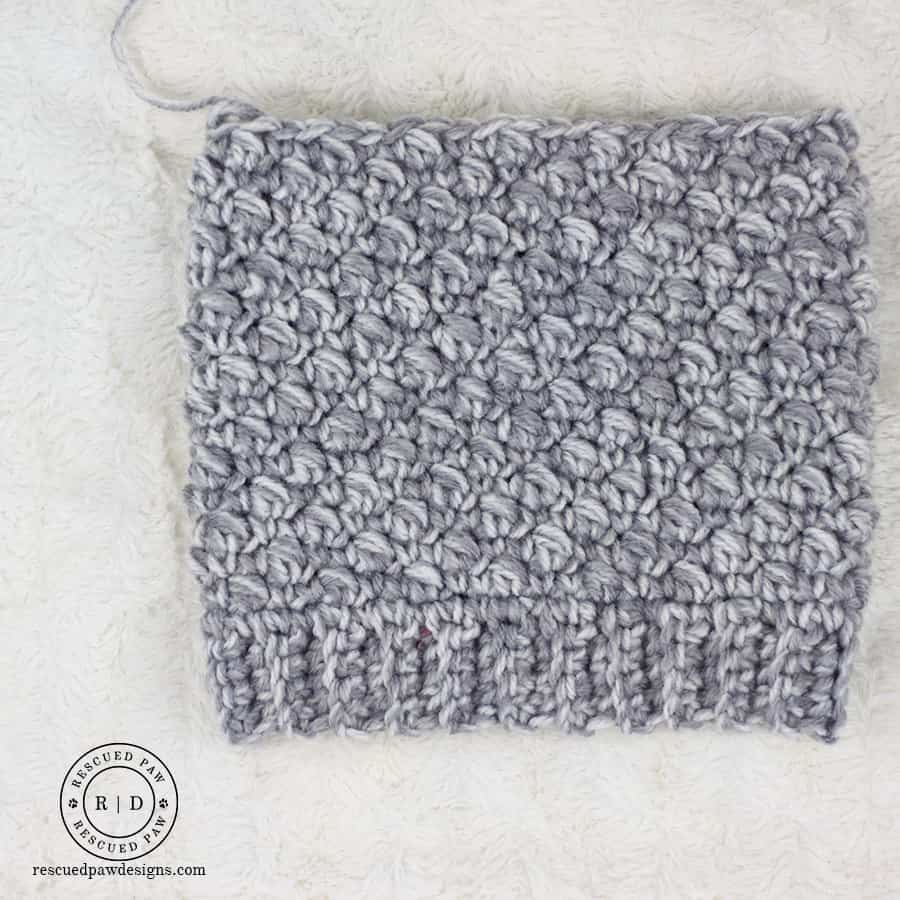
I worked the band using single crochets in the back loop to give it a ridged effect and then throughout hat used a special hdc stitch to give it a bumpy texture.
I’ll explain the special stitch in detail below, but it really is just working 1 almost completed hdc in the back loop of the indicated stitch and 1 completed hdc in the front loop of the same stitch.
Band of Beanie
*finished size of the band is 18″ (unstretched)
To Begin: ch 6
Row 1: in the second ch from the hook, sc, sc in each ch across, turn. (5)
Row 2: ch 1, in first st sc in the back loop, sc in the back loop of each st across, turn. (5)
Row 3 -45: Repeat row 2. (5)
To Finish The Band: ch 1, hold the two short ends of the band together to join. sl st up the side of the band to join together, do not fasten off.
Main Part of The Beanie
Round 1: ch 1, working along the long edge of band sc 46 times around evenly, sl st to the top of the first sc. (46)
Round 2: ch 1, sc in the first st, sc , sphdc stitch (see notes section above), *sc, sc, sphdc, repeat around ending with 1 sphdc in last st, sl st to the top of the first st in the round. (46)
Round 3: ch 1, sc in the first st, sphdc, sc, sc, *sphdc, sc, sc, repeat from * around ending with a sphdc in the next st and sc in last st, sl st to top of the first st in the round. (46)
Round 4: ch 1, starting in first st sphdc, sc, sc, *sphdc, sc, sc, repeating from * around and ending with a sc in the last st, sl st to top of first st. (46)
Round 5 – 16: repeat rounds 2-4 (46)
Learn how to use a pom-pom maker here.
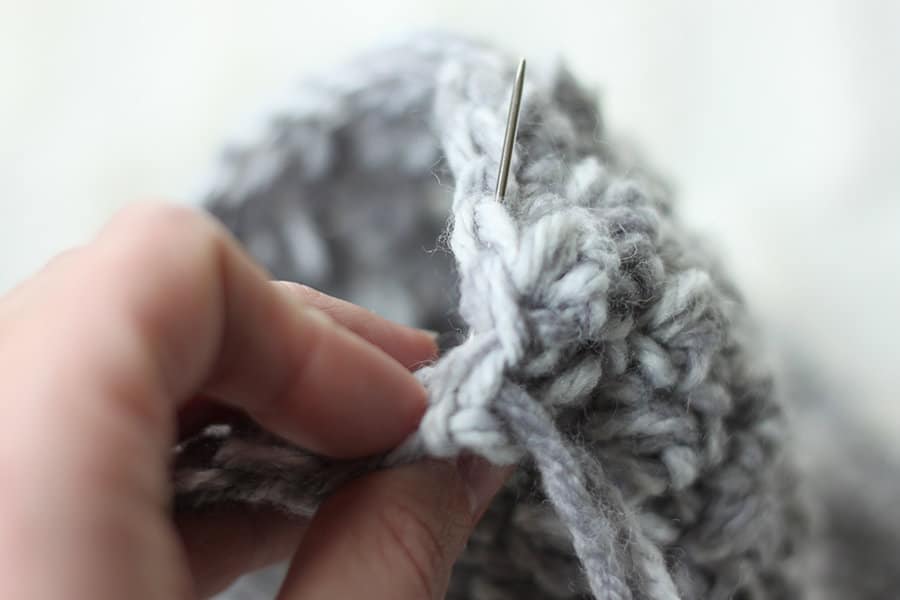
Finishing: Cinch together the top of the hat as shown below, and fasten in loose ends throughout the crochet beanie with a yarn needle.
Optional Finishing Touches: attach a yarn pom-pom using a Clover Pom Maker or a Faux Fur Pom for an added touch.
Closing up The Top of The Hat
After I finished the last row of the beanie, I cut the end of the yarn leaving a 12″ piece of yarn and used a yarn needle to weave in and out of every other stitch of the last row. Continue finishing the beanie off using the video tutorial. Watch here.

This diagonal beanie crochet pattern is such an easy design once you get the hang of it that I’m confident a crocheter who wants to try an advanced beginner pattern would be able to complete it with no problem. I promise!
If you do have any questions, just send me a message through my contact page.
Also, stay tuned, I have a baby hat crochet pattern of this in the works! <3
You May Also Like
More Free Crochet Hat Patterns & Headband Crochet Patterns
- 15 Free Crochet Bandana Patterns for all Skill Levels
- 14 Free Crochet Beret Patterns
- Neon Rainbow Striped Crochet Hat
- 7 Easy-to-Follow Slouchy Hat Crochet Patterns You’ll Love
- Chunky Crochet Ear Warmer Pattern
- Bernat Yarn Scrunchie Crochet Pattern
- Crochet Twist Headband Pattern
- Crochet Face Mask Pattern Covers
- Ear Warmer Headband Crochet Patterns
- Crochet Velvet Headband Pattern
This was my first time making a hat and I am so pleased with how it turned out! The directions were very easy to follow and I found I could easily make adjustments as needed. The yarn I used recommended 8mm hook, so I tested the gauge with that and it seemed about right. I ended up doing 50 rows for the band because I only got 16” from 45 rows. It was SO helpful to have the dimensions of the finished rectangle. I haven’t made other hats before because I could never get my gauge right now matter what I tried (I am a novice crocheter). I ran out of yarn in the color I was using so I only got to a height of 7.5”, but that was just enough to finish the hat. I love this stitch, as it reminds me of the moss stitch in knitting, and will definitely make this hat again. Thanks so much for the pattern!
I am fairly new to crochet, my grandmother tried to reach me almost 30 years ago, and I could never get past the chain. I finally taught myself via youtube videos and tutorials approximately a year ago. I personally found this to be a very easy pattern to read and comprehend. Thank you
I don’t understand where the directions for finishing the beanie are located. This means nearly nothing to me: ‘Finishing: Cinch together the top of the hat and fasten in loose ends throughout the crochet beanie with a yarn needle’ & google doesn’t seem to understand this either – the one link for tips is a completely different beanie – could you just explain how to ‘cinch it in’? I have never crocheted but was able to figure out the pattern with no problem but help me finish!
Hi Sarah,
It was confusing because some of the pictures are missing for some reason. I apologize. I updated with a Youtube video that should guide you in the right direction to finish the beanie.
Happy Crocheting.
Krista
I don’t understand where the directions for finishing the beanie. This means nearly nothing to me & google doesn’t seem to understand this either – the one link for tips is a complete different beanie – could you just explain how to ‘cinch it in’?
Hi Sarah,
Somehow the images and directions for closing the beanie got moved up to the beginning of the pattern. I just fixed it. Thanks for finding this!
Krista
It is very hard to follow the instructions for the special half double crochet because the ads keep upting interrupting in the middle of it. I understand why you have ads, but this is too disruptive.
Hi Jean,
I have a YouTube Channel too that may be easier to see. I just watched the video on my page and saw that there was an Ad at the beginning of the video but I didn’t experience anymore. Did more pop up for you during the video?
Krista
Hi i like ur pattern ill try it as soon as i could thanks Crista
Do you have this pattern adjusted for a 1-year-old or toddler?
Hi. I do not at this time.
Krista
I have been crocheting for 50 years, following patterns. I have never, ever been as frustrated with any of them as I have been with this one. I have used 3 different yarns, the current one being Bulky and am up to a K hook. Your pattern is wrong and I have adjusted it to what finally looks right. The gauge was incorrect and, in my case anyway, the hook size was totally off.
I suggest YOU try using THIS written pattern to make another one of these.
P.S. “Five inches for the length of each row” makes no sense if the height is supposed to be less than half an inch. ???? The length of what row? The width of what?
Hi Julie,
I am sorry you are having trouble with this pattern. Have you seen my video tutorial that may help. I also wanted to mention that the yarn I used for this design is no longer available so using any other yarn will more than likely not yield the same exact outcome as mine.
I do not see the part of the pattern that says 5 inches for the length of each row. I do see the note section where it says the gauge is 5 st’s = 2″ for each row of the band of the hat. Each row of the band is 5 stitches which means each row of the band is 2 inches wide. The height of each one of those stitches in that row are .43 or approximately a half an inch. Each row of the band will be 2″ in width and .43″ high.
I think you may have misread the st’s for inches.
Krista
Hello Krista, I really love the pattern and would like to try it but do you think that it would work for slouchy beanie as well? Wouldn’t it be too stiff? Thank you for your opinion on this.
Hi Veronika,
I think it would be a great slouchy beanie. If you do make it please share it with me over in the RPD Facebook Group! https://www.facebook.com/groups/RescuedPawDesigns
The band length is 16 inches.
Maybe if I try doing it looser? But then my gauge might be off
The 5 stitches = 2″ gauge is for the length of each row of the band not the width which is what maybe is happening? Each row’s height needs to be about .43 inches or a little less than a half an inch.
Oh no, mine is not 19.5 inches. But it’s 45 rows, and the correct gauge going across. Any ideas?!
What is the length of your band?
What is the length that the band should be once the 45 rows are done? I’ve done my 45 rows and it seems very very short for a ladies hat. My gauge is correct (the 5 SC stitches is 2 inches across). I don’t want to keep going until I know what to do! It is a 5 bulky yarn and a 5.5 hook.
Thank you!
HI Rebecca,
It will be 19.5″ un-stretched. 🙂
Happy Crocheting!
Krista
Do you have this pattern adjusted for a toddler size?
Hi Krista,
I’ve attempted this pattern a few times now and it’s not working out for me and I can’t figure out why. Even with a 8mm crochet-hook I am not reaching the correct gauge, My stiches are still too small, even though the space between the stiches is large enough to stick my fingers through (that’s not right I think, certainly doesnt seem very warm and cozy for a hat). I am using an 80% acrylic 20% wool yarn which is recommended for a 6-7mm crochet hook. Should be chunky enough. Do you have any tips I could try?
Regards,
Milla
Hi Milla,
What size yarn are you using? Is it a bulky yarn? If it isn’t you could always double up on the yarn (if it’s a worsted weight) and work with two strands at the same time to get a bulkier look. Hope this helps!
Krista