How to Crochet the Waffle Stitch
Do you want to learn how to crochet the waffle stitch? If so, I’ve put together a beginner tutorial with photos so you’ll be able to make the waffle stitch easily!
If you want to add texture to your crochet project, the crochet waffle stitch is a great stitch to use. You can use it in all types of different crochet projects like a waffle stitch blanket or a design like my waffle stitch dishcloth.
I promise, this waffle crochet stitch is the one to use if you want squishy projects with amazing texture. Scroll down to start learning!
What is The Waffle Stitch?
The waffle stitch gets its name from a double crochet and a post double crochet combination.
The raised stitch of the front post double crochet followed by a double crochet creates a stitch combination that looks like waffles.
You’ll be able to see how the stitches create the waffle design in more detail below in the photo tutorial. But first, let’s elaborate more on each of the stitches you’ll need to understand.
Why You Should Try This Stitch
The waffle stitch for beginners is a fantastic pattern to start with, as it’s easy to pick up and creates a beautiful texture.
Basically, if you’re just starting out with crocheting, trying the waffle stitch is a great choice because it’s simple to learn, looks really cool and makes a unique look to any project you make with it.
Crochet Techniques and Stitches Used in The Waffle Stitch
To crochet the waffle stitch, you’ll need to know how to double crochet (dc abbreviated) and the technique of creating a front post double crochet (fpdc abbreviated).
I’ll explain these stitches’ step by step below as well as link up a tutorial.
The Stitches
Double Crochet (dc):
- Wrap the yarn over (Yo) the hook, insert the hook into the specified st.
- Yo the hook again, draw the yarn through the st, so there are 3 loops on the hook
- Yo the hook again draw it through 2 loops, so there are 2 loops on the hook
- Yo the hook, draw it through the final 2 loops.
Front Post Double Crochet (fpdc):
- Yo, from the front of your work, insert hook front to back to front again around the post of the next stitch, pushing the post forwards towards you
- Yo, pull the yarn back through the post, so there are three loops are on the hook
- Finish like a normal dc stitch. (yarn over and draw through two loops twice
Projects That Use The Waffle Stitch
You can use the waffle stitch in all types of projects to create a piece that has great texture.
For example, one of my favorite waffles stitch patterns to make is a crochet washcloth or dishcloth because of the extra texture the stitch creates, which is perfect for cleaning. In a blanket, you would use this stitch if you’d like to add interest and make a unique project.
Below you’ll find our easy waffle stitch tutorial that is simple enough for beginner crocheters too.
Waffle Stitch Crochet Tutorial
Skill Level: Intermediate
Materials
- Crème Cotton Yarn by Loops + Threads
- J-10 6 mm crochet hook
- You can use any yarn weight such as worsted weight yarn or chunky yarn as well as any brand you’d like to make this stitch. Use the yarn label to figure out the crochet hook size the yarn calls for.
- Yarn needle / tapestry needle to locate stitches (optional)
- Tape measure (to measure gauge)
- Scissors

Crochet Stitches + Abbreviations
- dc(s) = double crochet(s)
- st(s) = stitch(es)
- ch(s) = chain(s)
- fpdc(s) = front post double crochet(s)
- rep = repeat
Notes
- Ch 2s at the beginning of the rows count as a st
- Written in standard US terms
- A waffle stitch is created by chaining a multiple of 3 such as 9, 12, 15, 18, 21, etc. and adding 2 more stitches to that multiple. You’ll always use a starting chain of 3 + 2 when crocheting a waffle stitch.
- You may see some designs that use a ch 3 instead of a ch 2 at the beginning of the rows. I prefer the ch 2s because it makes for cleaner edges. If you’d like to use a ch 3 it would still work perfectly.
Gauge Swatch
- 3″ x 3″ = 11 sts x 3 rows using a J 6 mm hook + four weight yarn
- I am including the gauge swatch, so you can use it to create a pattern with the waffle stitch in our blanket calculator or scarf calculator if you’d like.
Waffle Stitch Pattern
Written Instructions
To Start: Ch multiple of 3+2
Row 1: dc in 4 ch from hook and in each st across, turn.
Row 2: ch 2, *fpdc in next st, dc in next 2 sts, repeat from * until the last 2 sts, fpdc in next st, dc in top of ch, turn.
Row 3: ch 2, *dc in next st, fpdc in the next 2 sts, repeat from *until the last 2 sts, dc in next st, dc in top of ch, turn.
Row 4 -?: Rep rows 2 and 3
Step-by-Step Photo Instructions
Use this photo tutorial to make a swatch to practice the waffle stitch. Once you get the hang of this stitch, you then can apply it to make bigger projects by using a starting ch in a multiple of three plus two additional stitches added on at the end of that multiple.
Reminder: The ch 2s at the beginning of the rows count as a stitch throughout the pattern. Keep that in mind with the stitch counts.
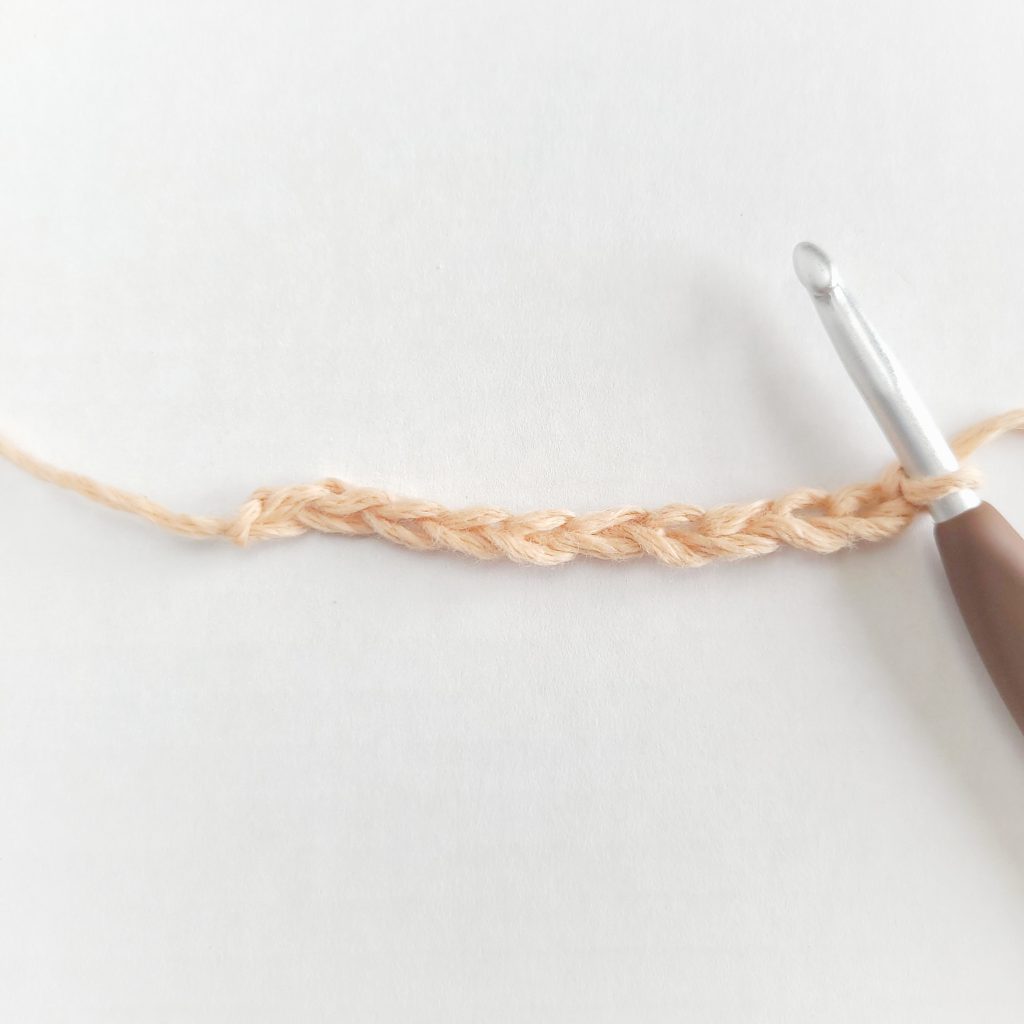
Step 1
Ch 11 (a multiple of 3 + 2 sts)
Step 2 (Row 1)
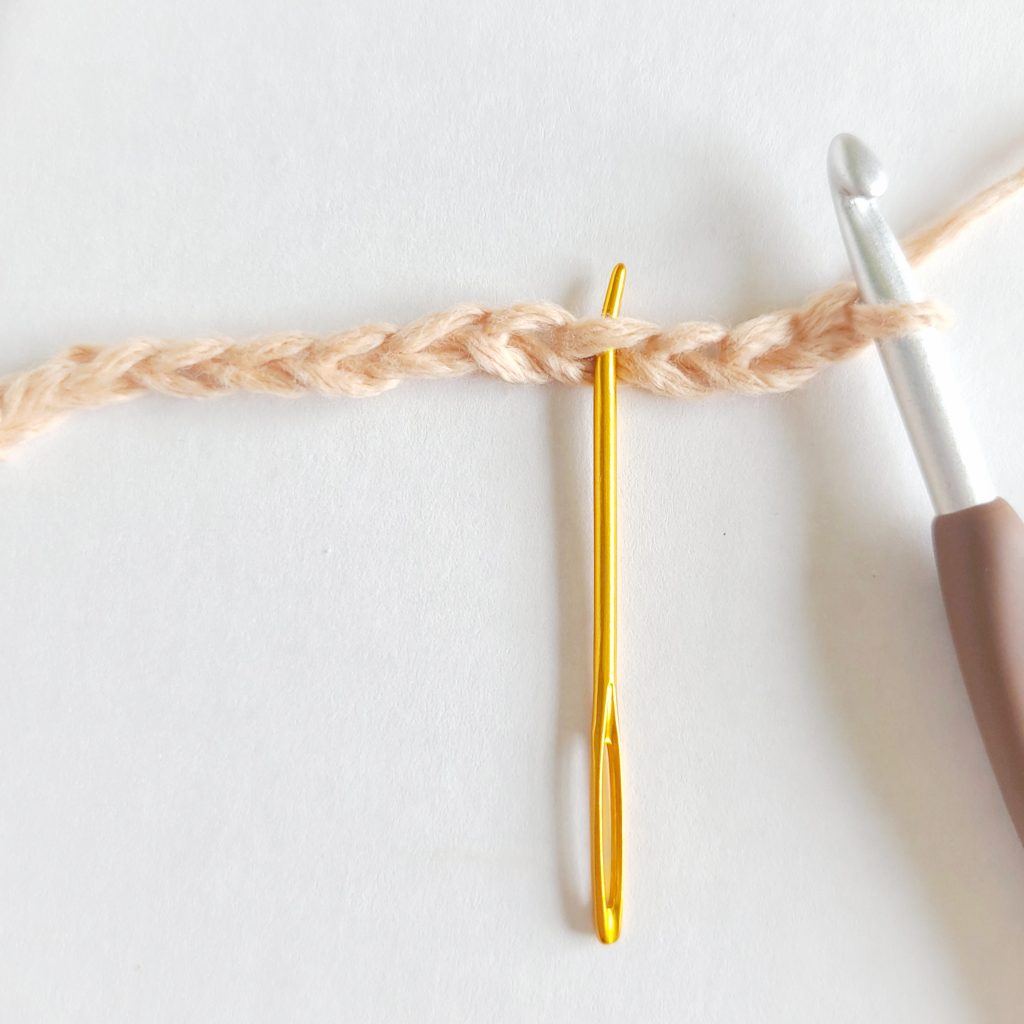
Locate the 4th ch from the hook
Step 3
Dc into the fourth ch from the hook
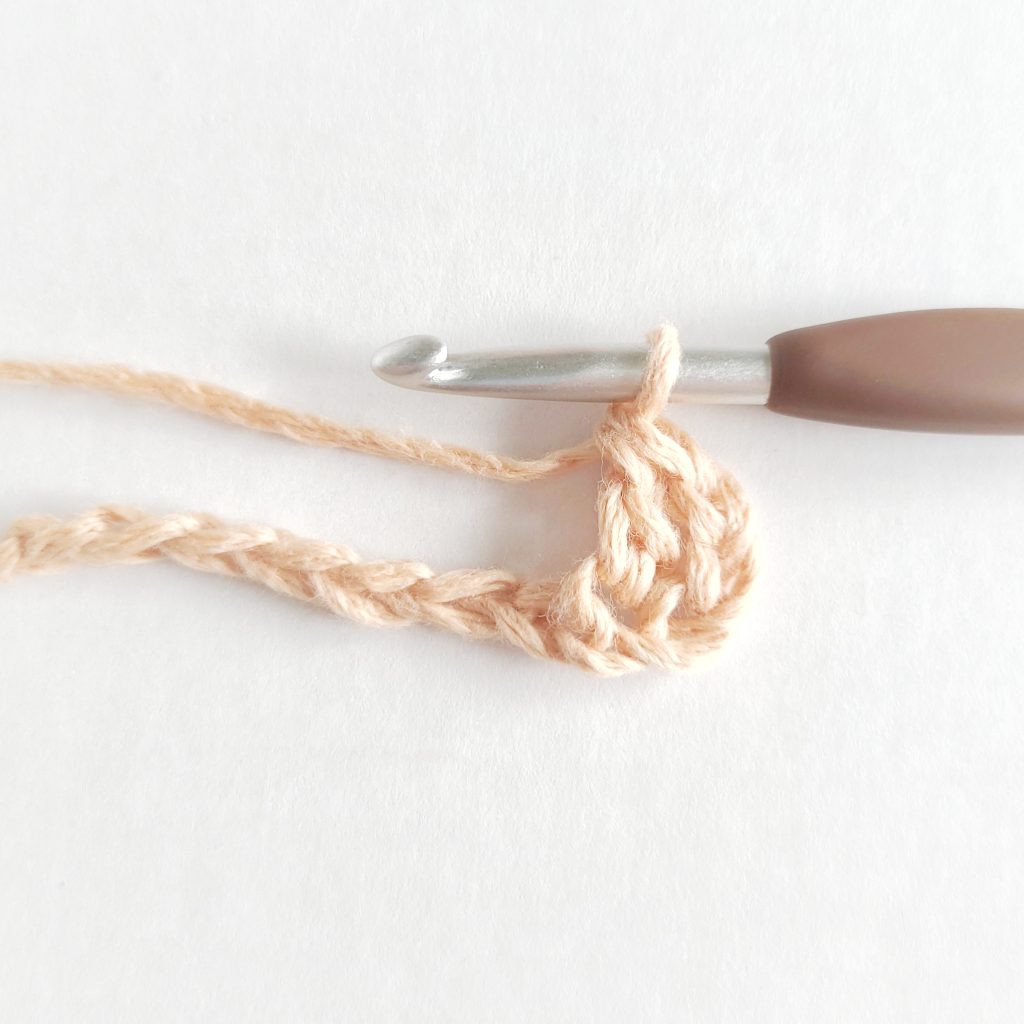
Step 4
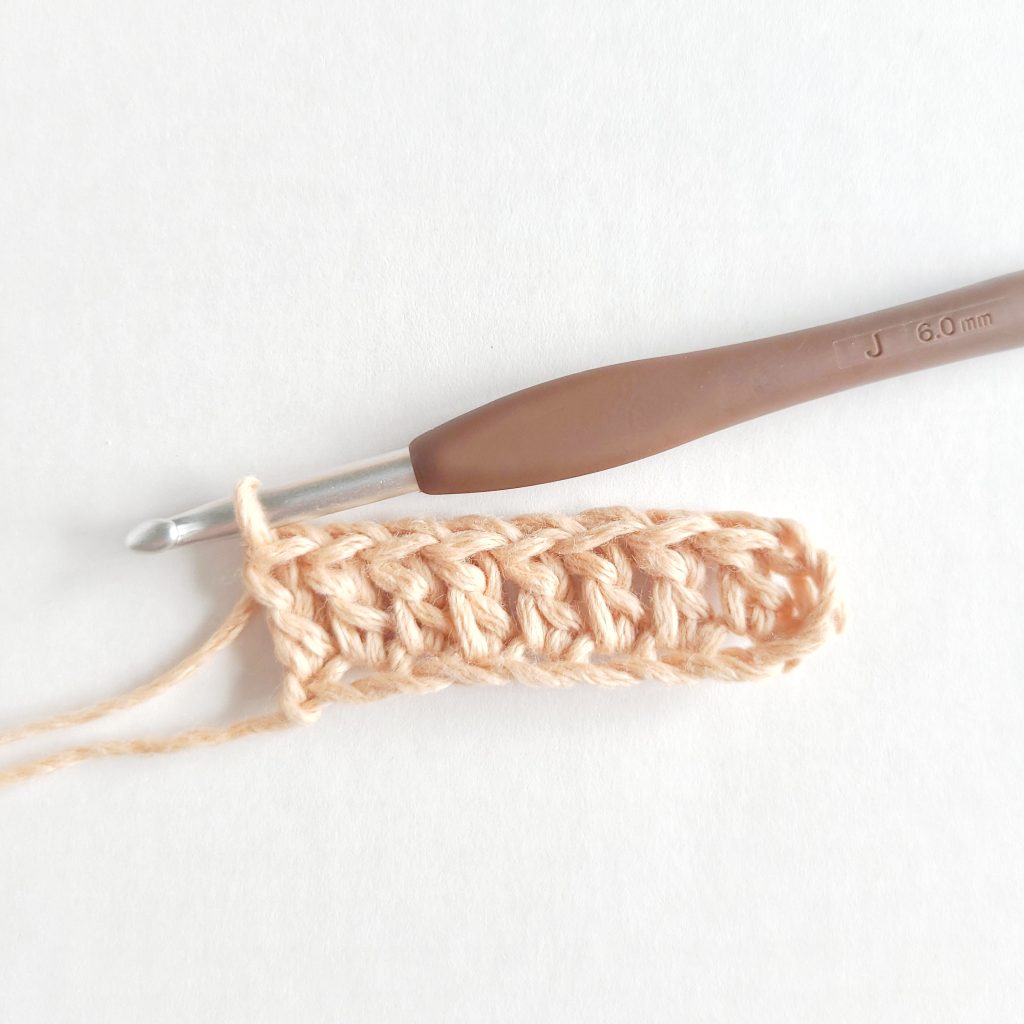
Double crochet (dc) into each of the remaining chs in the row
Step 5 (Row 2)
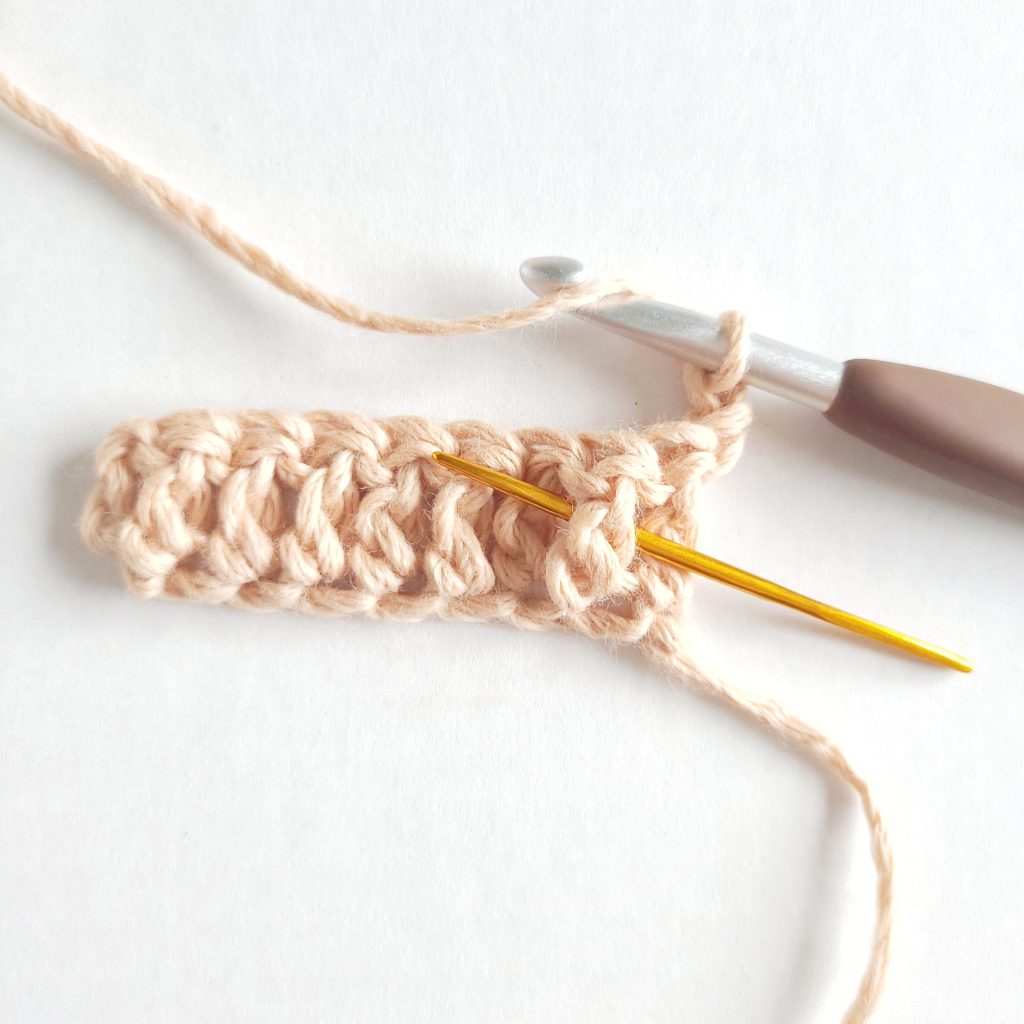
Turn the work, ch 2 and locate the next st to fpdc around.
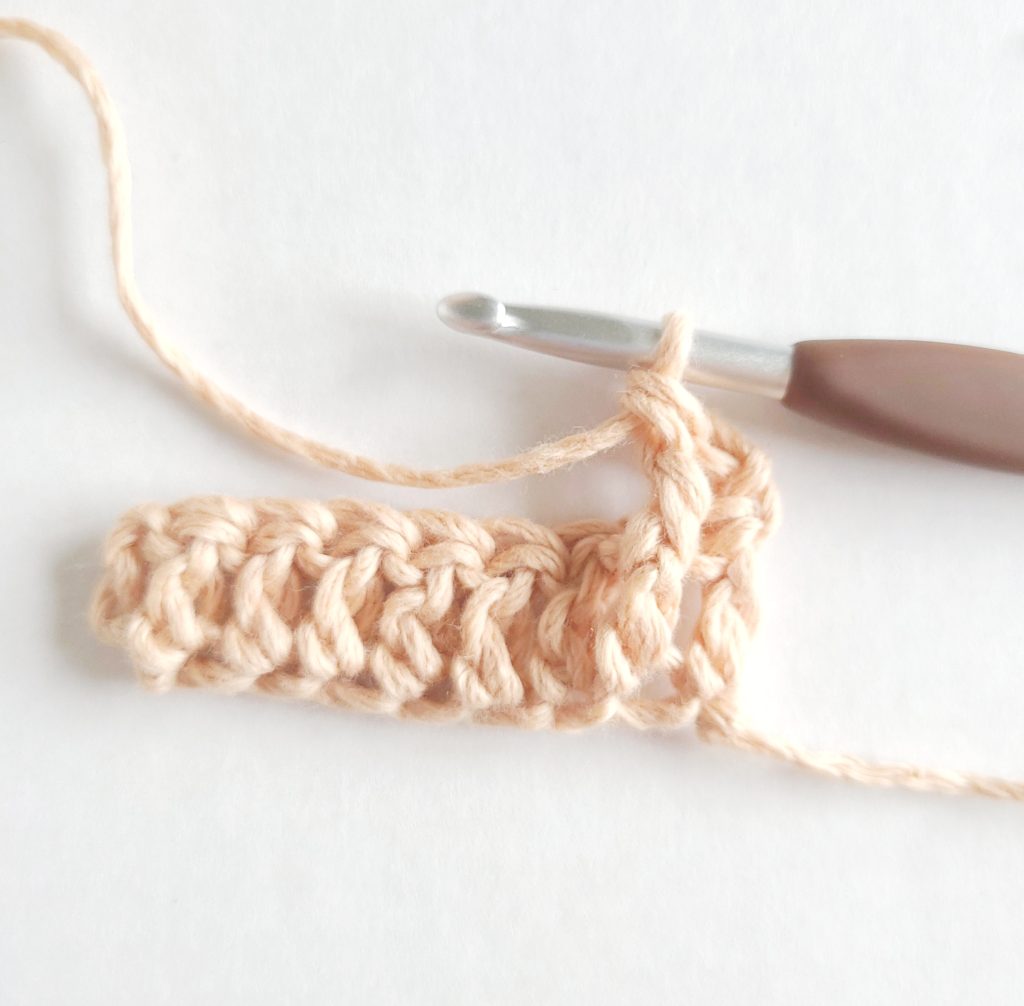
Step 6
Fpdc around the stitch
Step 7
Dc into the next st
Step 8
Dc into the next st
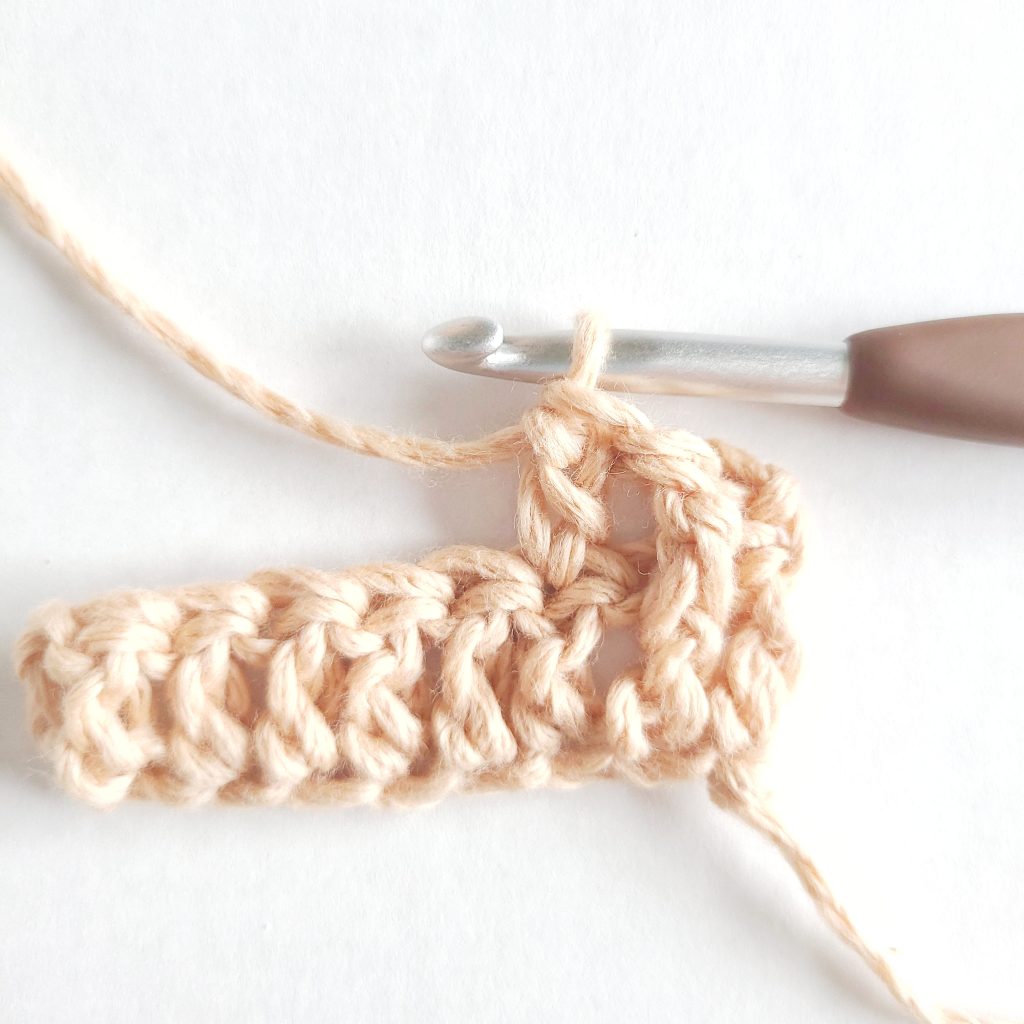
Step 9
Fpdc around the next st
Step 10
Dc once into each of the next two sts
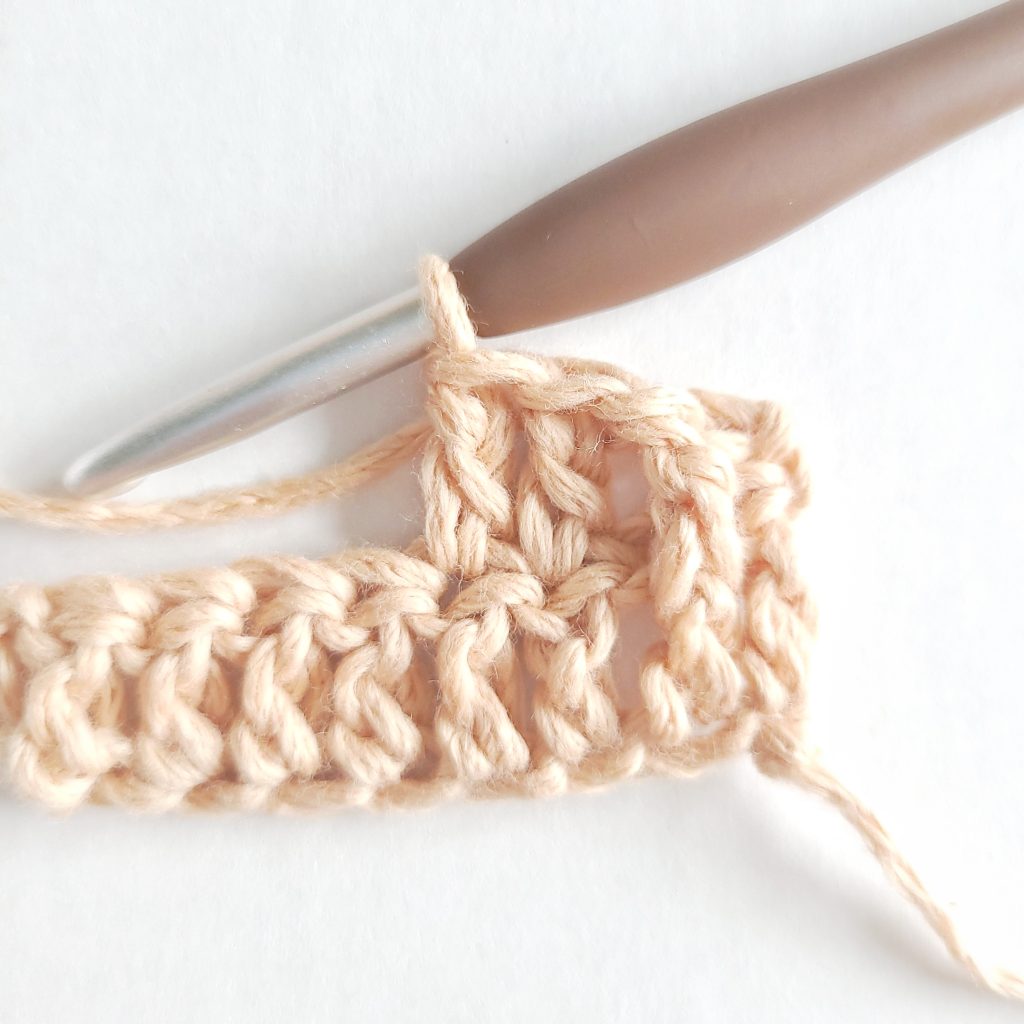
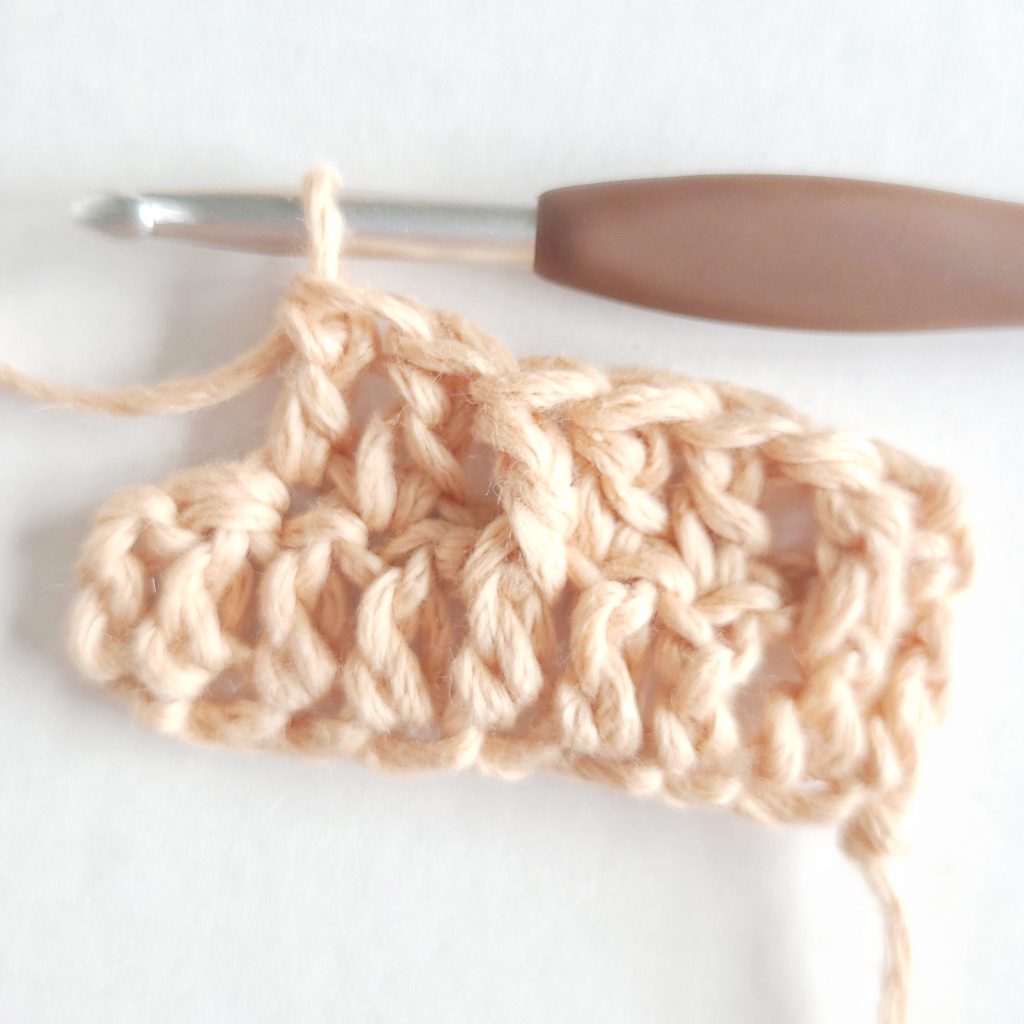
Step 11
fpdc around the next st
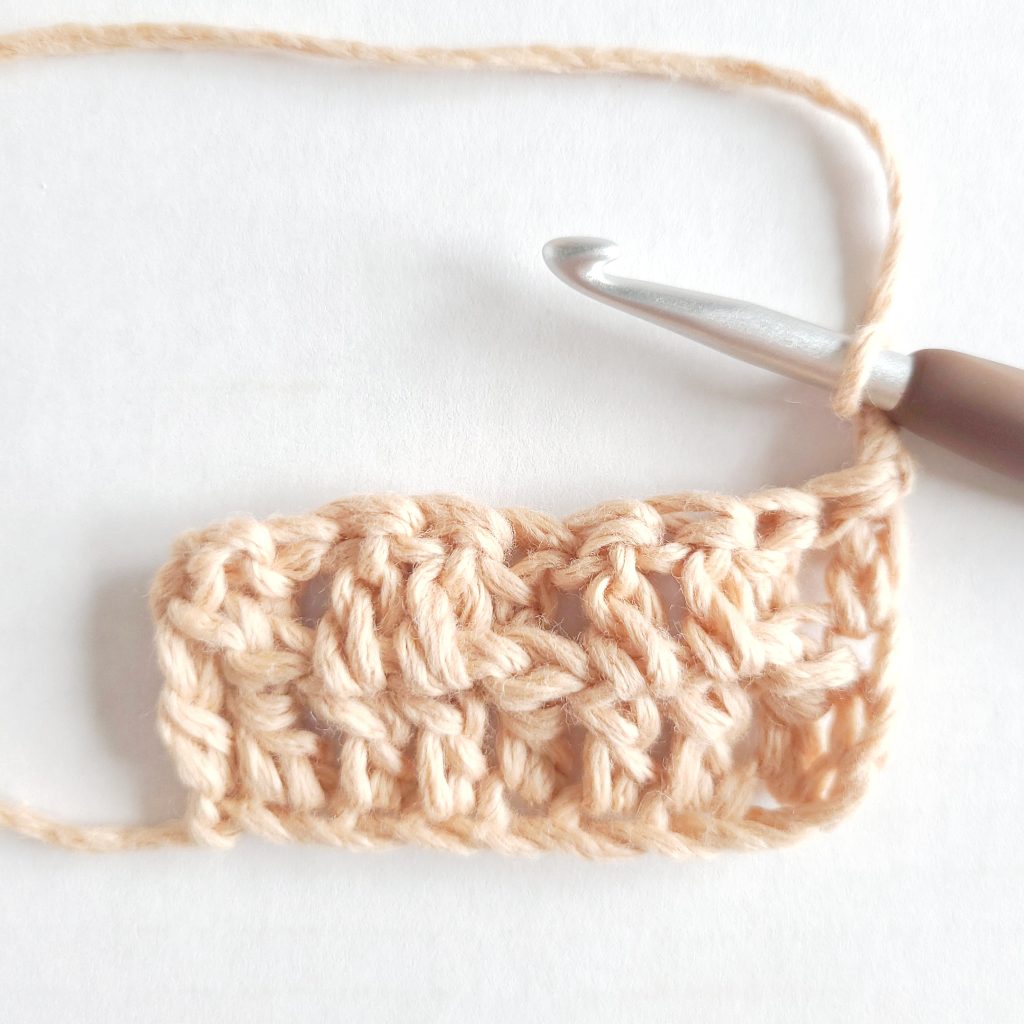
Step 12
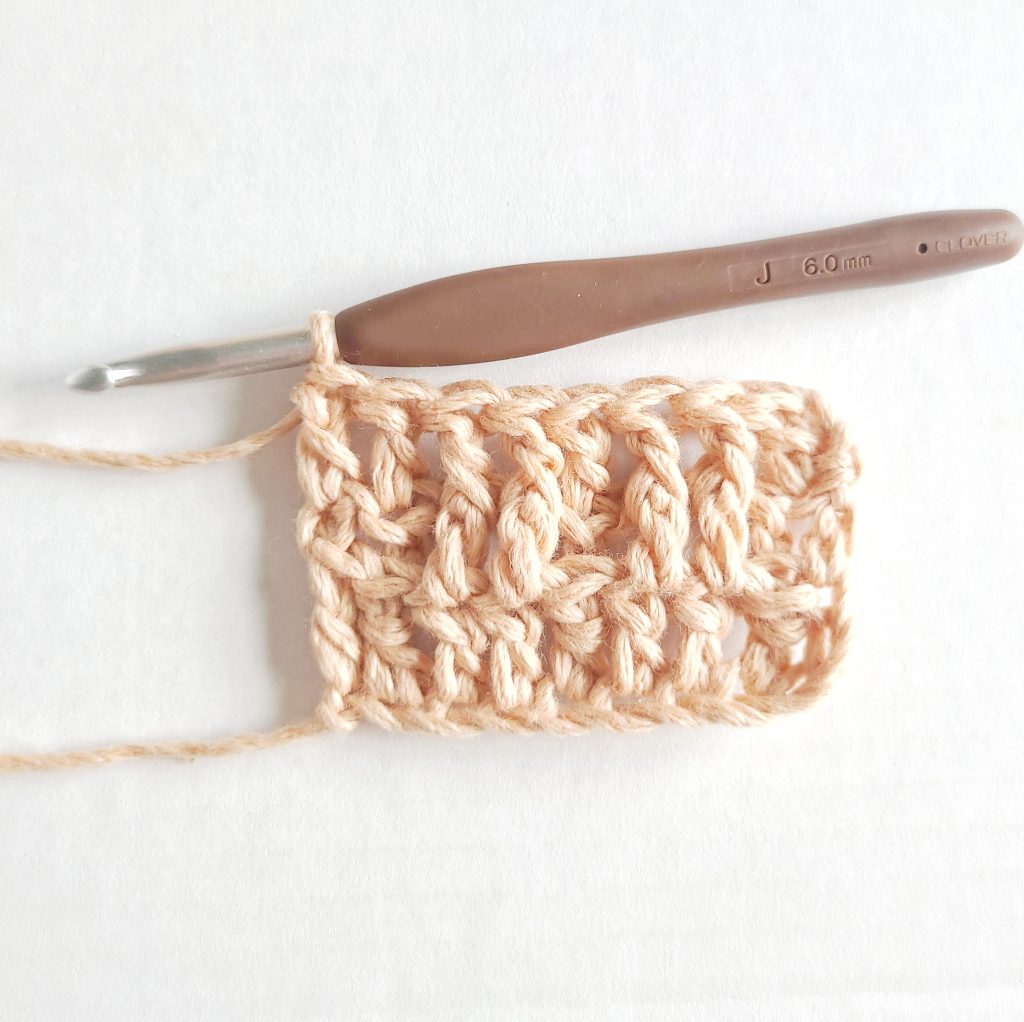
Locate the turning ch
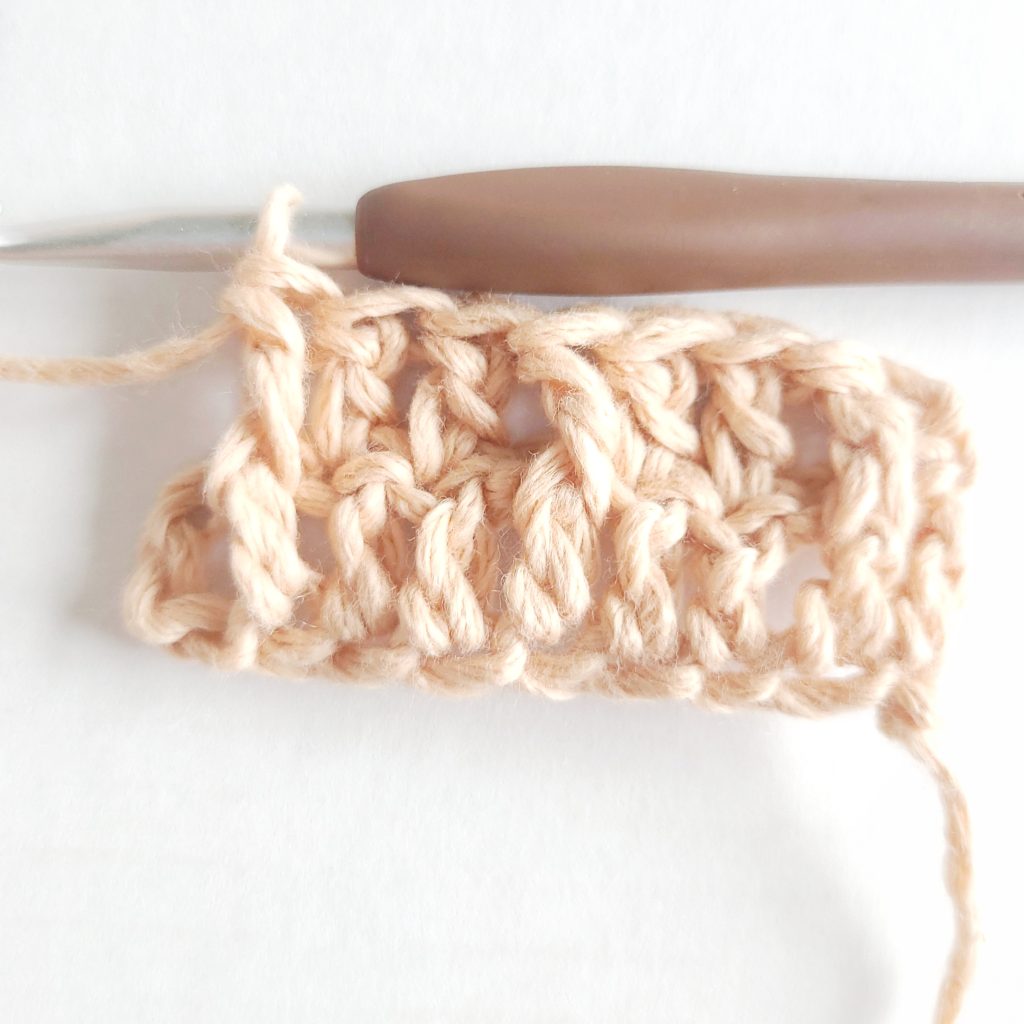
Step 13
Dc into the top of the turning ch (9 total sts across the row)
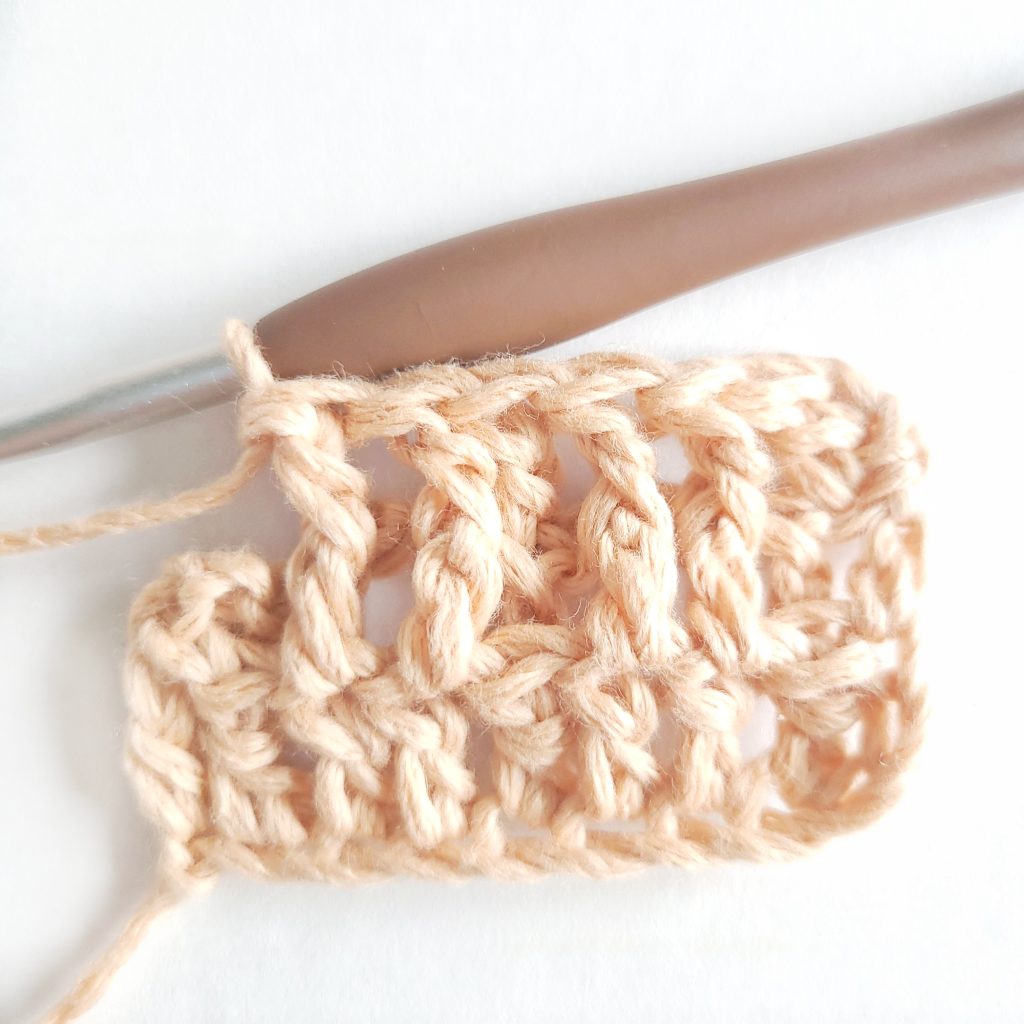
Step 14 (Row 3)
Turn the work, ch 2

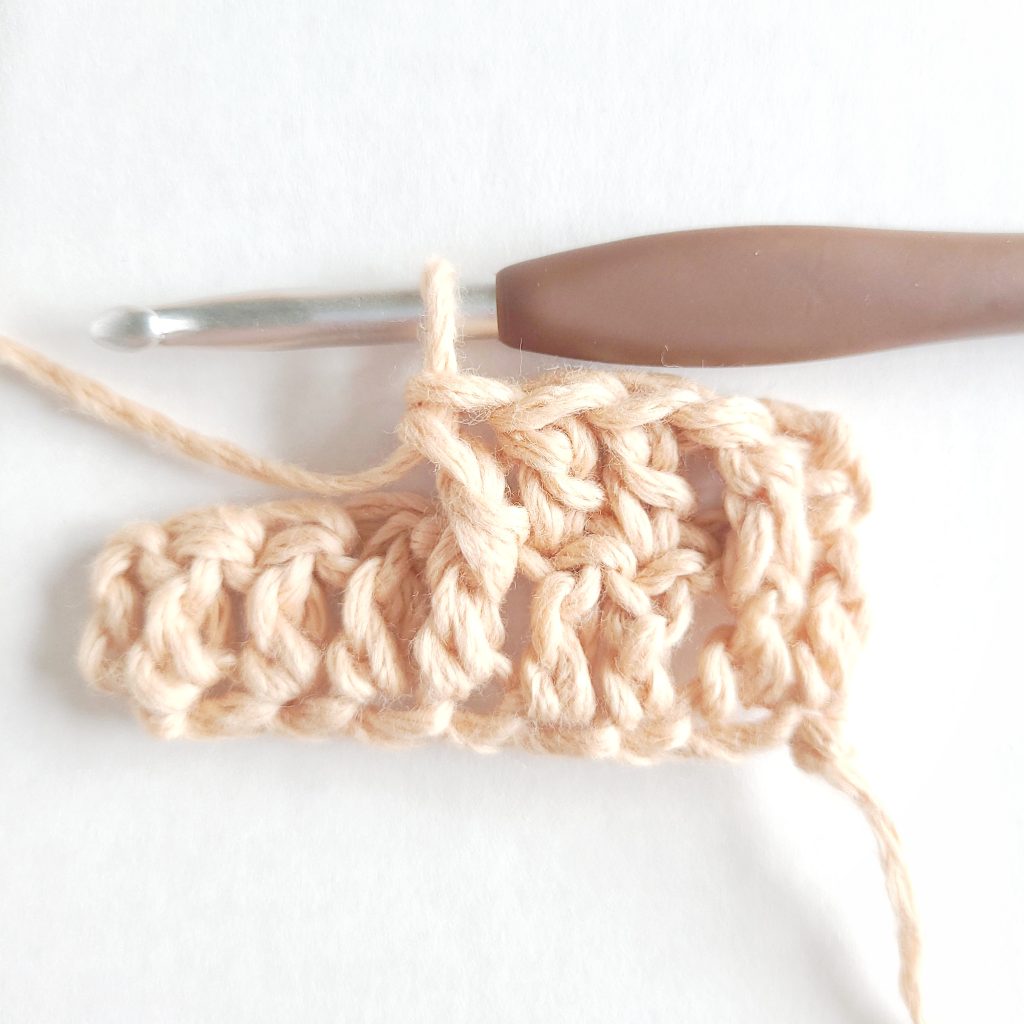
Step 15
dc in the next stitch, fpdc around each of the next two sts
Step 16
dc in the next stitch, fpdc around each of the next two sts
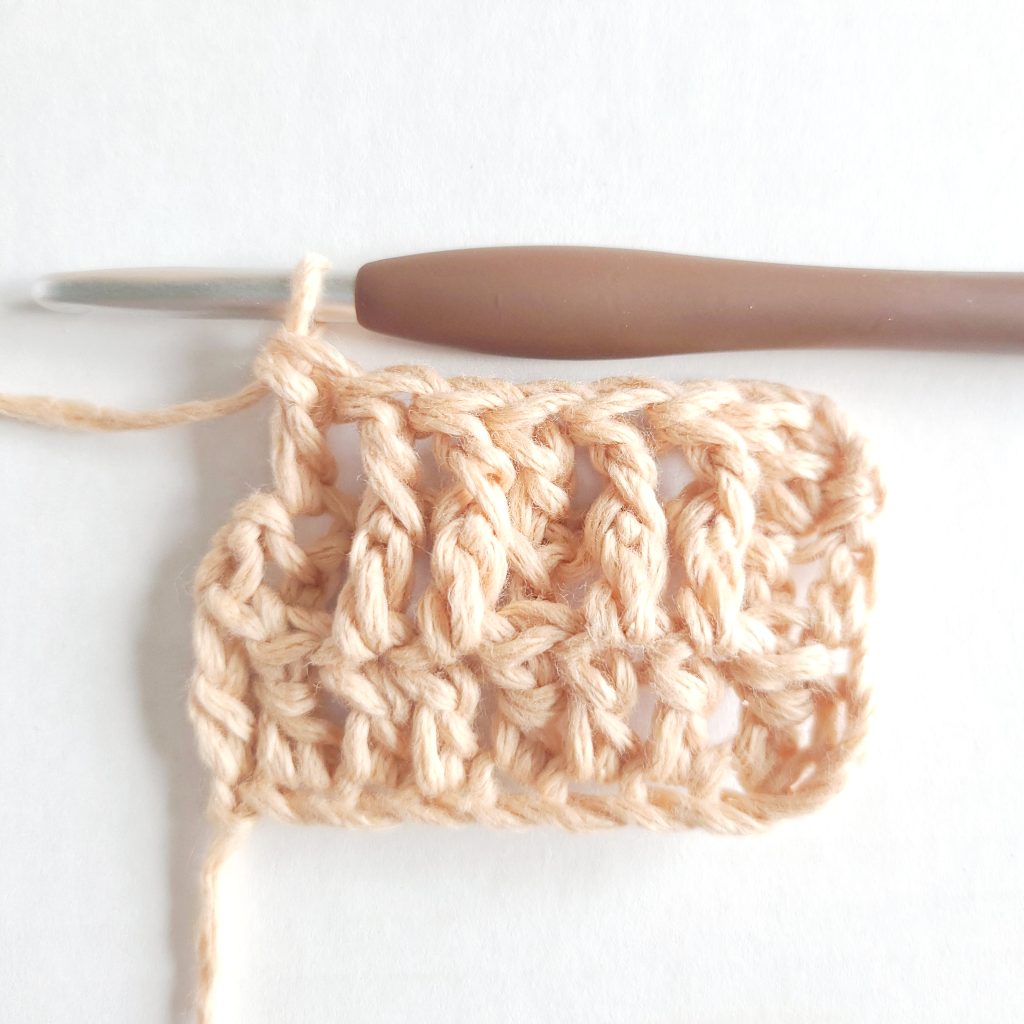
Step 17
dc in the next stitch
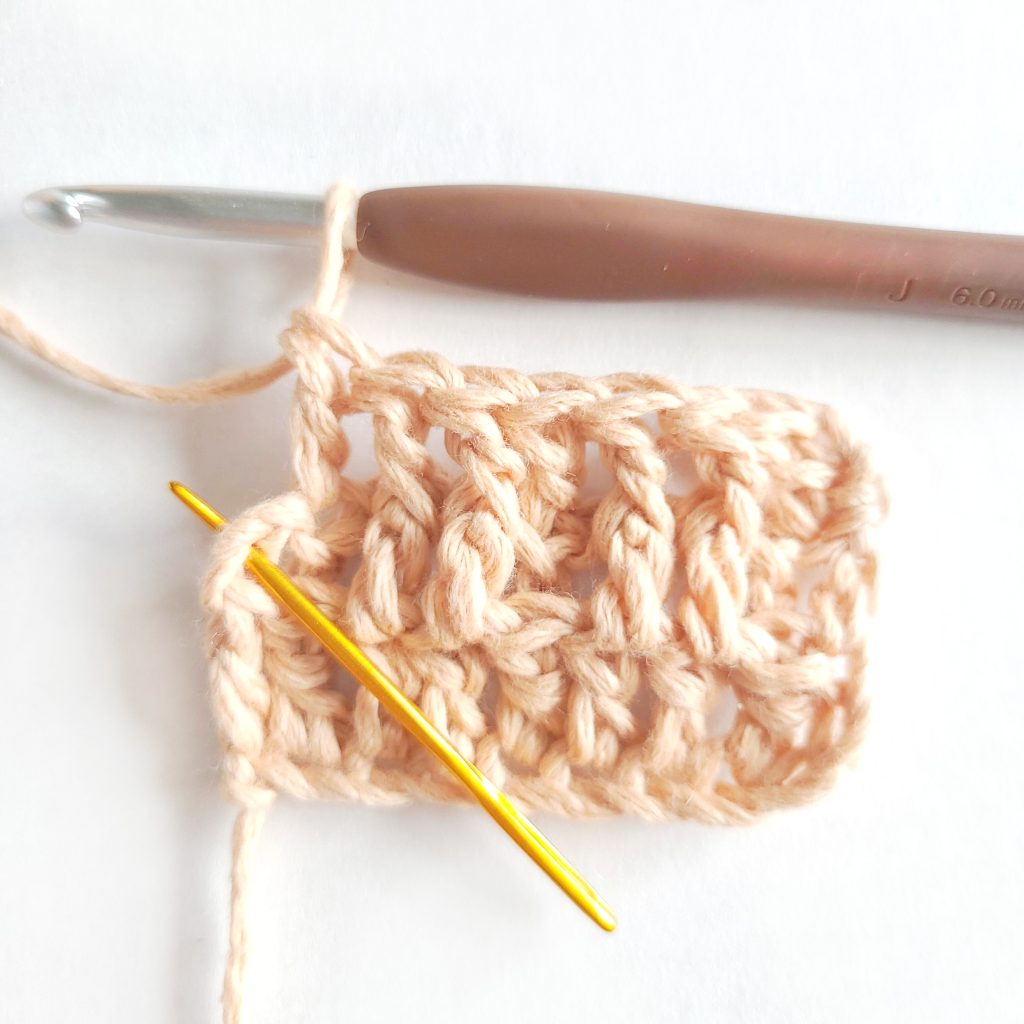
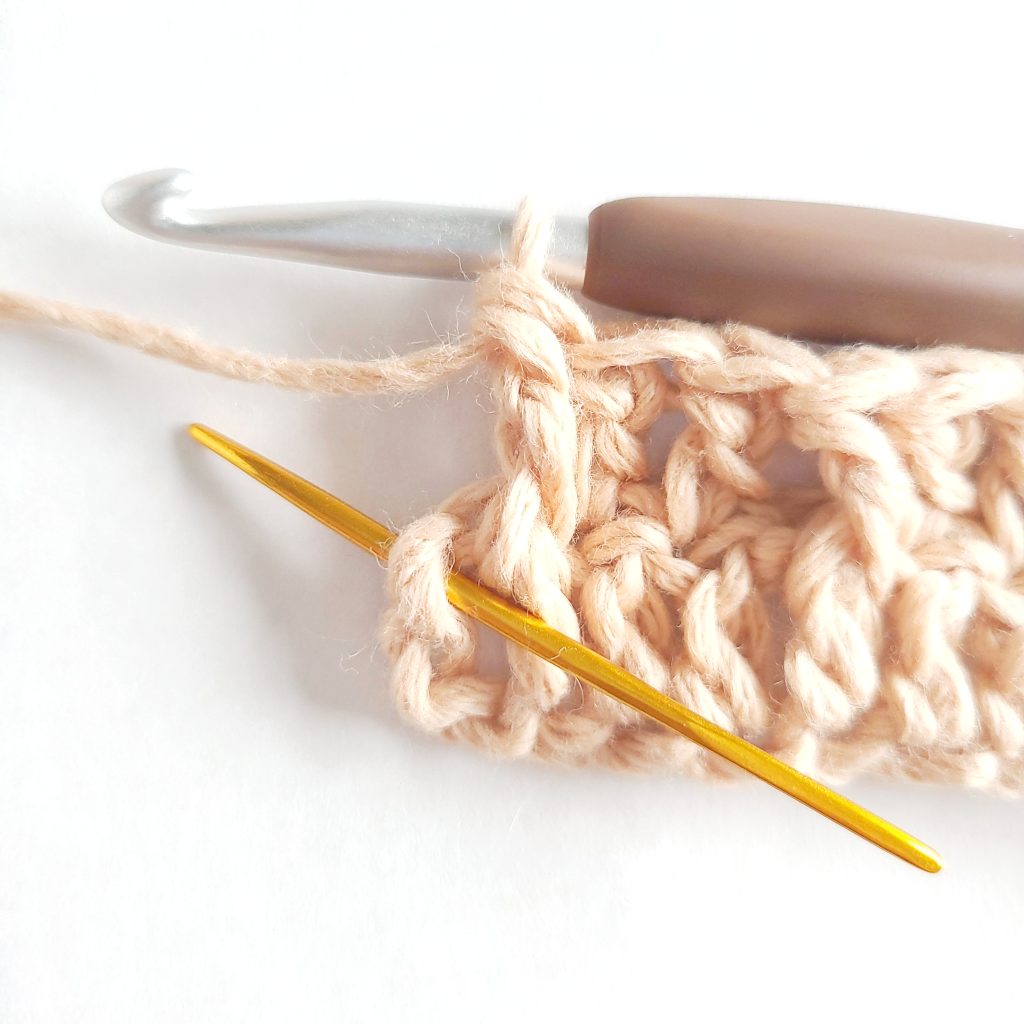
Step 18
Locate the top of the turning ch
Step 19
Dc into the top of the turning ch.
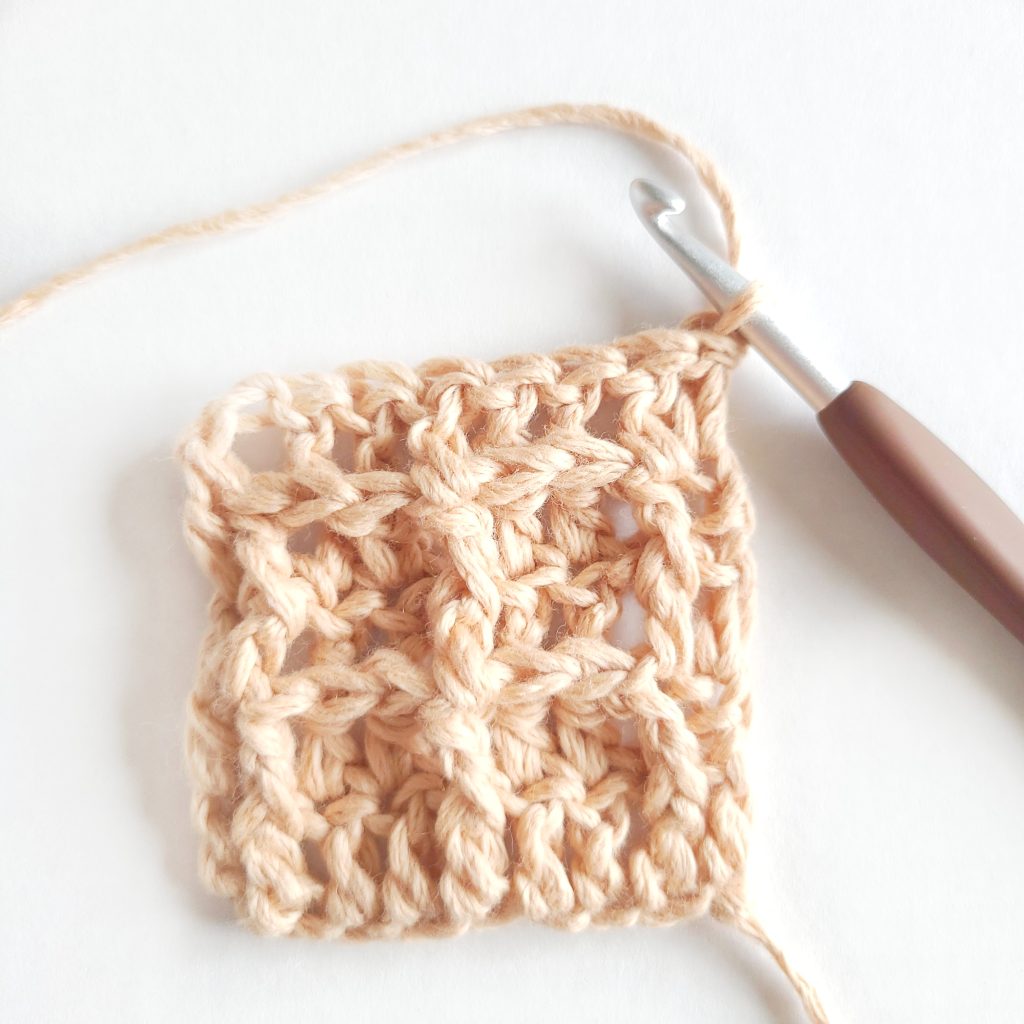
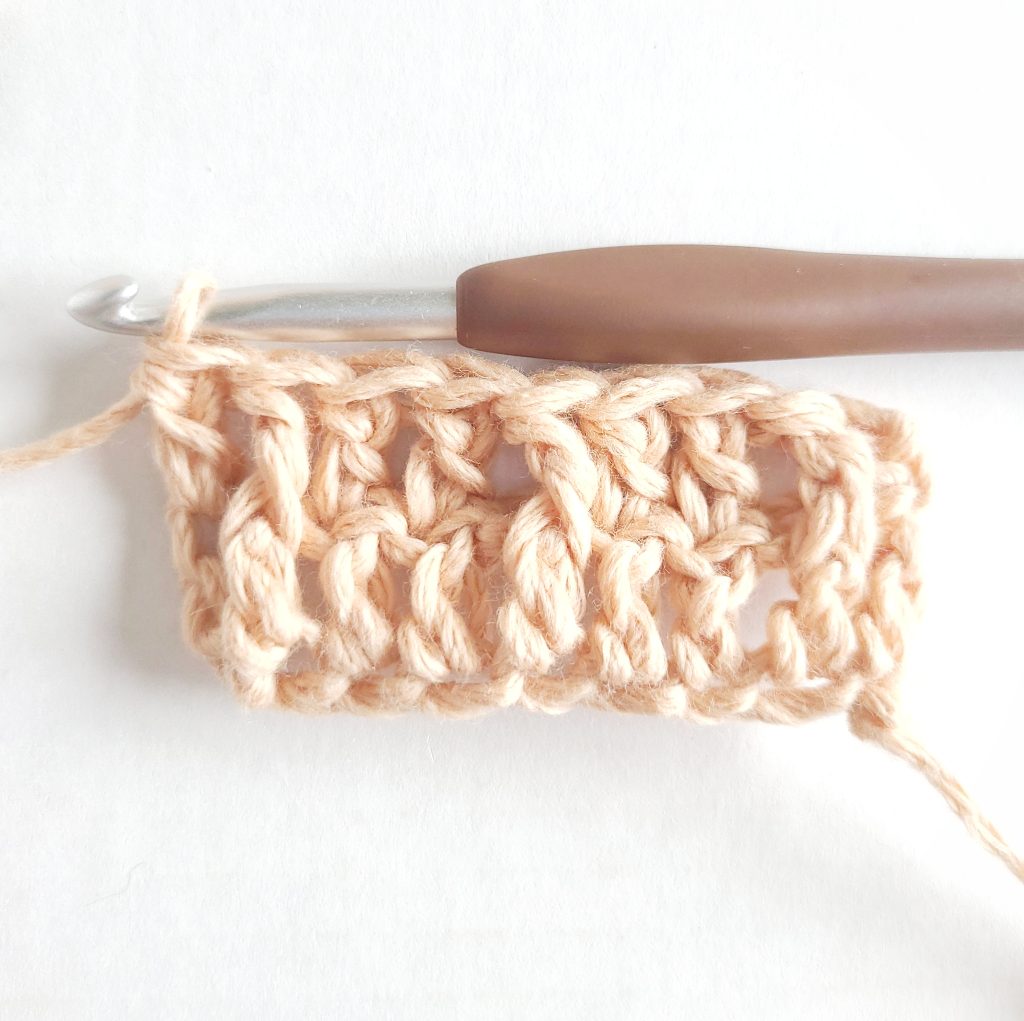
Step 20
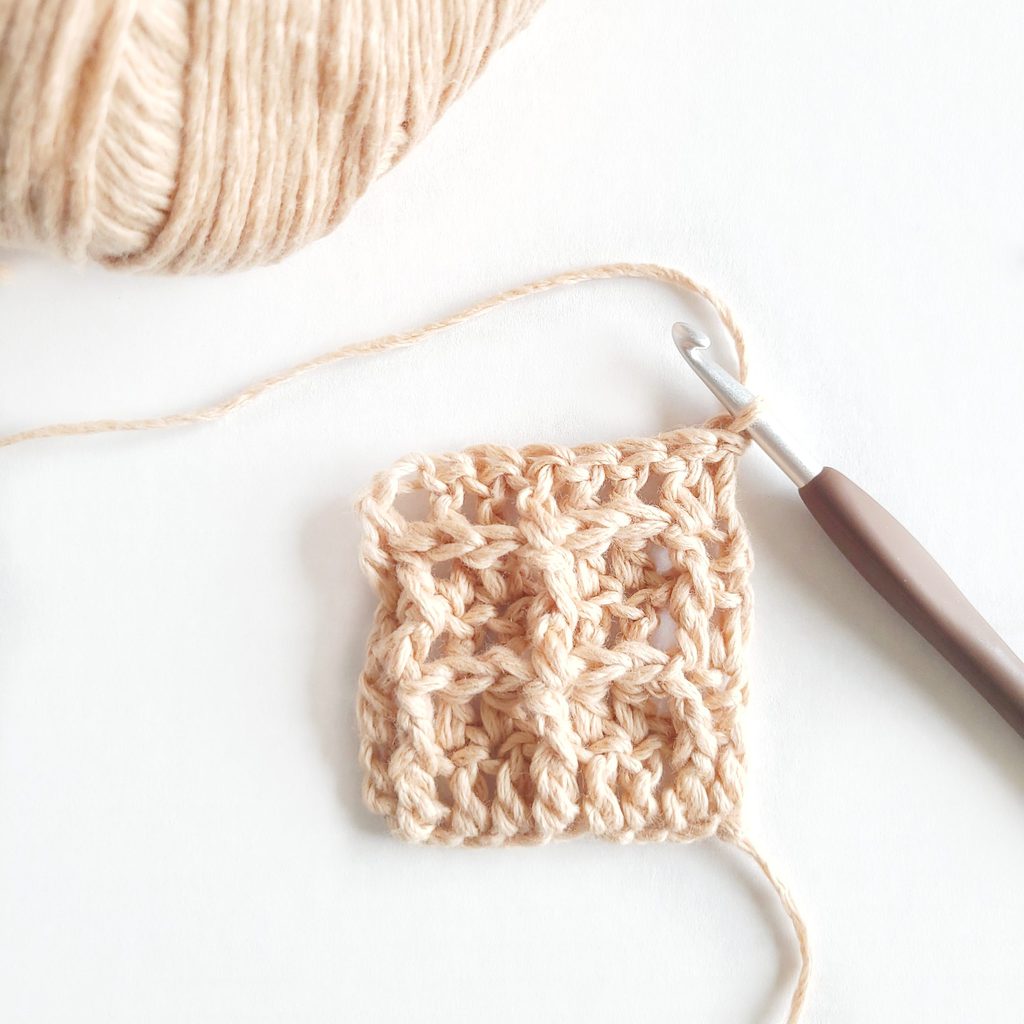
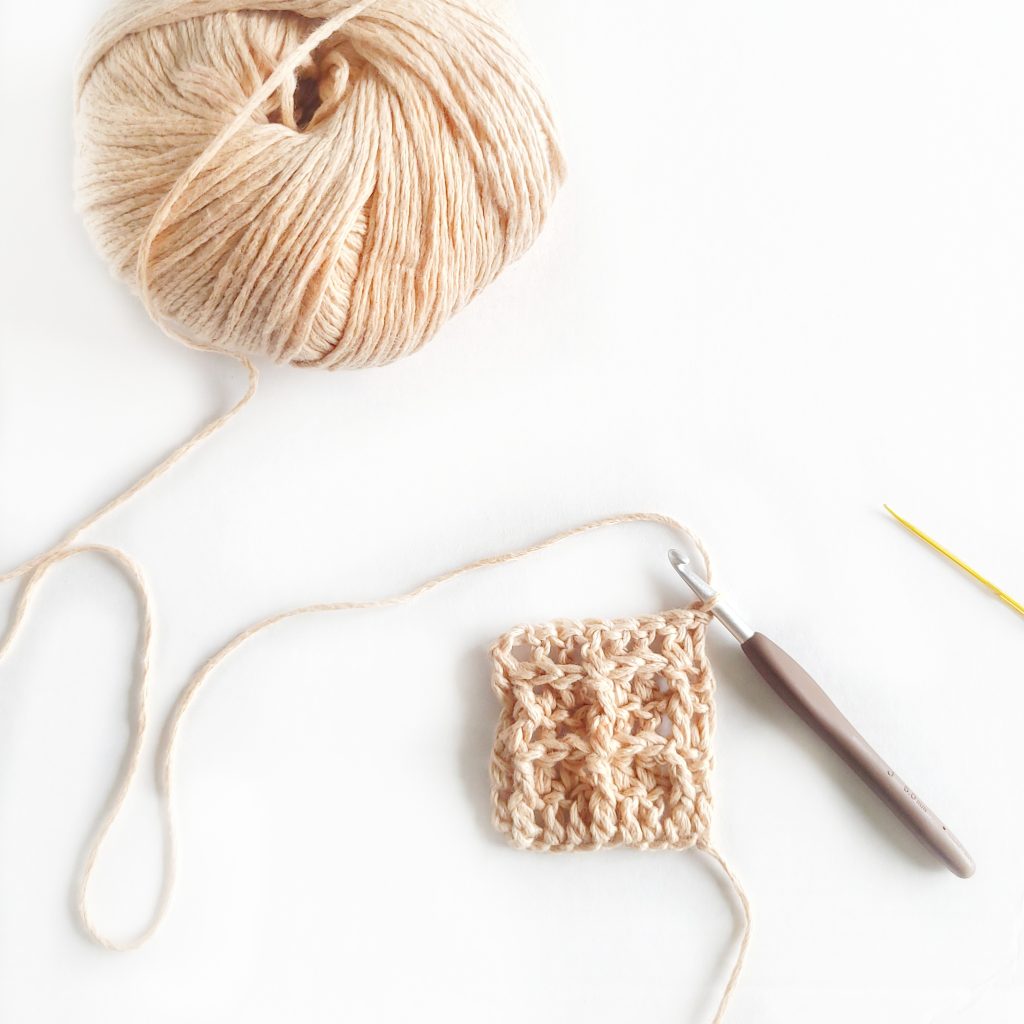
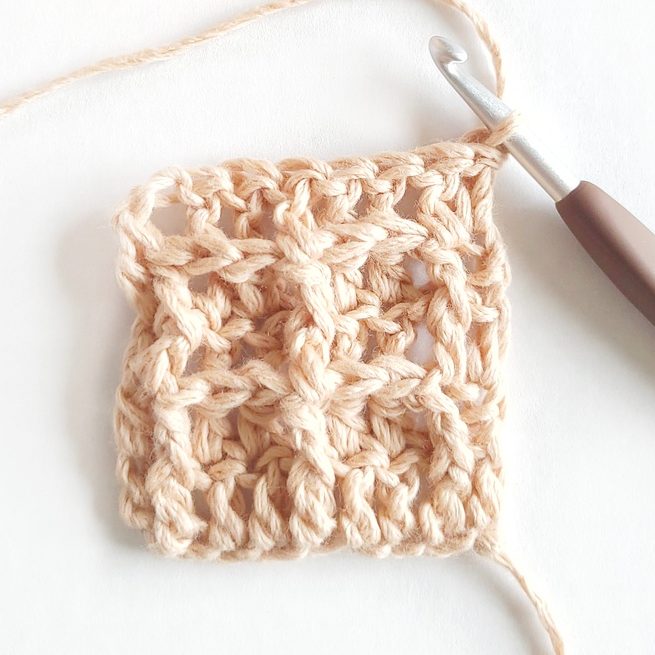
Rep rows 2 + 3 for to the desired length of the pattern or crochet project. You will see the waffle stitch start to form with the row repeat.
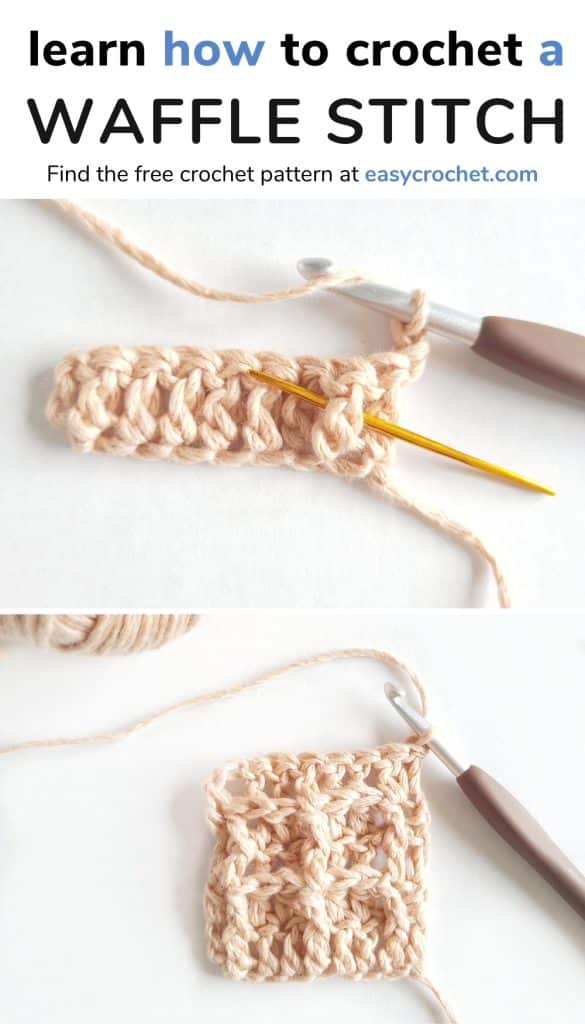
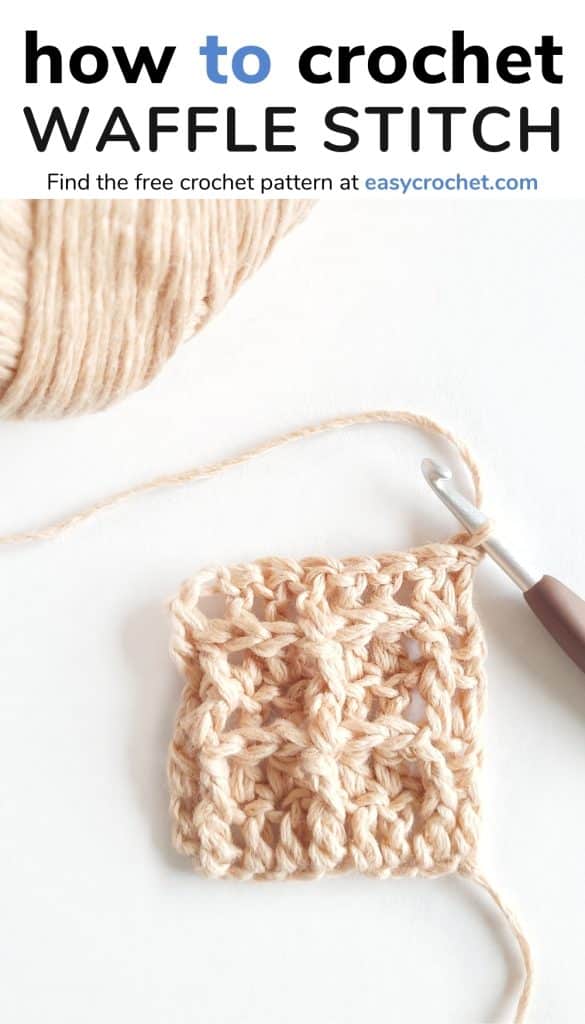
Share this on Pinterest to Crochet Later
Use the images below to pin to Pinterest, so you can make learn the waffle stitch at any time.
Follow along with us there too since we always share new free patterns as well as crochet stitches and tutorials too.
More Crochet Stitch Tutorials
- Crochet Puff Stitch Tutorial with Photos
- Whip Stitch Crochet Seaming Technique
- Half Double Crochet Slip Stitch (hdc slst) for Beginners
- Single Crochet Increase Tutorial (sc inc)
- Creating Seams Using the Mattress Stitch
- Single Crochet Two Together (Single Crochet Decrease)
- How to Crochet a Cable Stitch
- Crochet Moss Stitch Tutorial (Written, Photo and Chart)
Free Crochet Patterns You May Like
- 30 Free Crochet Baby Blanket Patterns
- Primrose Crochet Baby Blanket
- 10 Cozy Crochet Blanket and Afghan Patterns You’ll Love
- Easy Moss Stitch Crochet Baby Blanket
- Rainbow Crochet Blanket Pattern
- Easy Crochet Afghan Pattern (8 Sizes)
- Easy Crochet Shell Stitch Baby Blanket
- Mountain Pine Crochet Tree Blanket
This was perfect! I bought a pattern on Etsy that used the waffle stitch, and I could not understand from the designer’s instructions how to make it. Your tutorial showed me exactly what I needed to make the pattern work. Thank you!
I normally don’t do this but I wanted to say Thank you for posting for free instructions on how to do a waffle stitch. It is perfect. They were simple and direct.
You are very welcome. 🙂 Thanks for leaving a comment!
Happy Crocheting!
Krista