How to Crochet a Magic Circle (Photo Tutorial + Video)
Making a crochet ring might seem hard, but even if you’re new, you can do it. It’ll make crocheting in a circle (or round) way better. The way you work in the round will be changed by learning how to make a magic circle (aka magic loop or adjustable ring) in crochet.
What’s in the Guide
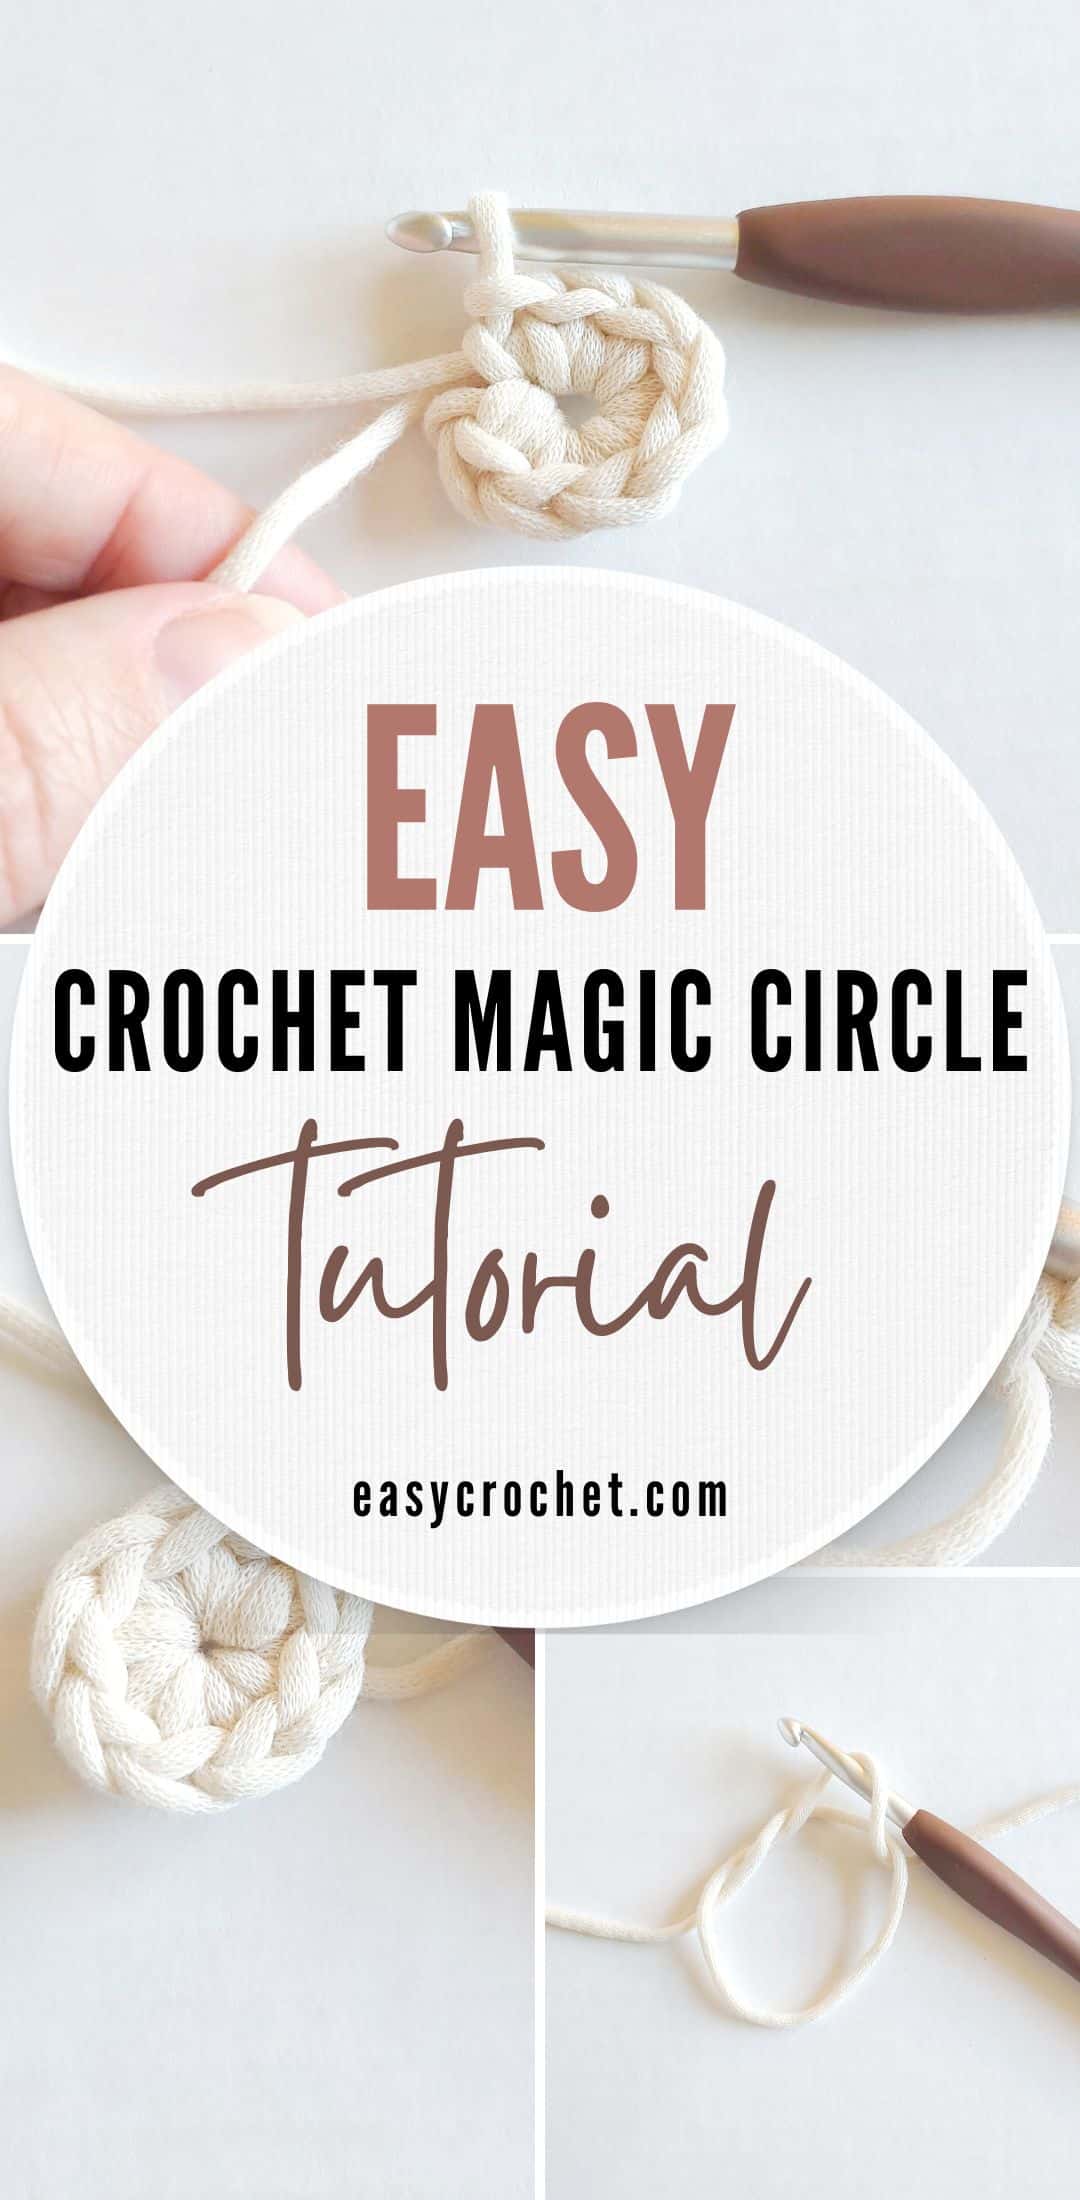
This magic circle crochet guide contains techniques, tips, and step-by-step instructions for making a magic ring, the most common way to begin crocheting in the round.
Keep on reading to learn how to crochet a magic circle with our detailed photo magic ring tutorial and video tutorial below. And make sure to read after the tutorial to find the answers to the most common questions about this technique.
How To Crochet a Magic Ring (Magic Circle)
Skill Level: Easy
Materials
- Yarn (I used Bernat Home Dec Yarn, a #5 weight bulky cotton blend yarn)
- Crochet Hook (I used a J-10 6 mm for this tutorial)
- Yarn Needle
Notes
- This tutorial is written in standard US terms
- This tutorial is using the single crochet stitch to teach the magic circle technique.
- Keep in mind the type of yarn you use (weight, fiber, etc.) will make it easier or harder to hold the yarn while crocheting a magic circle.
Magic Circle Tutorial (Magic Ring) with Step-by-Step Photos
Step 1
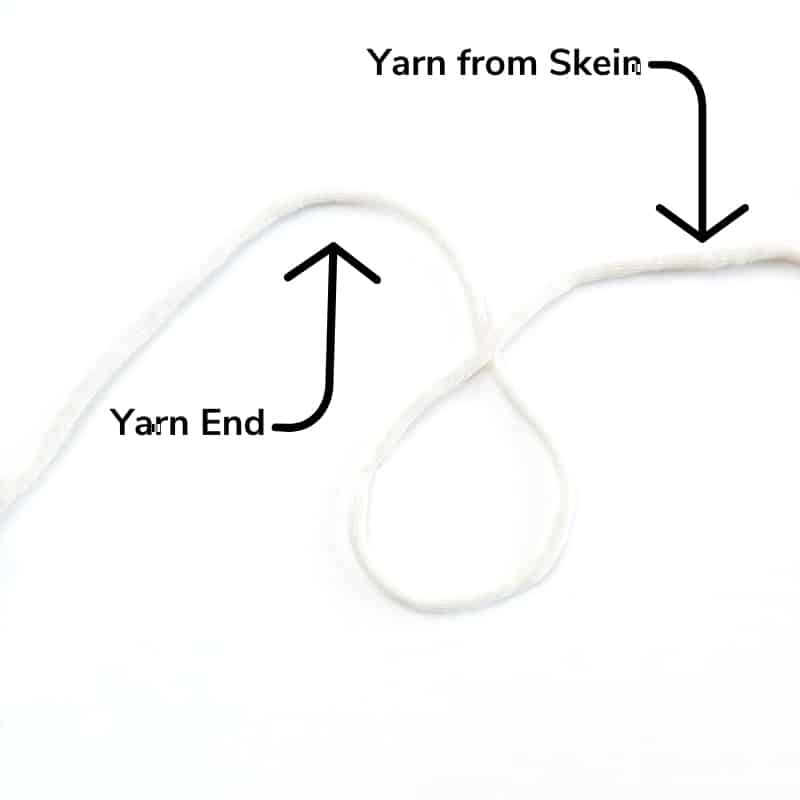
Begin by crossing the yarn from the skein (working yarn) over the tail end of the yarn (yarn end) to create a circle.

Step 2
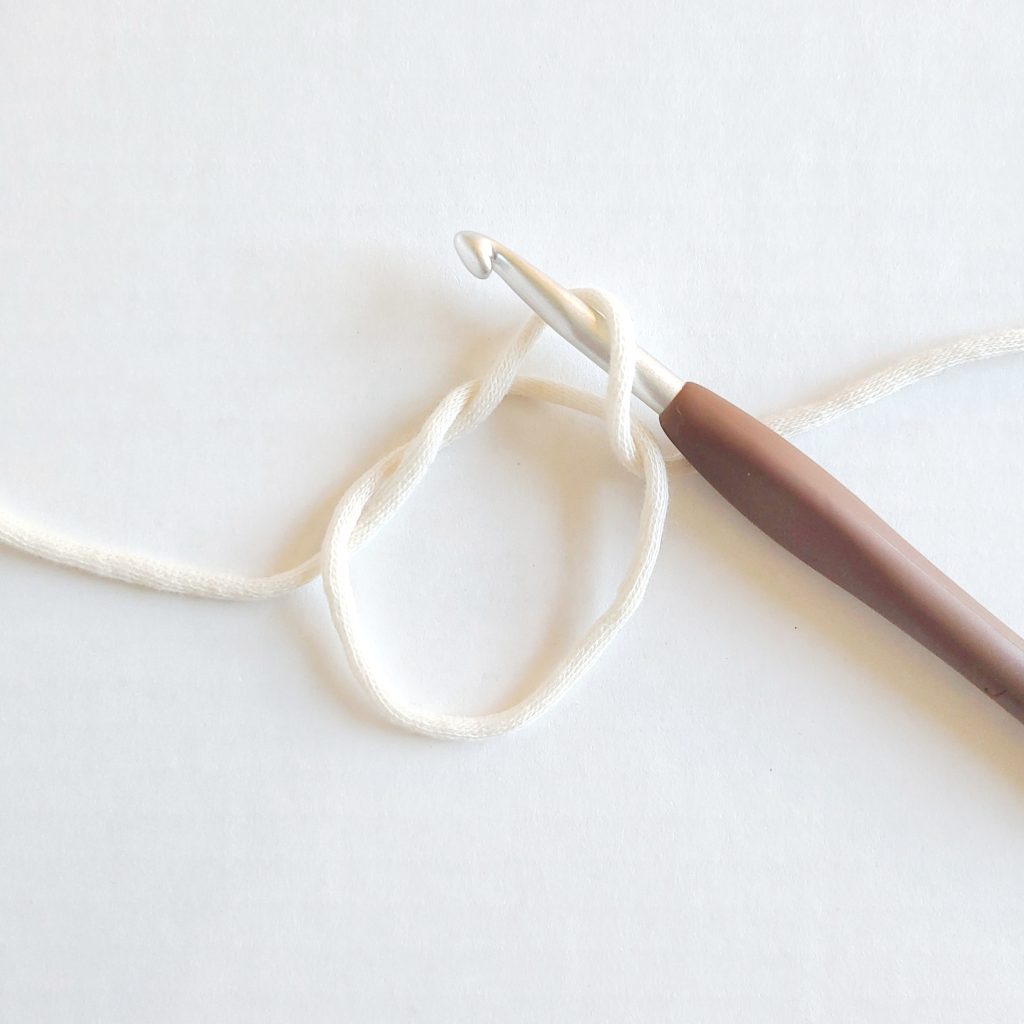
Insert the crochet hook into the circle as shown. Yarn over and pull the yarn from the skein end down through the circle.
Step 3
Step 2 will form a loop on the hook and the circle that you will work into
Step 4
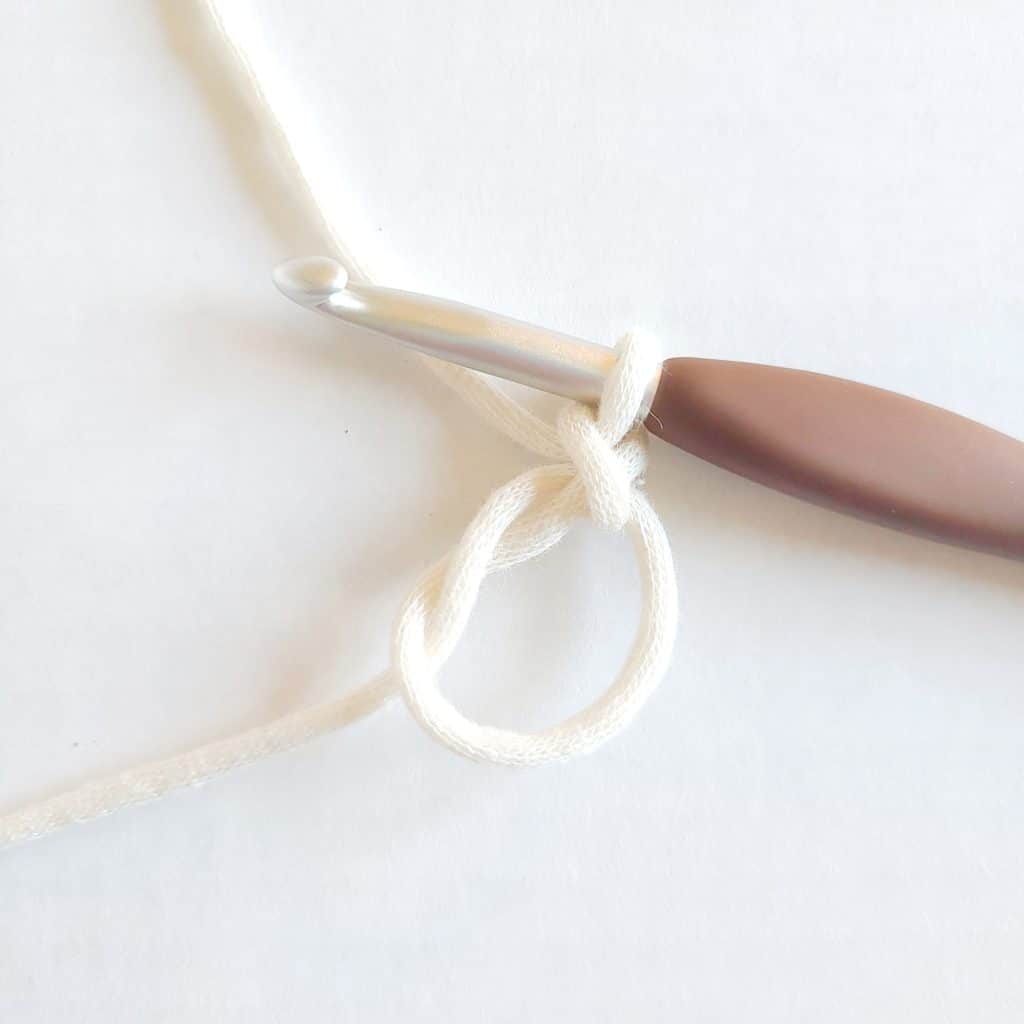
Chain 1 with the skein end of the yarn.
Step 5
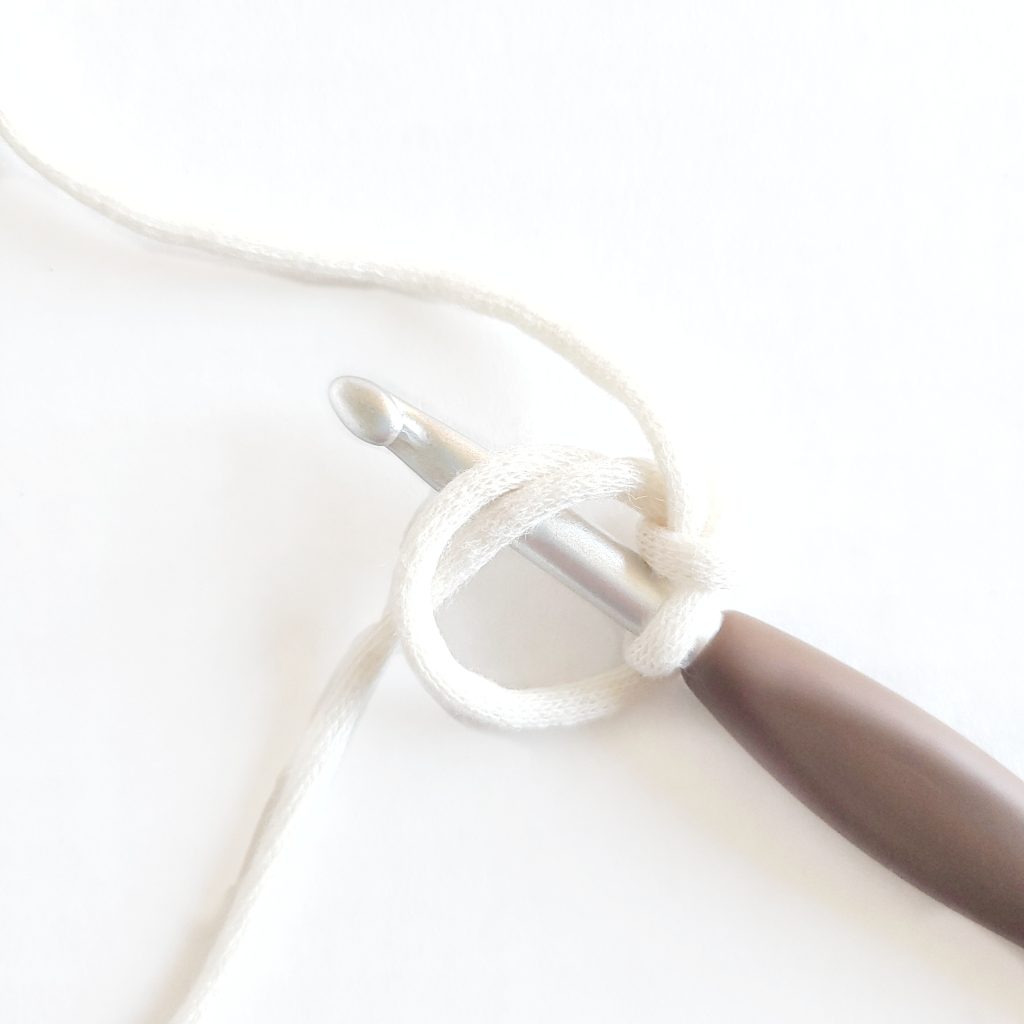
This step is where you’ll start making a single crochet. Insert the hook into circle under both strands of yarn.
Step 6
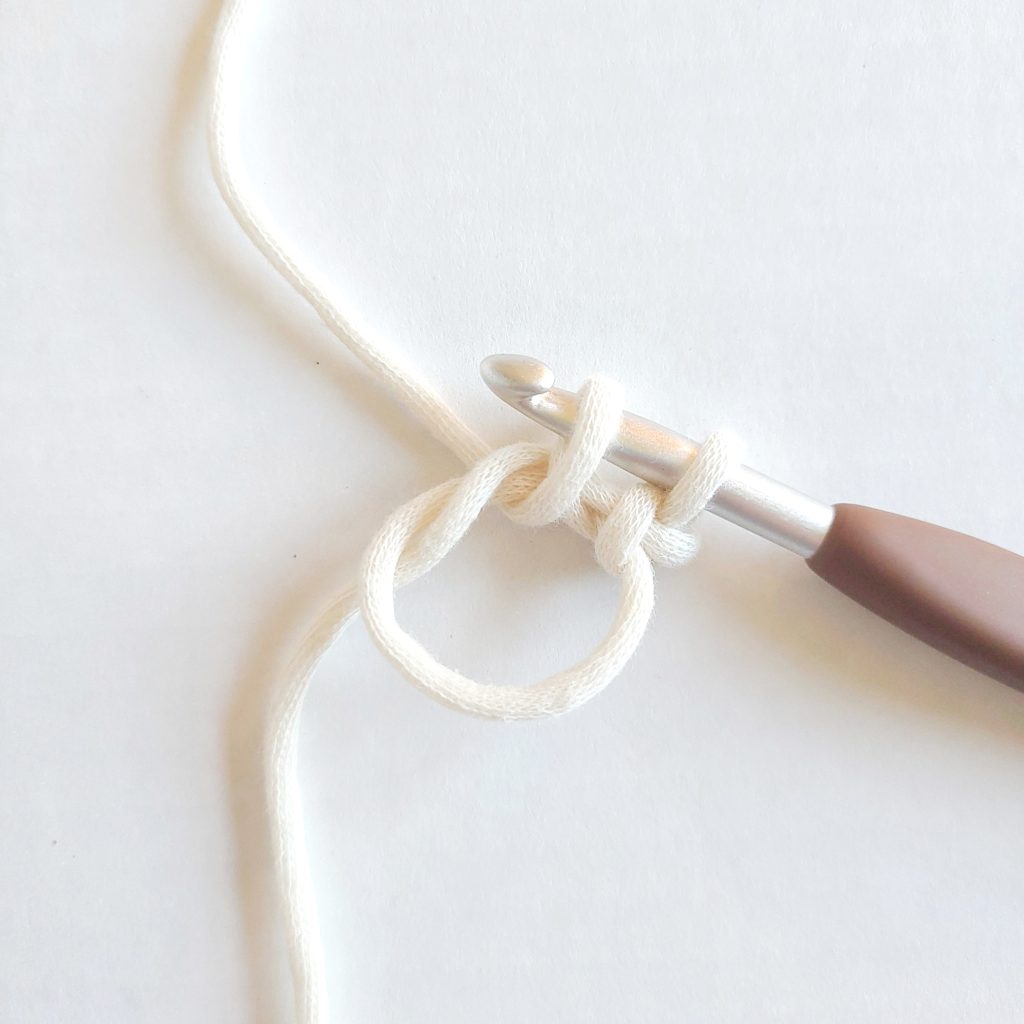
Yarn over the hook and pull back through the circle of yarn (two loops on hook)
Step 7
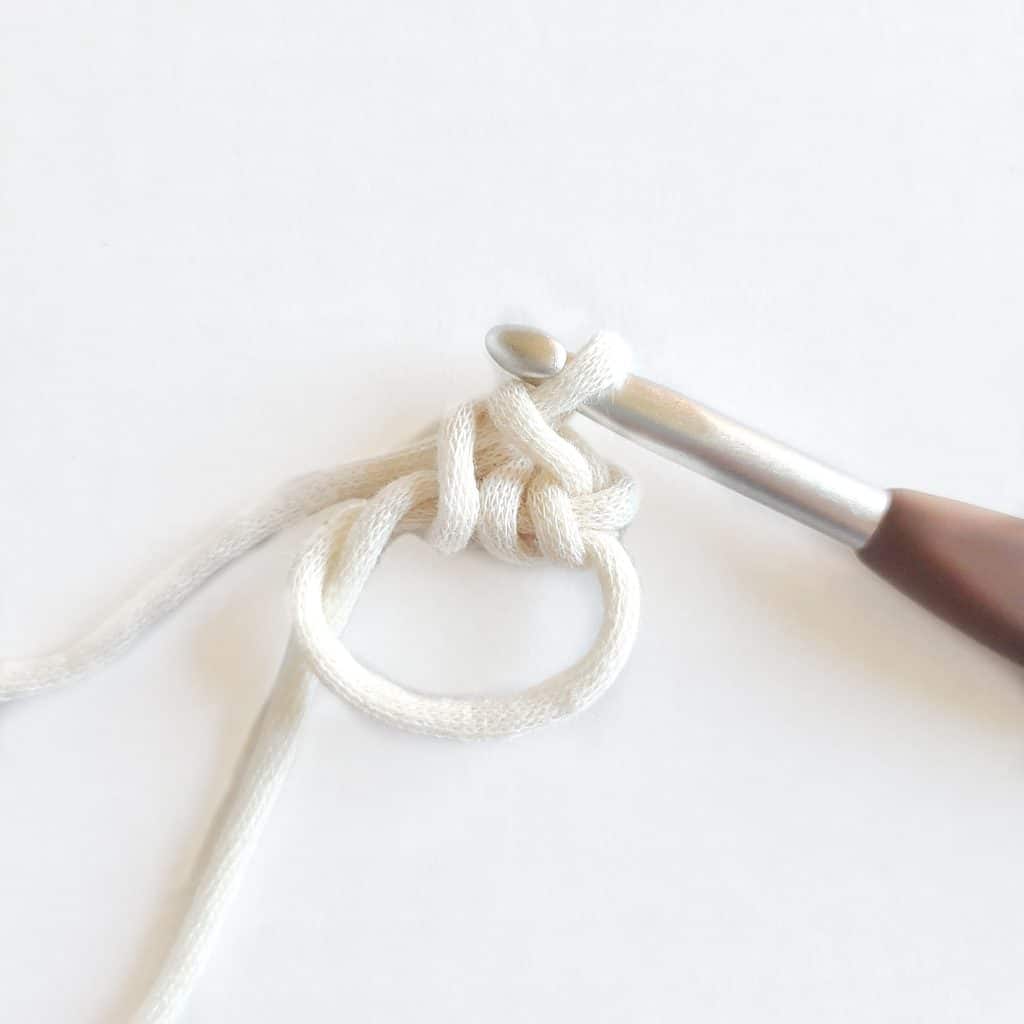
Yarn over the hook and pull back through the two loops on the hook. You have now completed your first stitch, a single crochet in a magic circle
Step 8
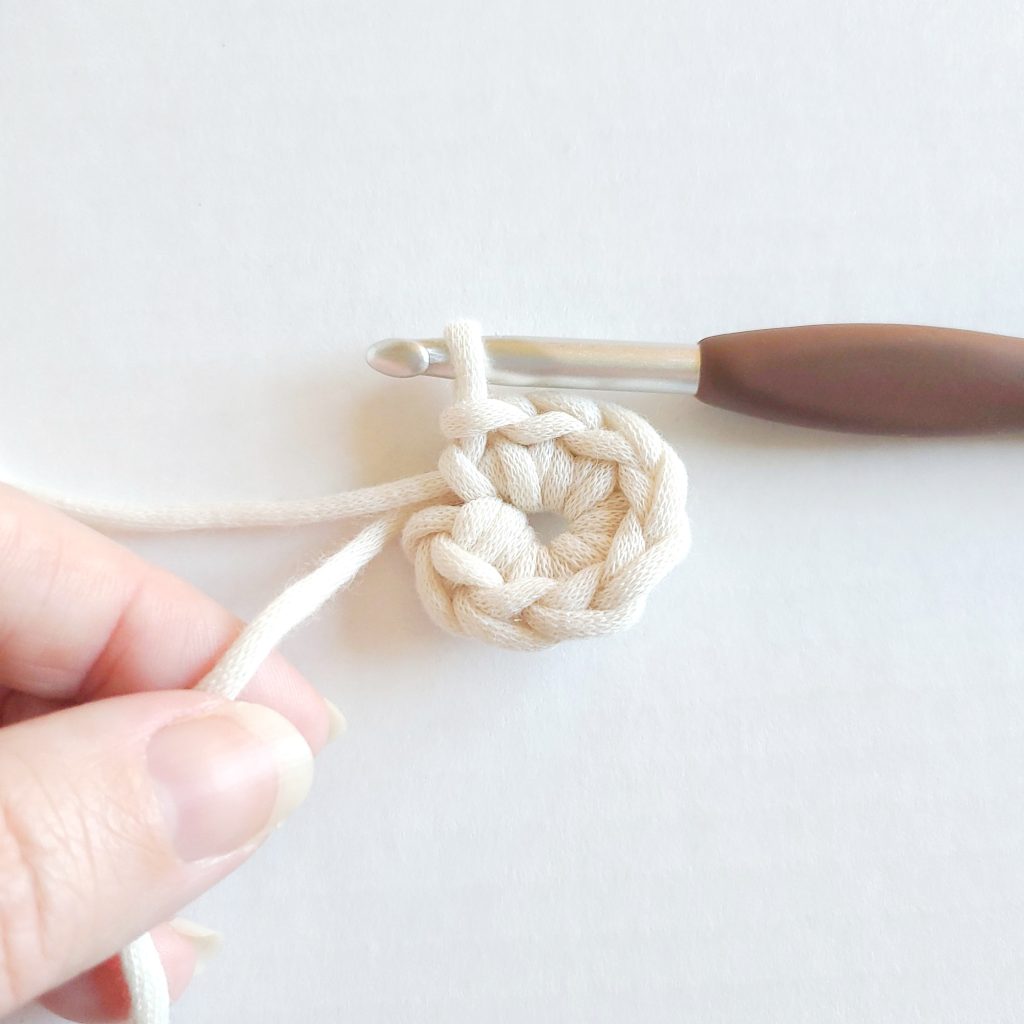
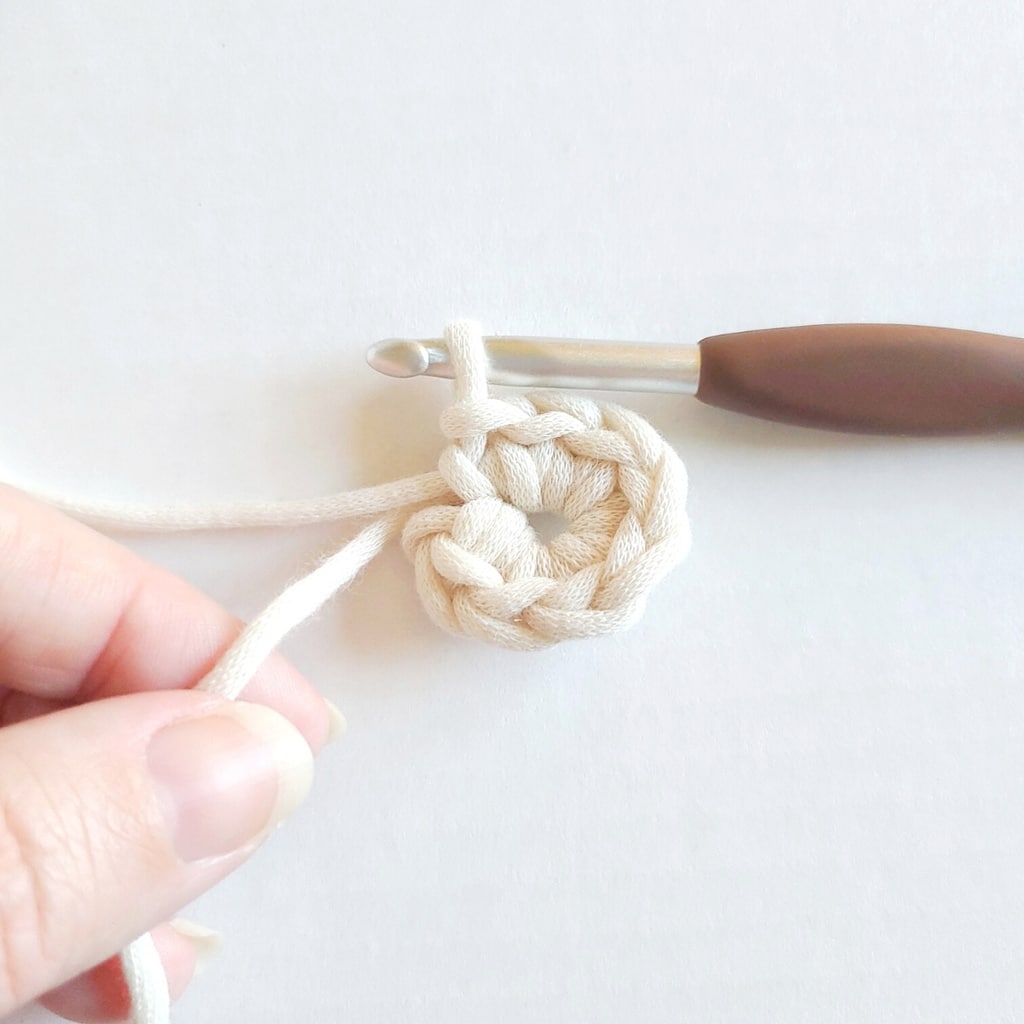
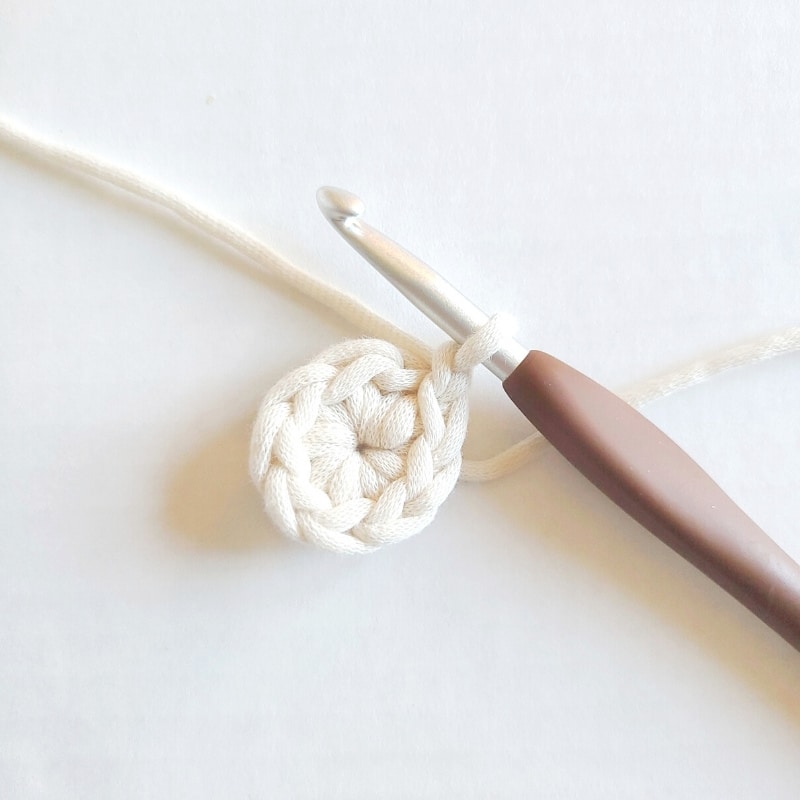
After you finish your first single crochet stitch continue by working the remaining stitches (the single crochet stitch used in the example) into the circle by repeating steps 5-7, tighten the ring by pulling the yarn end to close the circle. You have now completed a crochet magic ring!
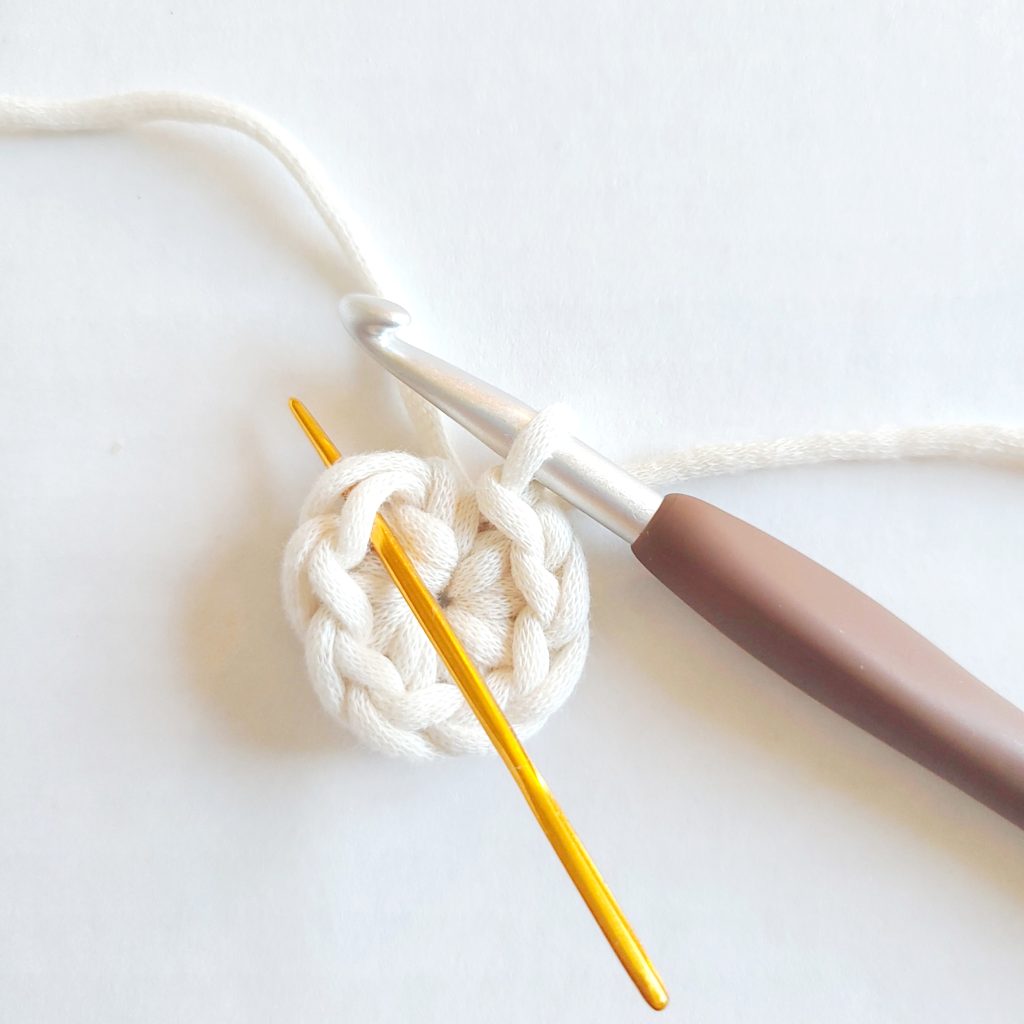
Step 9
Next, we will learn how to join to make a circle by joining the last stitch to the first stitch of the round. Locate the first single crochet you crocheted into the circle. The first chain 1 does not count as a stitch.
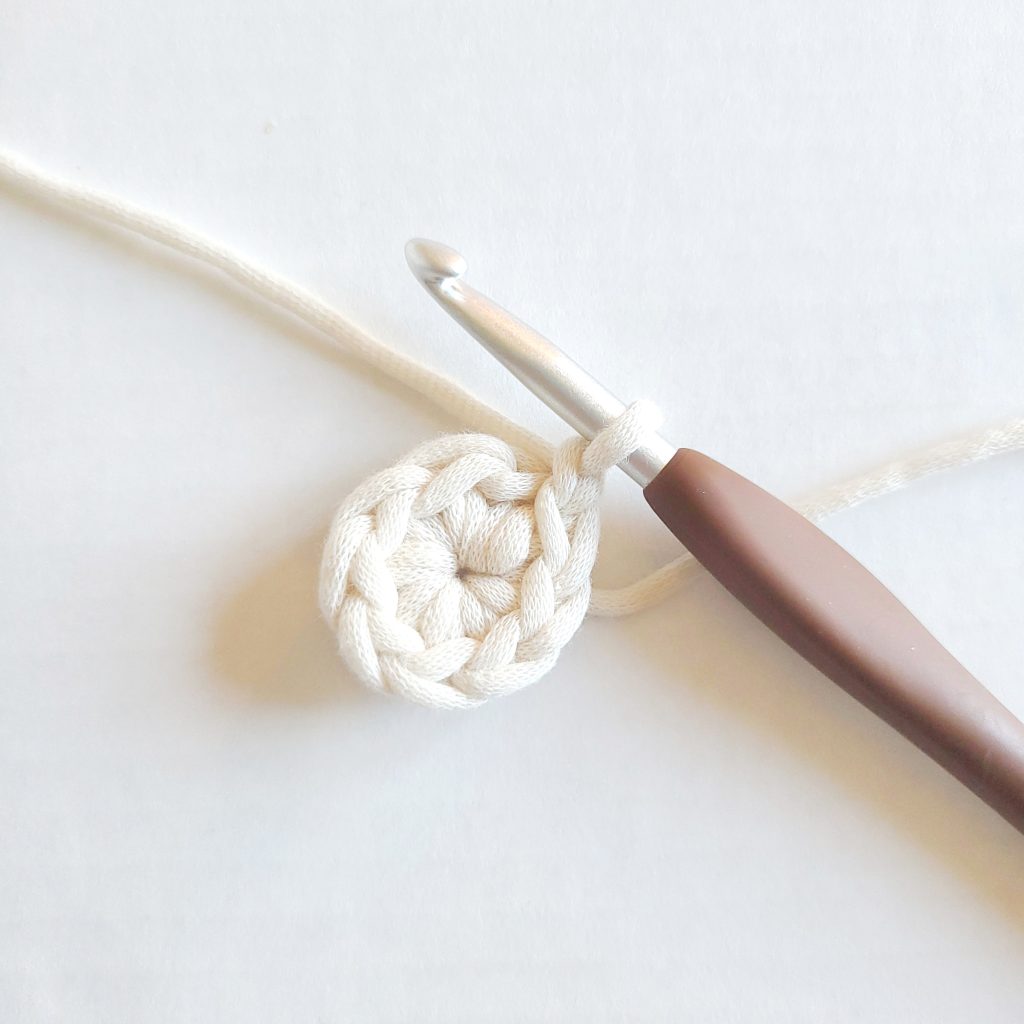
Step 10
Slip Stitch into the first sc of the round to join the circle to complete the first round of stitches. I hope you enjoyed this magic circle technique!
Tip: If you’d like, on step 8 after tightening the ring you can weave in that yarn end to make it more secure, which will make the circle stay closed.
Magic Circle Video Tutorial
If you have an ad blocker on, you will not be able to see the video. Turn off and refresh the page to view. You can also watch on YouTube.
Magic Ring or Circle?
A magic ring is the same as a magic circle. These two terms are frequently used interchangeably in the crochet world. In fact, we use them both in this tutorial!
In fact, a magic ring is also referenced as an adjustable ring or a magic loop at times as well.
What is a Magic Ring in Crochet?
In crochet, a magic ring is a technique used to start working in the round. It creates a tightly closed center for your crochet project, usually used when starting projects that require working in a circular pattern, such as amigurumi (crocheted stuffed toys) or hats.
Why Use a Magic Circle?
A magic circle is a great starting technique to use in crochet projects like granny squares, coasters, potholders, motifs, amigurumi projects or crocheted hats that are worked in the round.
I love beginning all of my projects in the round, using a ring or magic circle for a clean “hole-free” design.
For example, when you start a crocheted hat with a magic circle, it allows you to completely close off the top of the hat, so it will be free of the hole that a traditional foundation ring starting method creates.
Foundation Ring vs Magic Circle
Both of these methods are good for starting a crochet project or crochet pattern in the round, but do have some differences, which I’ll explain below in detail.
Foundation Ring Method:
The foundation ring method is used to start a crochet project in the round that creates a circle that can be worked into with crochet stitches.
This technique works for starting round projects nicely, but doesn’t get that closed off circle as close as the magic ring method. You will need to be familiar with chain stitches to use this method.
How to Make a Foundation Ring
- Make a slip knot and start with a chain of 4
- Slip stitch into the first chain to form a foundation ring
- Work stitches into the ring (circle) around the chain 4 to start your project.
Magic Circle Method:
The magic circle method is an adjustable loop (or magic ring) technique that quickly starts a crochet project in the round that has a yarn tail that pulls to close the center hole when tightly closed.
So in conclusion, the foundation ring method starts with chains and doesn’t close to a tight circle. The advantage of the magic ring method is the center of the ring closes tight with no holes, and it’s easy to add as many stitches as you’d like to the center ring.
The magic circle method is my favorite method to use when crocheting granny squares, granny square blanket pattern and many other patterns too! I promise you’ll quickly only want to use a magic ring when starting projects in the round! It is that easy.
Crochet Terms Used in a Magic Circle

As a beginner crocheter, it is important to understand the different terms used in crochet. These are a few that are used in this tutorial.
Yarn End or Tail End of Yarn: This is the part of yarn that is the short end of the yarn that isn’t being used to crochet. It is best to leave yarn tails longer so when you weave in the ends of this yarn at the end of your project you’ll have enough to hide them within the project securely.
Working Yarn or Yarn from the Skein: This is the working end of the yarn that you will be “working” with or using to crochet your pattern or project.
Crochet Stitches in a Magic Circle
Our magic ring crochet technique uses the basic crochet stitches listed below. Each of the stitches used are commonly used to crochet a magic ring. While other stitches can be used (like double crochet stitches), the single and chain stitches are the easiest to learn.
- Insert the crochet hook from front to back in the second chain from the hook or designated stitch.
- Bring the yarn over (Yo) the hook and pull the yarn back through the chain (or stitch) from back to front (2 loops on hook).
- Yo and pull through both loops on the hook.
Chain Stitch in the Round (ch):
Chain stitches are a simple crochet stitch that often forms the foundation of crochet stitches and are worked into during projects, and they can also be used to bring rows and rounds up to the height of the stitch used.
- Yarn over the hook
- Pull the yarn back through to create a loop
Follow along with the step-by-step picture tutorial below to learn all about how to crochet the magic ring in crochet and learn the answer to the question, “What’s a magic circle in crochet?”.
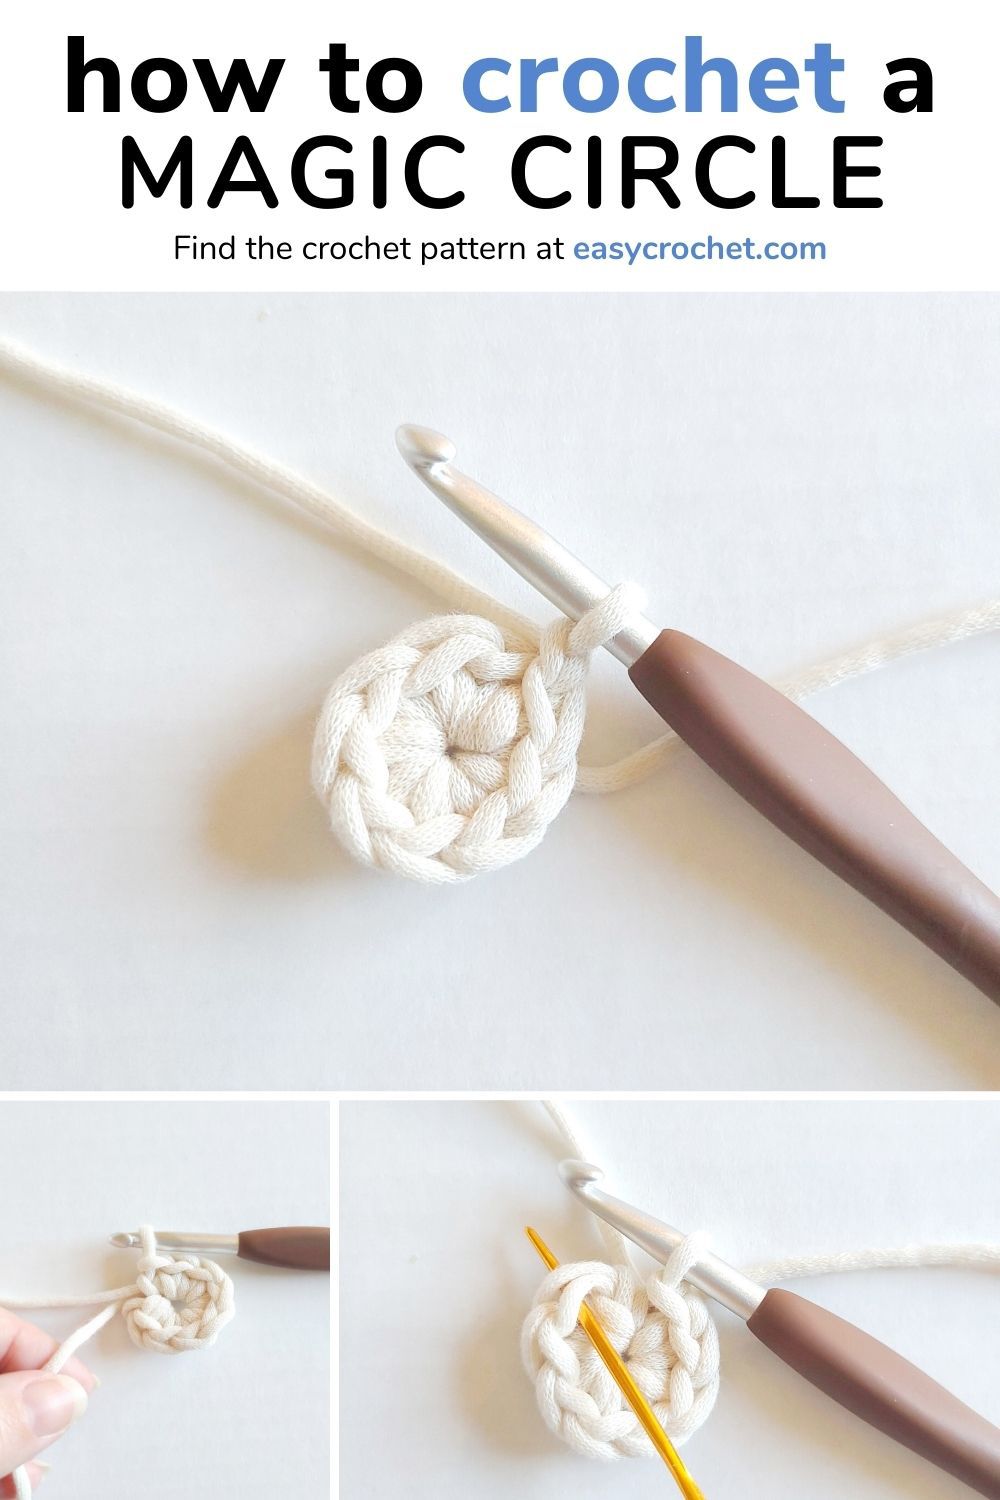
If you enjoyed this magic circle tutorial, then use the images below to pin to Pinterest, so you can make learn the magic ring method at any time.
Follow along with on there too since we always share new free patterns as well as crochet stitches and tutorials as well.


Common Questions About Magic Circles
Here are some questions that arise occasionally when using the magic ring. Have one that you don’t see? Join the Easy Crochet Facebook group to ask.
Can I Use Different Crochet Stitches to Make a Magic Circle?
Yes, other stitches can be used, such as the half double crochet (hdc) and double crochet stitch (dc). If you use other stitches, the number of chains will be different before working the stitches into the magic ring.
Half Double Crochet: Chain 2 before starting to work into the ring.
Double Crochet: Chain 3 before starting to work in to the ring.
How Do You Keep a Magic Circle Closed?
The best way to make sure your magic circle stays closed is to leave a long yarn tail and weave it in securely. This way, your circle will not come undone by unraveling.
Free Crochet Patterns using the Magic Circle
I hope you enjoyed my version of how to crochet magic ring for dummies. lol. I so wish I had this when I started crocheting! If you’d like to make something with your new crochet skill, take a look at the free patterns below.
More Crochet Stitches + Tutorials for Beginners
- The Easy Way to Add and Use Crochet Appliqués
- Crochet the Perfect Temperature Blanket Guide (+ Free Patterns)
- Understanding The Right Side vs Wrong Side in Crochet
- Whip Stitch Crochet Seaming Technique
- What is Frogging in Crochet?
- Why is My Crochet Blanket Curving And How to Fix It!
- The Many Types of Crochet
- Half Double Crochet Slip Stitch (hdc slst) for Beginners
- Single Crochet Increase Tutorial (sc inc)

It’s also not helpful that you can’t stop the video.
Hi Deb,
You can watch it on YouTube where you can pause, rewind and fast-forward much easier.
Krista
I’m sorry. I totally couldn’t even follow the first step. I didn’t know what you meant by pulling the skein yarn through. I had my yarn positioned as you showed but it looked like it was positioned to put the yarn from the end but the skein.
It was so disheartening. I couldn’t even get my project started.
Hi Deb,
I linked up a YouTube video for you in an earlier comment and there is also a step-by-step photo tutorial in this post that may help more than the video.
Krista
Thank you so much! I have been on YouTube watching video’s but it finally clicked watching yours. I am a very beginner and have been struggling until I found you!
Thank you Krista this helped me a lot
You are welcome, Lola! I am glad to!
– Krista
I started learning to crochet recently using the 4 week crochet course from this website. Everything was going well for me until I started learning the magic ring. For some reason, I could not close the ring even while following the steps. Could there be some way I could make sure that my circle can close properly? Thanks for the advice in advance.
I am so glad you have enjoyed the 4-week course! 🙂 For the magic ring, if you’d like, on step 8 after tightening the ring you can weave in that yarn end to make it more secure, which will make the circle stay closed.
-Krista
I love that you used the gold crochet hook to show where to do the stitch – SO helpful! Wish every pattern used that technique. Awesome!
You are very welcome! Happy Crocheting!
Your tutorial for the magic ring is the best ever. I’ve tried others and never got it right — worked first time following your directions. Thank you, thank you, thank you!!
You are so welcome, Patty!! I am glad it worked out!
Happy Crocheting.
-Krista
This is absolutely the easiest instructions for making a magic circle! And I have searched all over!!
Beautifully done in both written instructions and photos. I’ve been crocheting for many years but have always struggled with the magic circle UNTIL now.
Thank you so much!
Carol
You are welcome, Carol!
I am so glad this tutorial helped. 🙂 Thank you for the kind words as well.
Happy Crocheting.
-Krista
This is the best tutorial I have ever used for making a magic circle. Got it first try; usually I give up. When I first learned to crochet as a kid over 40 years ago, magic circles were not a thing, so making one is not in my muscle memory. Thank you for making it so clear!
Thank you, Audrey! I am so glad you enjoyed this tutorial and happy crocheting!
-Krista
Thank you for all the interesting tidbit. I will save it to my Pinterest for future projects.
You are welcome! Glad to help!
-Krista