How to Crochet the Shell Stitch (Step-by-Step Instructions)
The shell stitch is a very beginner-friendly stitch technique, and the finished product looks much more complicated than it actually is to make. Don’t worry, you can learn how to make this stitch!
Below, I will share how to crochet an easy shell stitch using four double crochets that can be applied to crocheting baby blankets, baby clothes, afghans and borders to create an heirloom look.
How to Make a Shell Stitch
Shell stitches are an easy way to add some texture and interest to any crochet project.
This crochet stitch is made by working 3 or more stitches into the same space (or a chain & stitch) to create a fan, shell, or scallop crochet stitch look.
Types of Crochet Shell Stitches
The most common shell stitch is one that uses double crochets. To make shell stitches, you can crochet anywhere from 3 to 6 double crochets (dc) in a stitch (or space) to make a shell.
Take a look at how each variety of shell stitches look below worked with a different number of double crochets.
Shell Stitch Variations
Example of 3 dc shell (3 dcs in one chain)
Example of 4 dc shell (4 dcs in one chain)
Example of 5 dc shell (5 dcs in one chain)
Example of 6 dc shell (6 dcs in one chain)
You can also add chains or spaces between the shells to create a lacy shell, which gives a project a more delicate look.
While I do not have written tutorials yet for these particular shell stitches, I linked up some that I thought you might like. They are an open shell stitch or mesh shell stitch.
When you are researching shell stitches, keep in mind that you may see shells in patterns using a treble crochet stitches (tr) or a half double crochet stitches (hdc) too from time to time.
The Yarn & Crochet Hook
You can make a shell stitch with any type of yarn you’d like. I am using Lion Brand 24/7 cotton (yarn color golden rod) for this example. It is a 100% mercerize cotton medium weight (#4) yarn that is great for all types of home decor projects like coasters, bags and more!
If you’d prefer to use a chunky yarn / bulky (#5 weight) or super bulky (#6 weight) yarn to make a shell stitch project, that is perfectly fine. My advice is to remember to use the recommended crochet hook size for each yarn, which can usually be found on the label.

For this tutorial, I used a 4 mm (G-6) crochet hook size, which is what the yarn suggested. I use the brand Tulip Etimo for most of my projects, and highly recommend them to all crocheters who want to try a quality hook set.
If you use a different brand of yarn, that is totally fine, and your shell stitch will still turn out great either way.
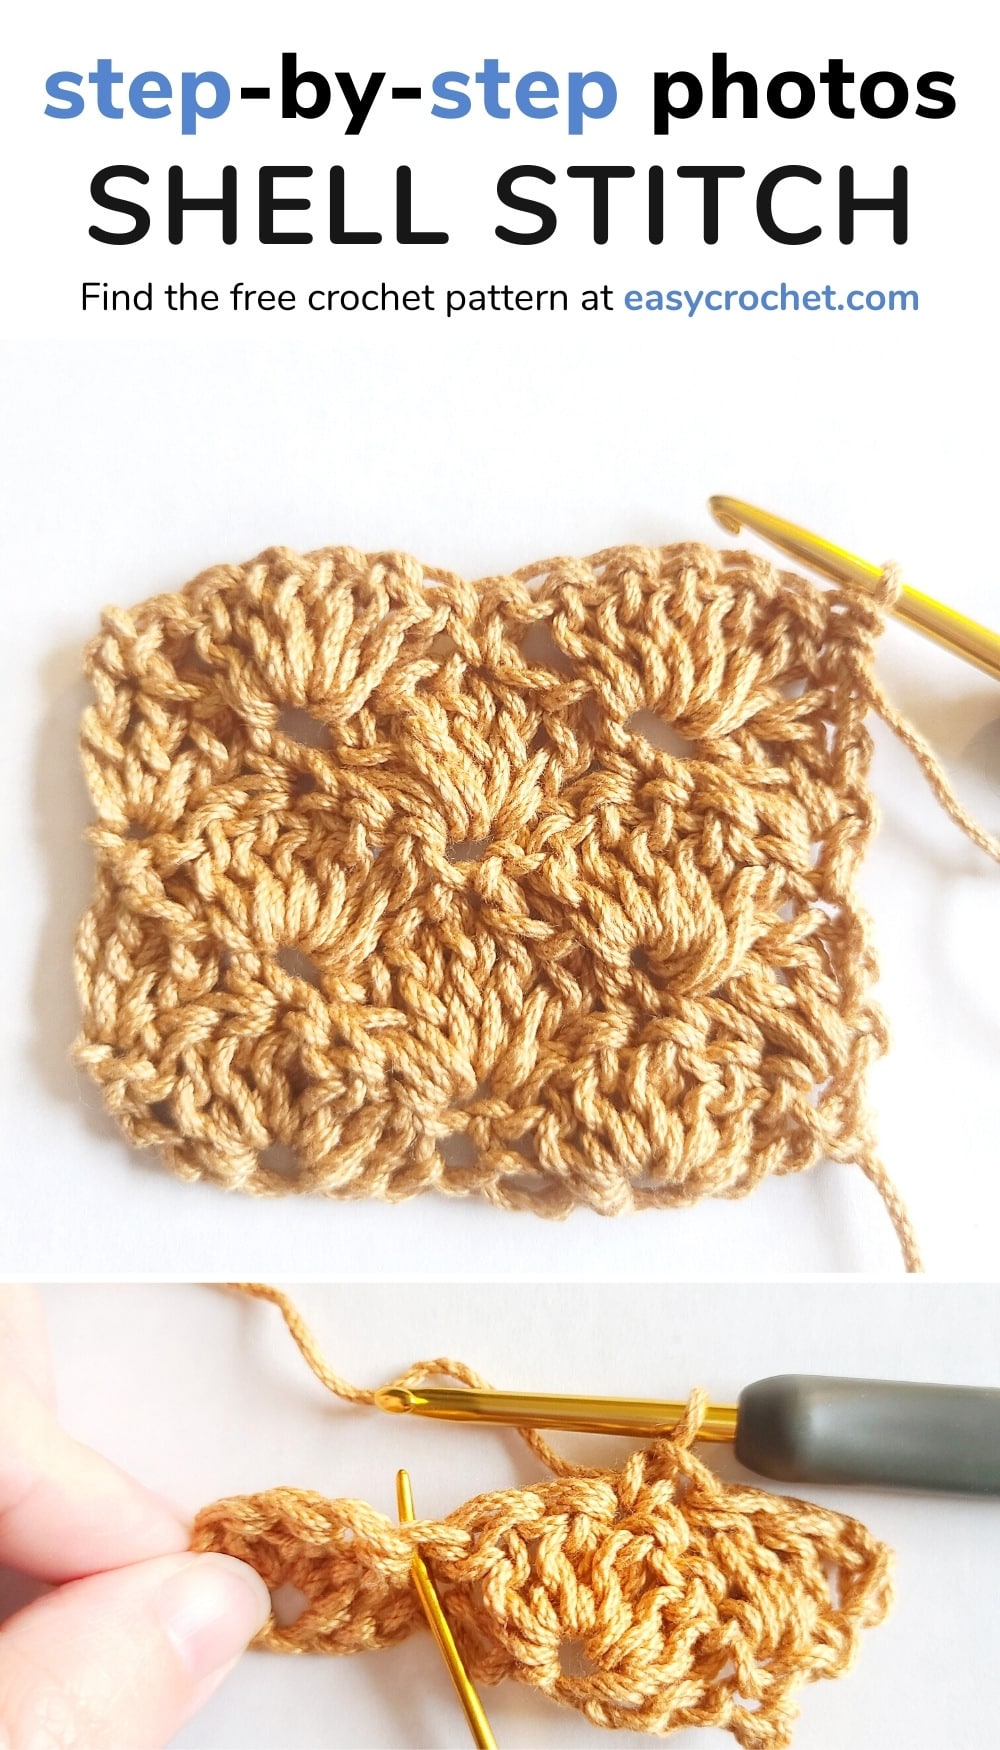
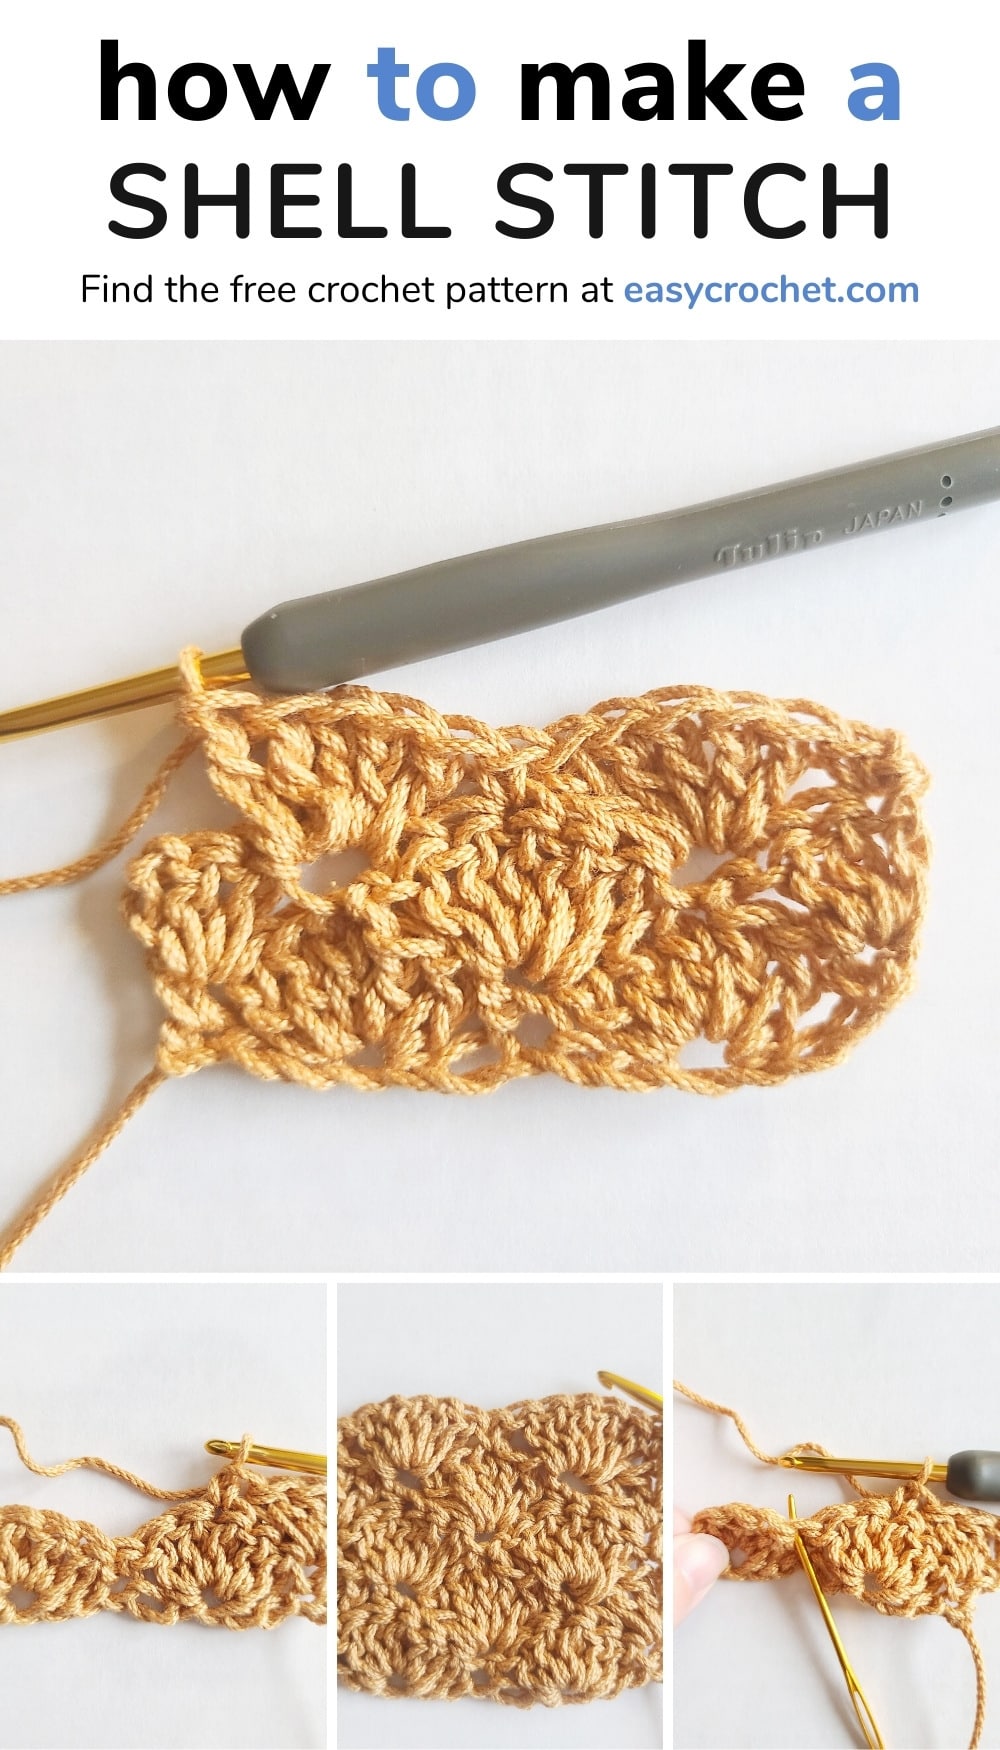
Shell Stitch Tutorial
The easy stitch tutorial below will show you how to use a five double crochet stitch shell with no spaces to create a closed shell stitch design. After the first 3 rows of the pattern, the rest is a just a repeat of rows, which means it will be simple to recreate this stitch design for any level of crocheter.
Since everyone learns differently, I included two different tutorials about the shell stitch. You could even use both sets of instructions to help you learn to crochet the shell stitch.
First, you can learn to make the shell stitch with our written pattern.
Secondly, you can use the step-by-step photo tutorial, which is great for beginner crocheters.
Happy Crocheting!
Crochet Shell Stitch Pattern
Skill Level: Easy
Materials
- Yarn: 24/7 Cotton by Lion Brand was used for this example, but any yarn weight or type will work.
- Crochet Hook: 4 mm (G-6) or any hook the works with the yarn you are using.
- Yarn needle
- Scissors
Crochet Stitches & Abbreviations
- sc = single crochet stitch
- dc(s) = double crochet(s) stitch
- sk = skip
- st(s) = stitch(es)
- rep = rep
- ch(s) = chain(s)
Notes
- The stitch tutorial is written in standard US terms
- The turning ch 3’s count a st
- The turning ch 1’s do NOT count as a st
- Parentheses at the end of the rows show total st count
- Change the size by working a foundation chain in a multiple of 6 then add 2 extra chains to that multiple.
The Shell Stitch Pattern
Written Shell Stitch Tutorial
To Start: Ch 6 + 2 (example is 12 + 2 = 14 total stitches )
Row 1: sc in the second ch from the hook, *sk next 2 chs, 5 dcs in the next st, sk next 2 chs, 1 sc in the next st, rep from * across, turn. (13)
Row 2: ch 3 (counts as a st), 2 dcs in the first st, *sk next 2 sts, 1 sc in the next st, sk next 2 sts, 5 dcs in the next st, rep from * ending with 3 dcs in the last st of the row, turn.
Row 3: Ch 1 (does not count as a st), 1 sc in first st, *sk 2 sts, 5 dcs in next st, sk 2 sts, sc in the next st, rep from * ending with a sc in the top of the ch 3 from the row before, turn.
Rest of Rows: Rep Rows 2 & 3 to make the pattern bigger.
Photo Shell Stitch Tutorial
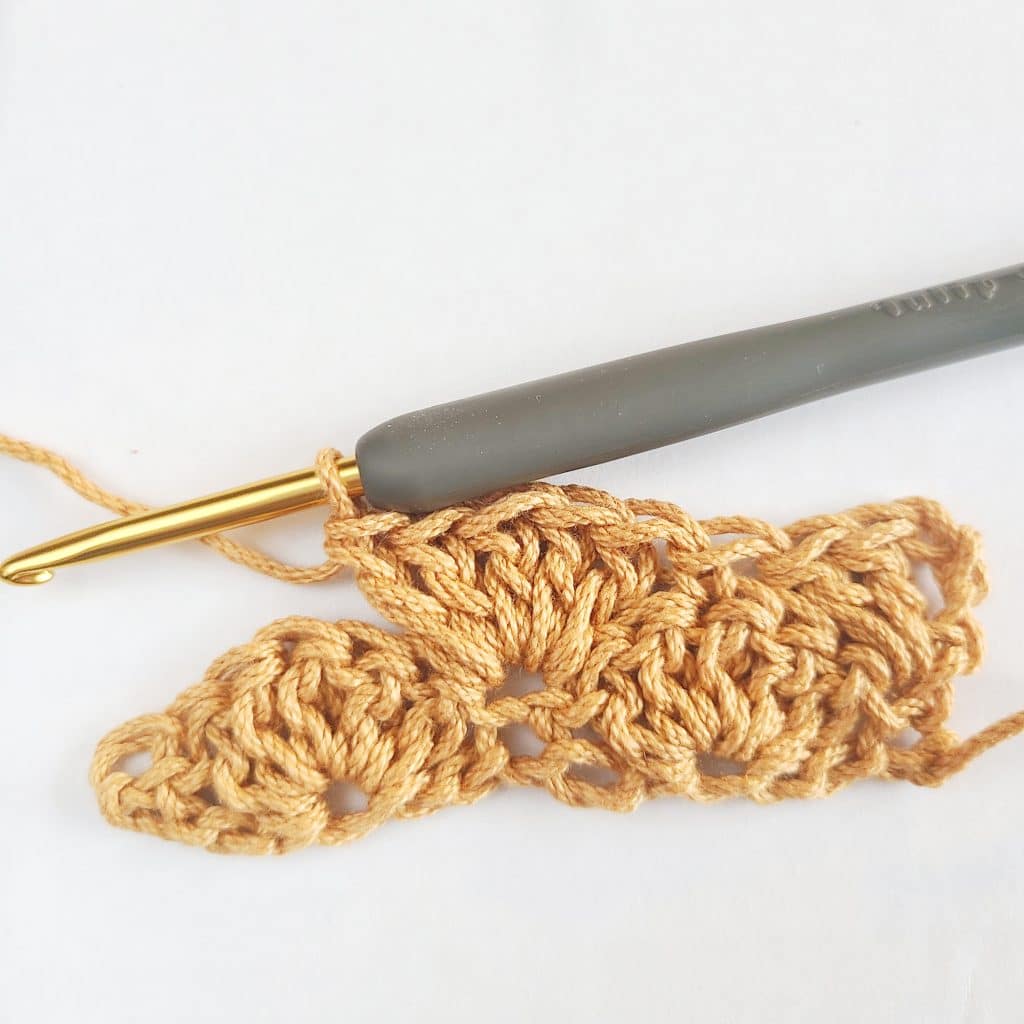
Step 1
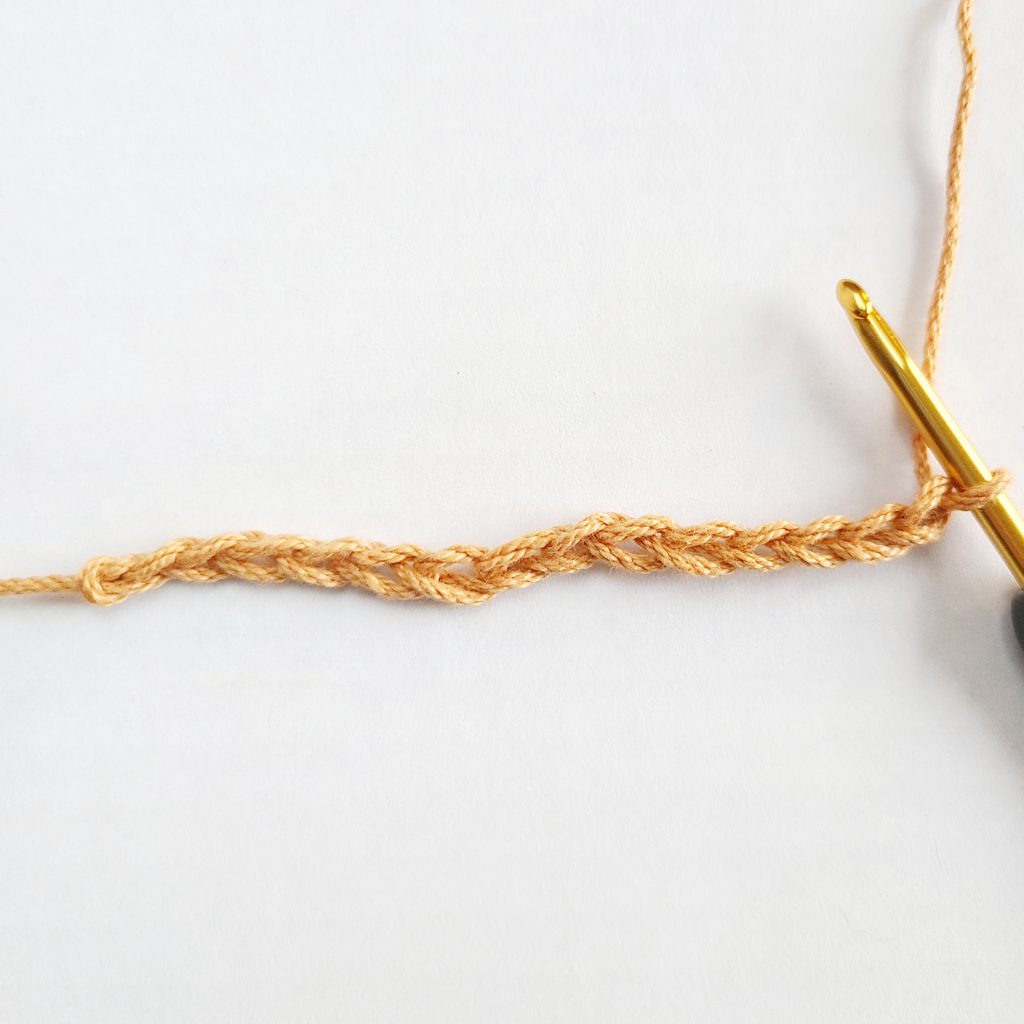
To start the first row, ch a multiple of 6 plus 2 extra chs. This photo shows a foundation ch of 14 or 12 + 2 chains.
Step 2
Single crochet (sc) into the 2nd ch from the hook.
Step 3
Sk the next 2 chs and locate the next st.
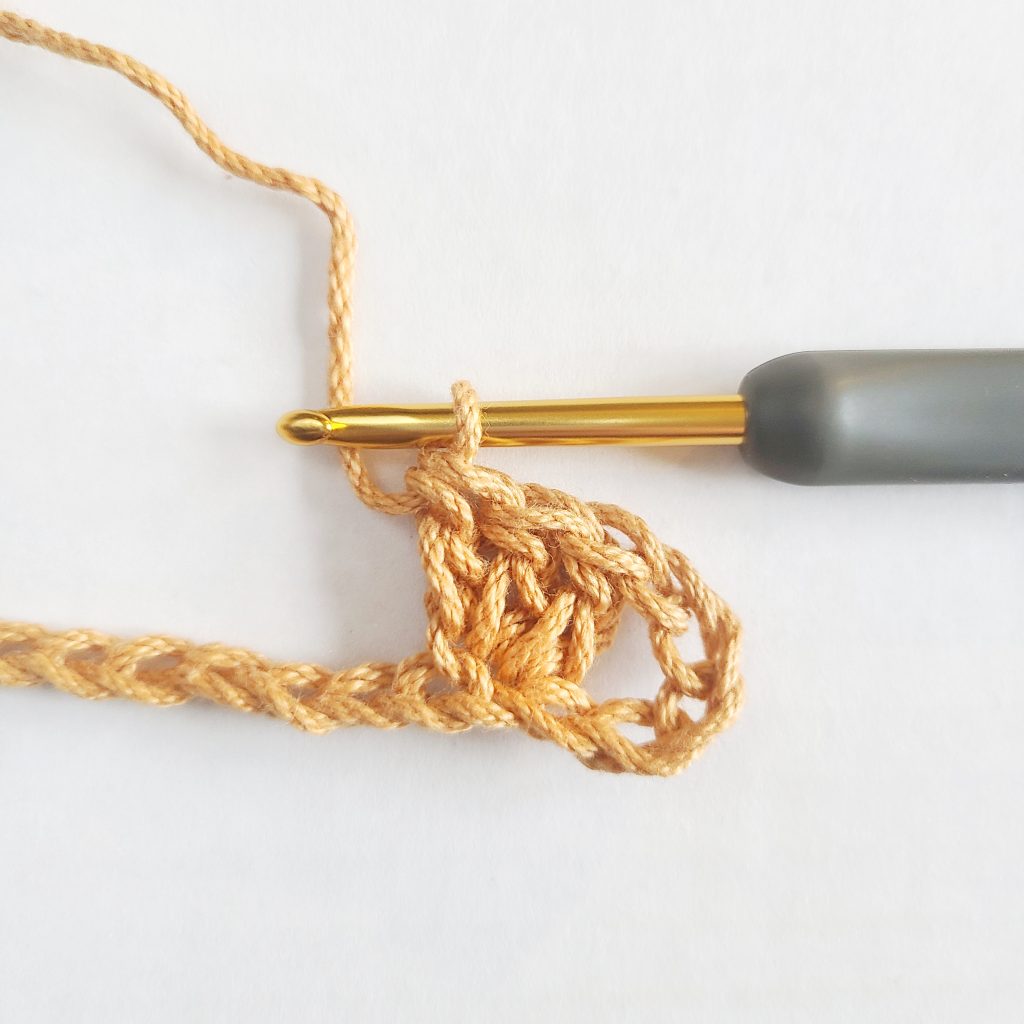
Step 4
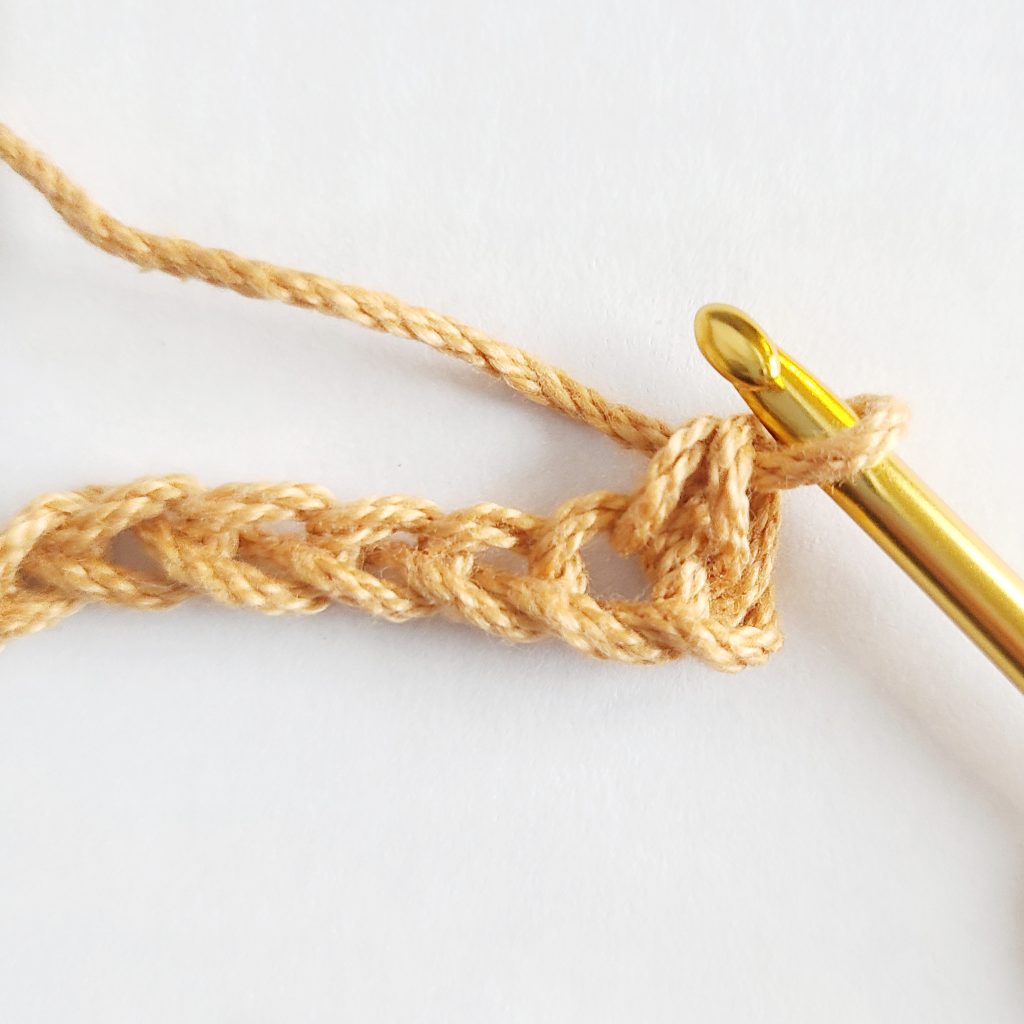
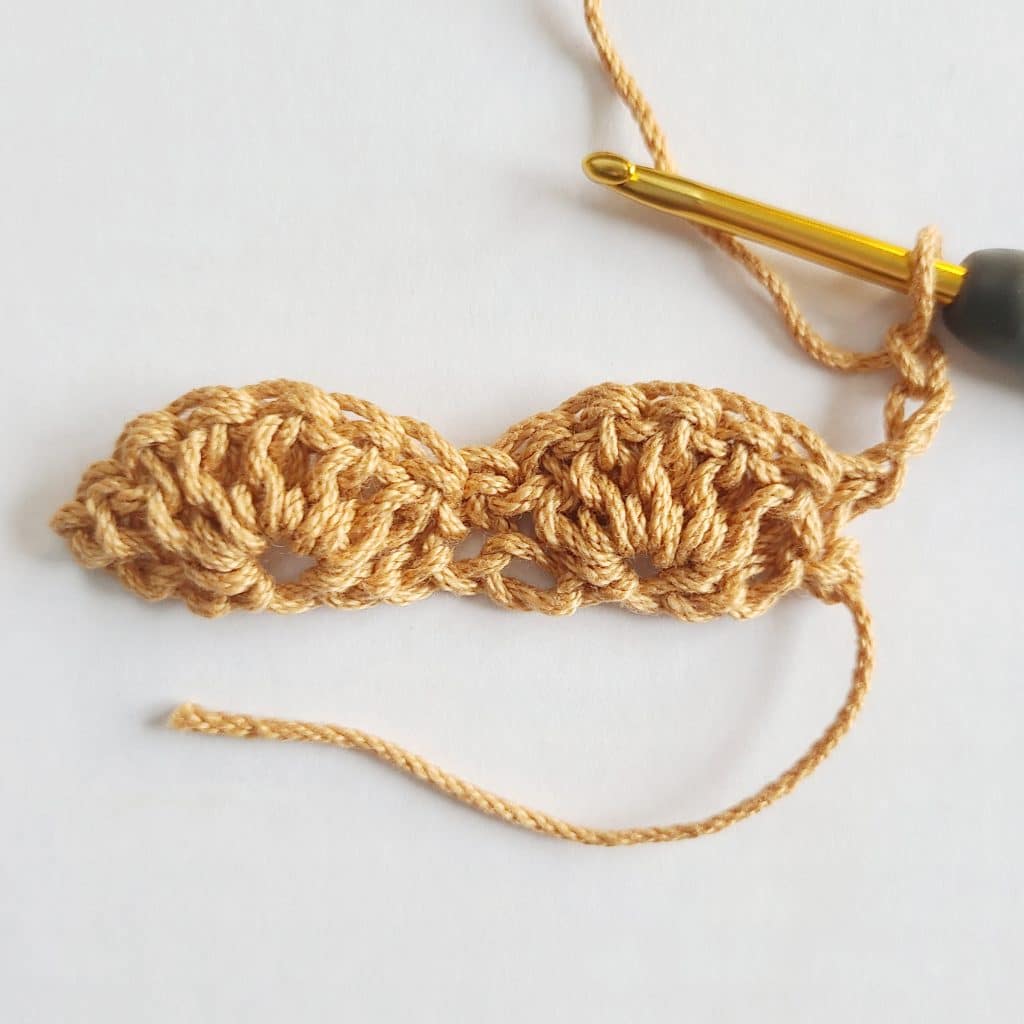
Dc 5 times into the st you just located in the previous step. You made a shell!
Step 5
Sk the next 2 chs and locate the next st.
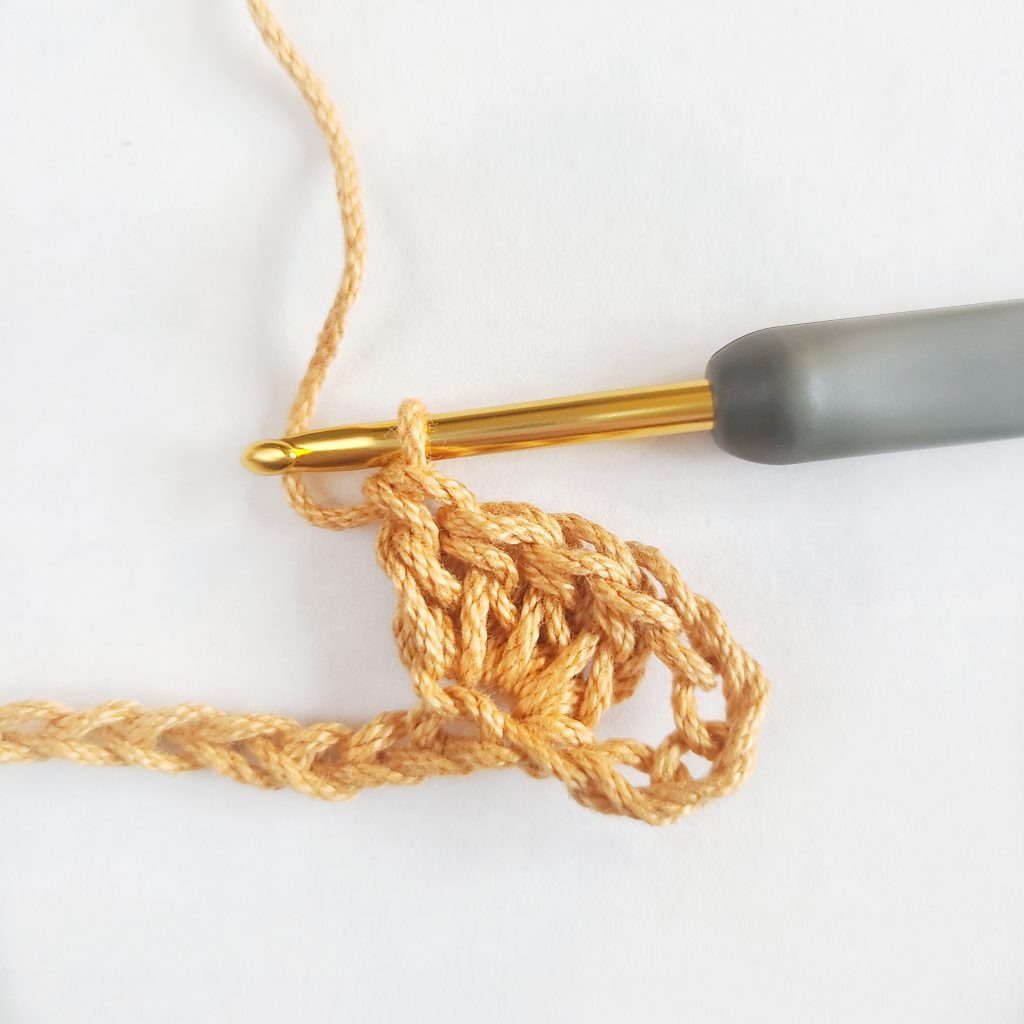
Step 6
Make a sc into that located st from the step before.
Step 7
Sk 2 sts and dc 5 times (shell) in the next st.
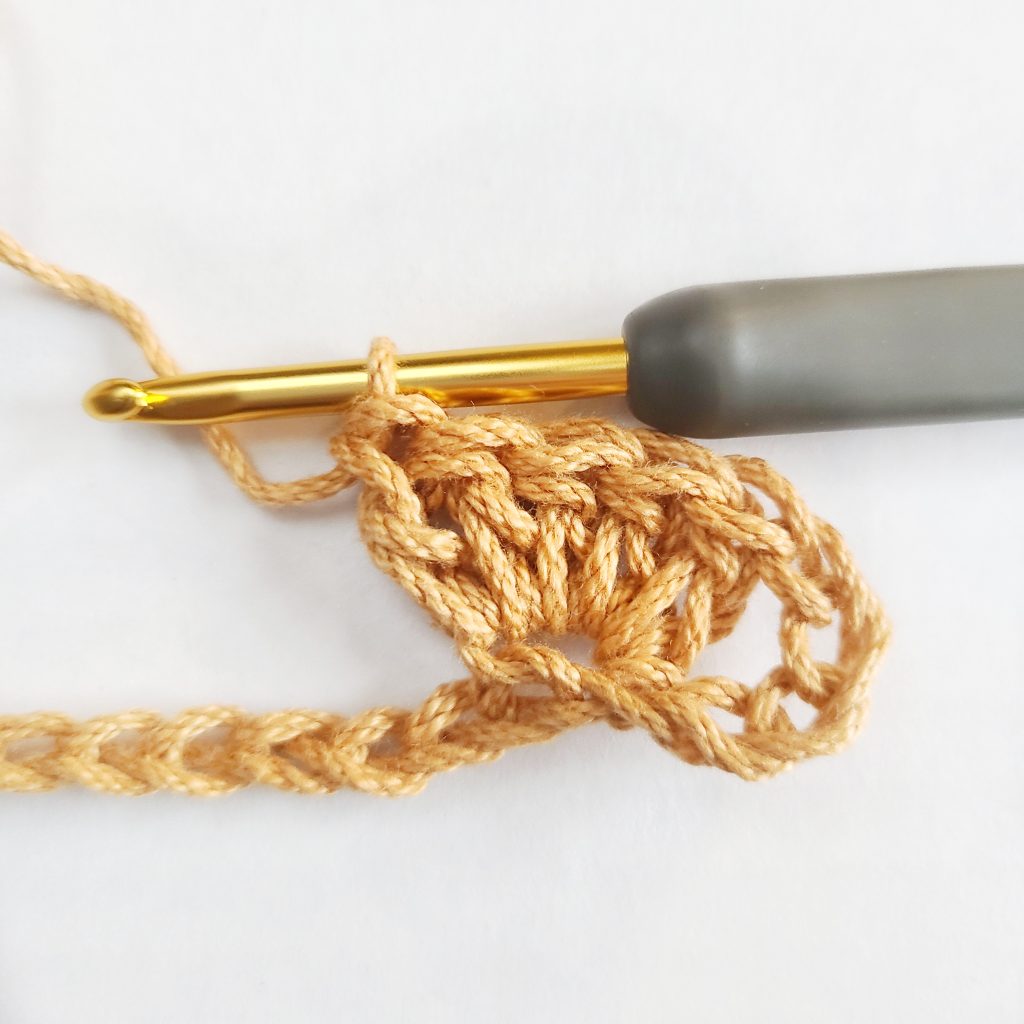
Step 8
Sk 2 st and sc one time in the last st to finish the first row, turn. (13)
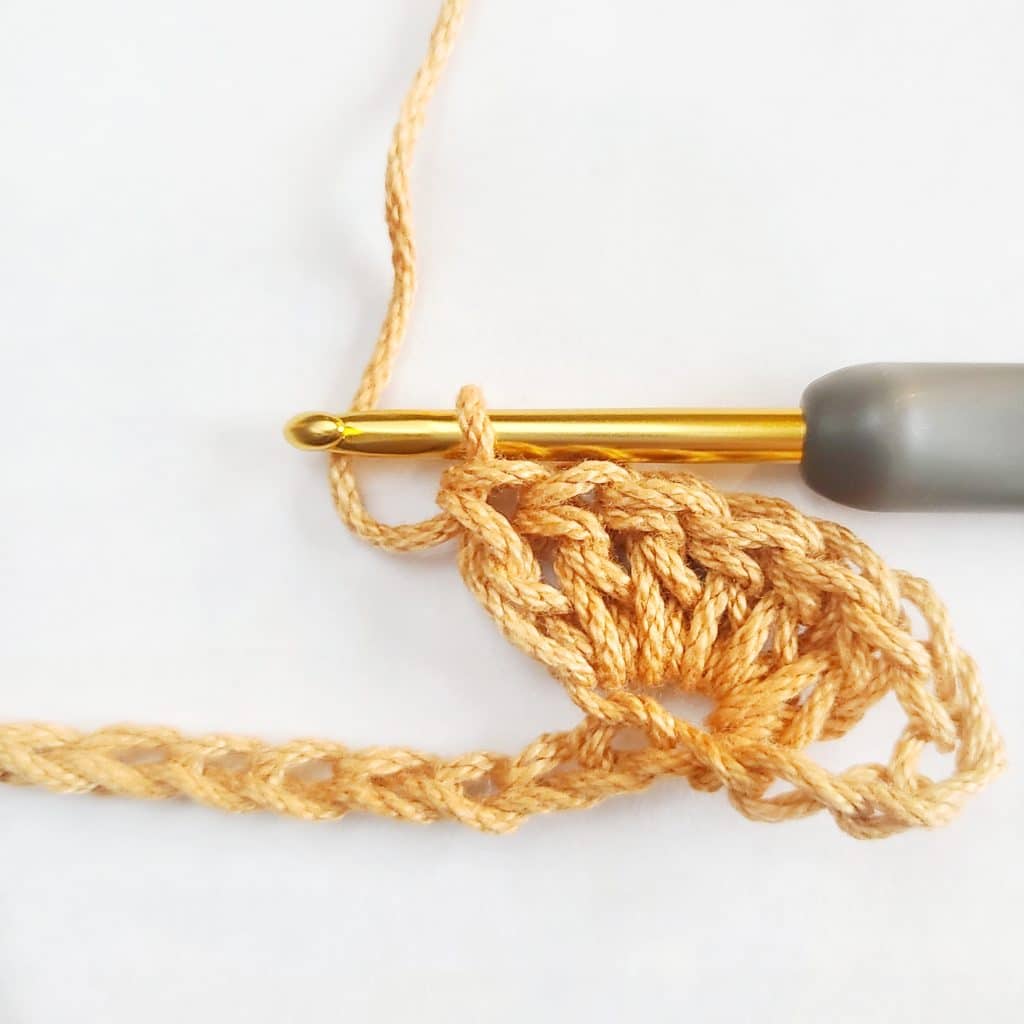
Step 9
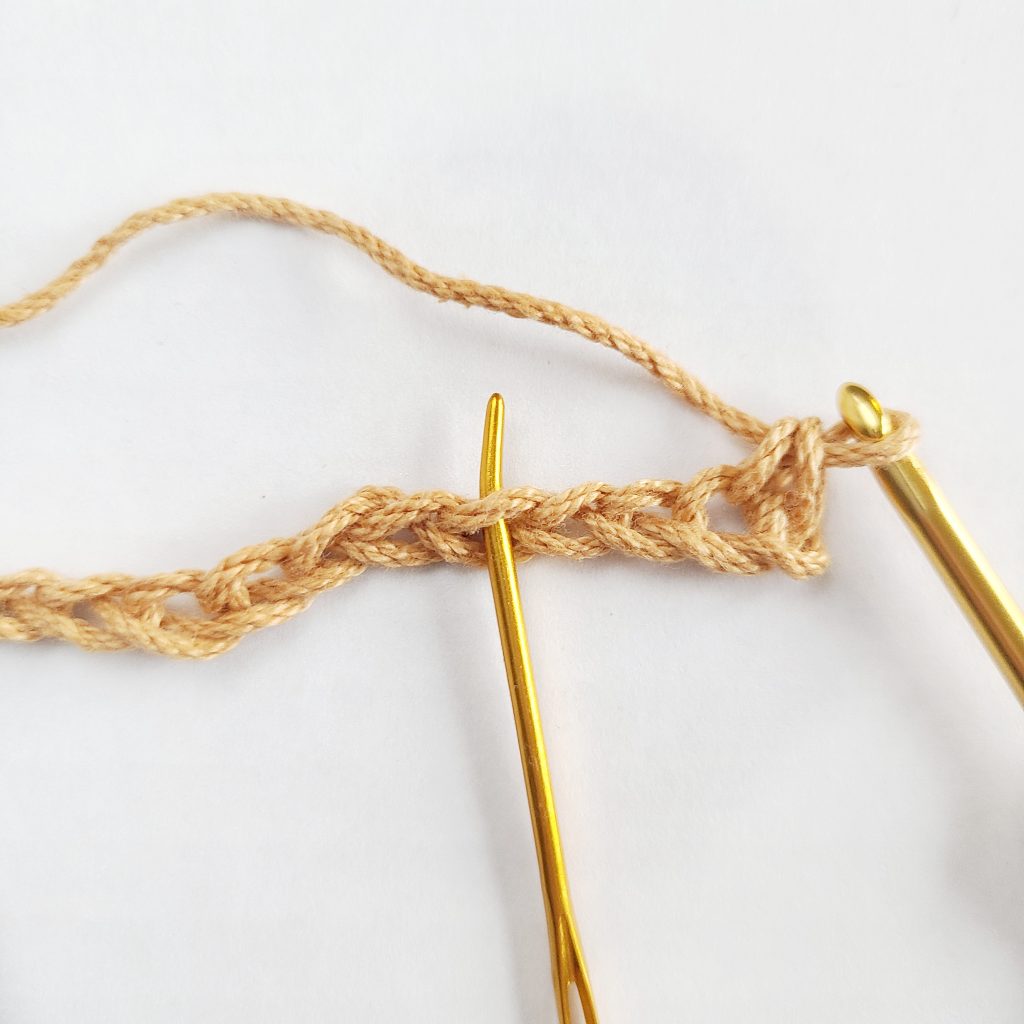
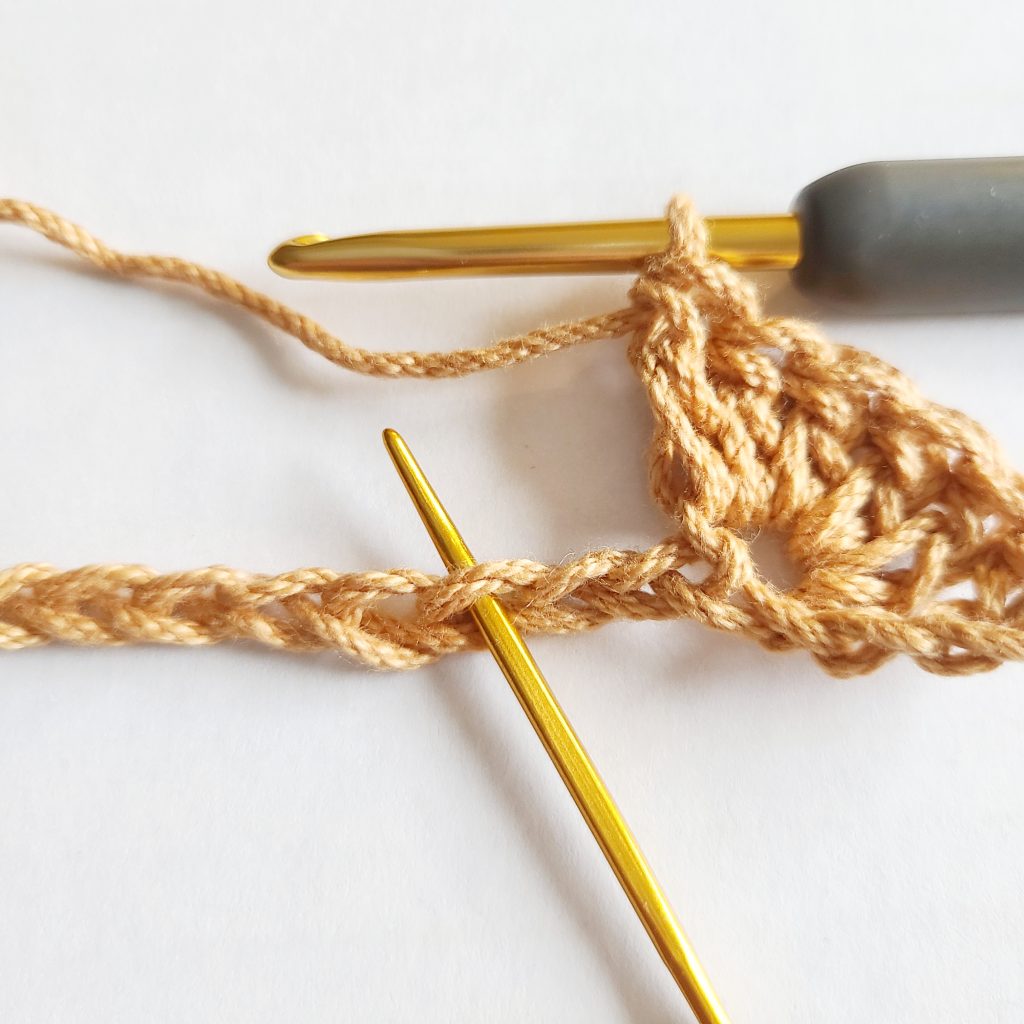
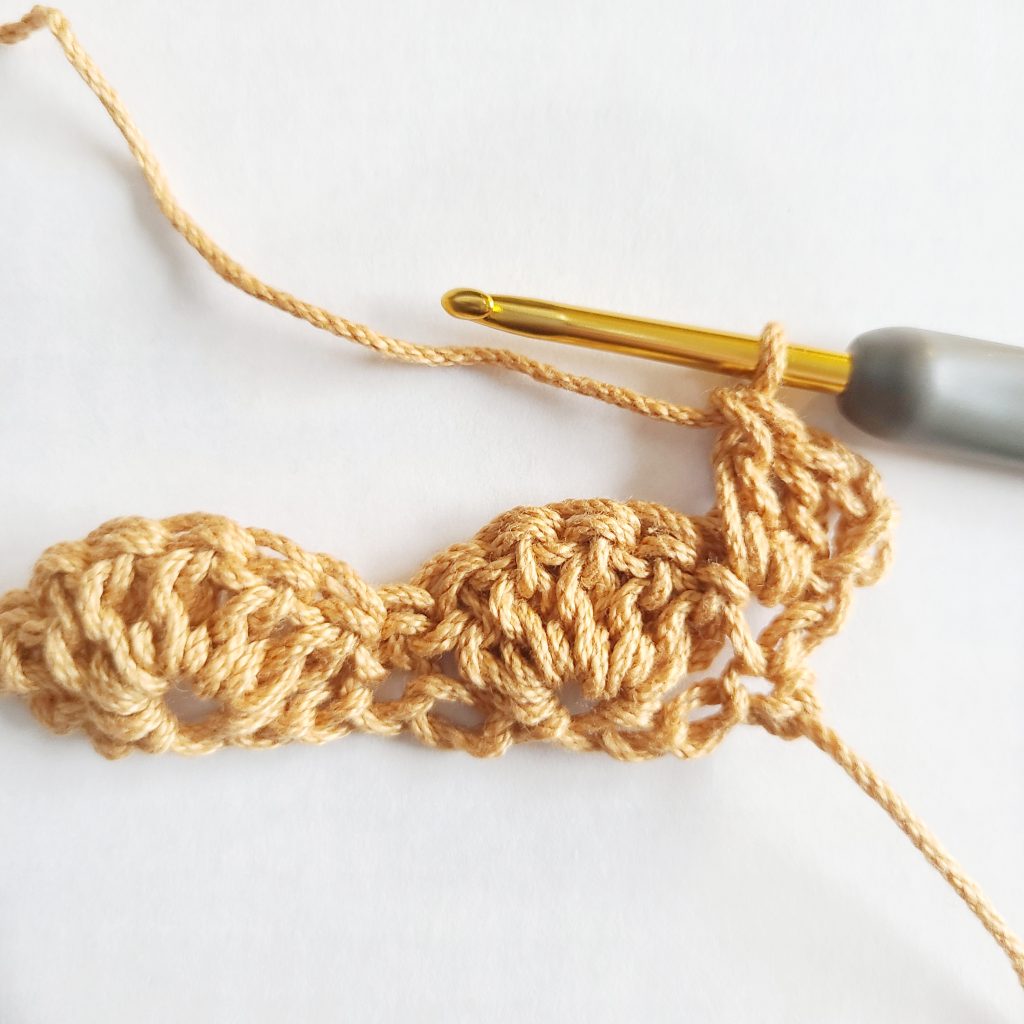
To start the second row, ch 3 (counts as st)
Step 10
Work 2 dcs into the first st, this combined with the ch 3 (turning chain) makes a half shell.
Step 11
sk 2 sts and locate the next st.
Step 12
Make a sc in the st located in the step before.
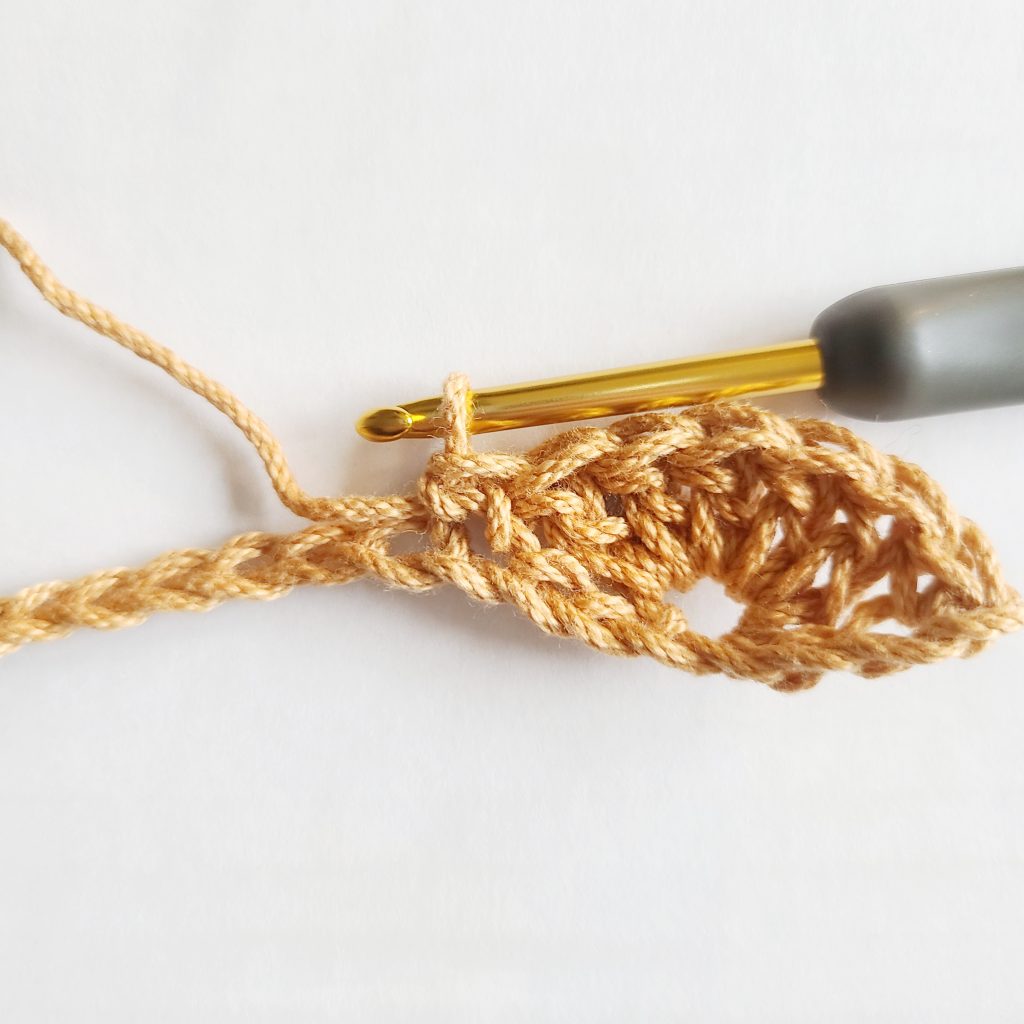
Step 13
Sk 2 sts and locate the next st (in between the two shells)
Step 14
Work 5 dcs (shell) into the located st from the step before.
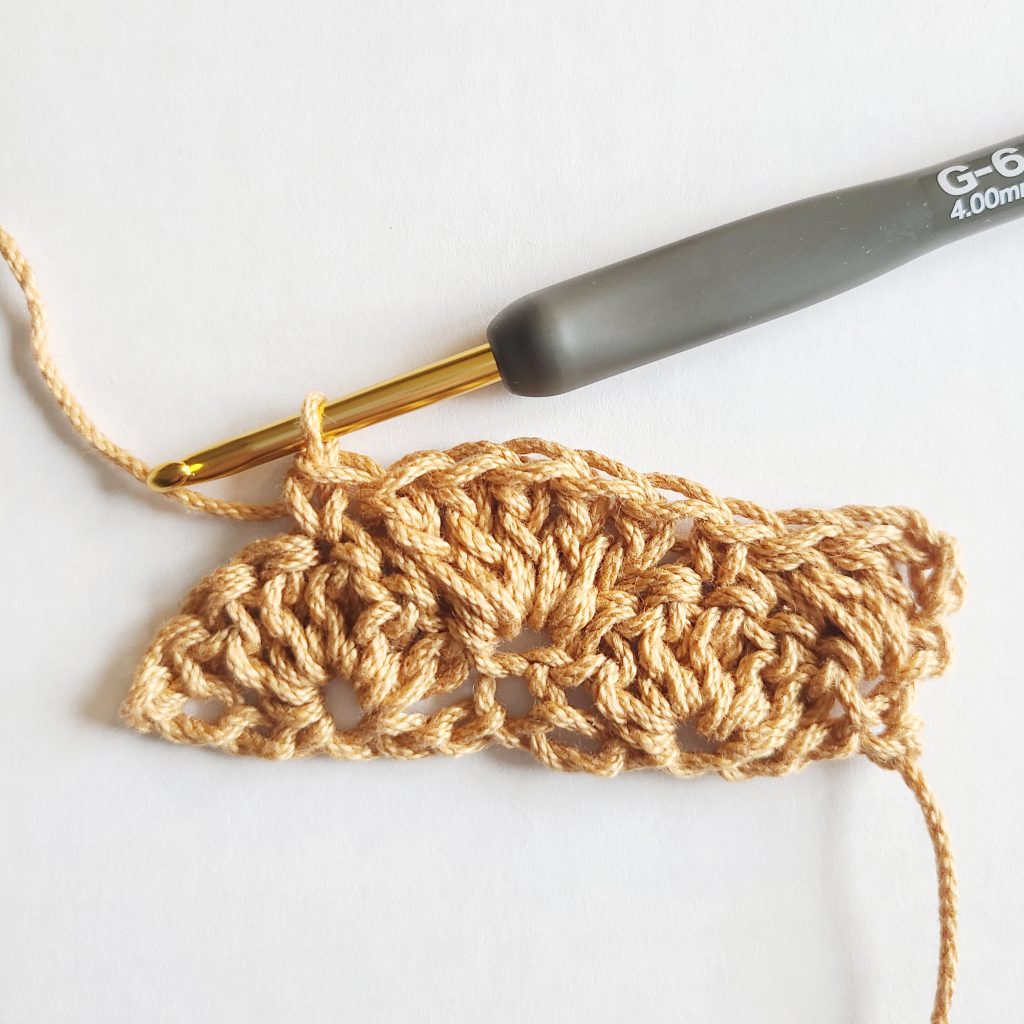
Step 15
Sk 2 sts and make a sc into the next st.
Step 16
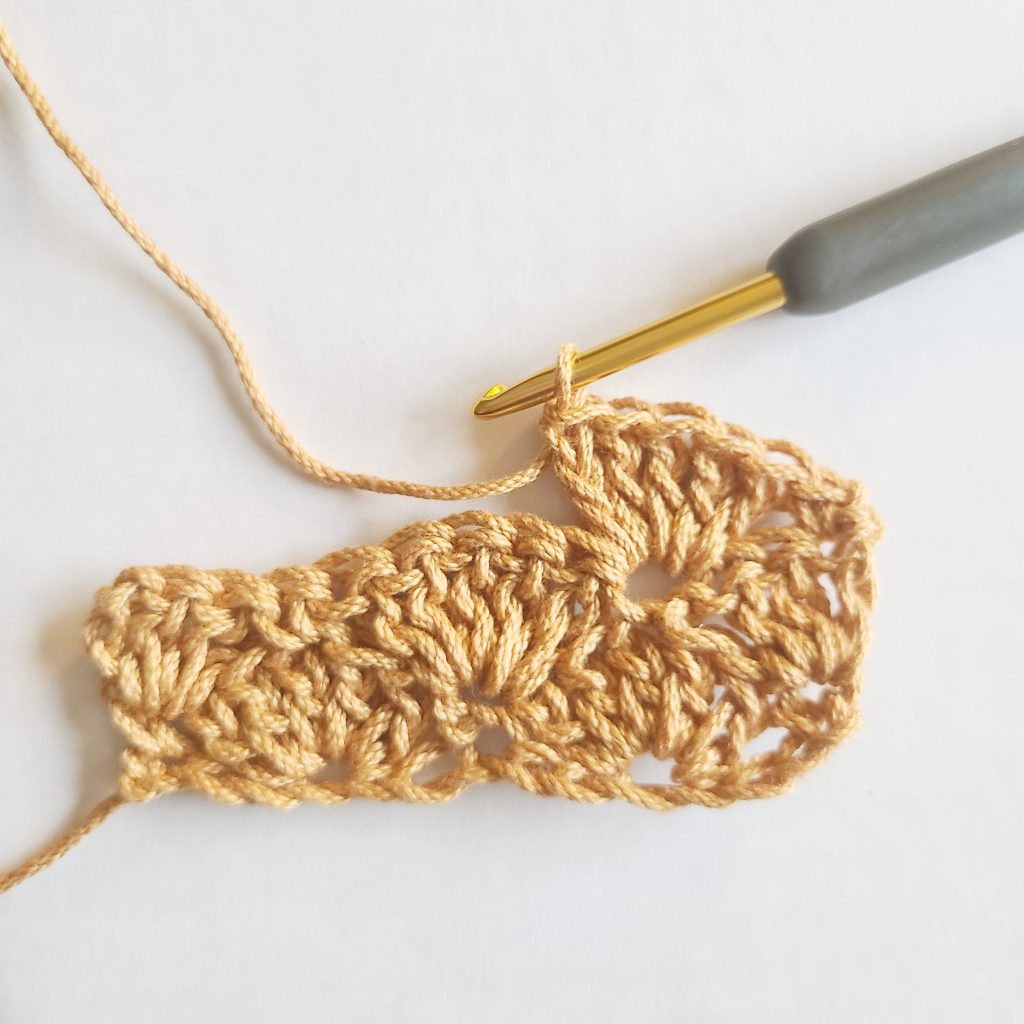
Sk 2 sts and end with 3 dcs into the last st to create another half shell, turn. Row 2 is now finished.
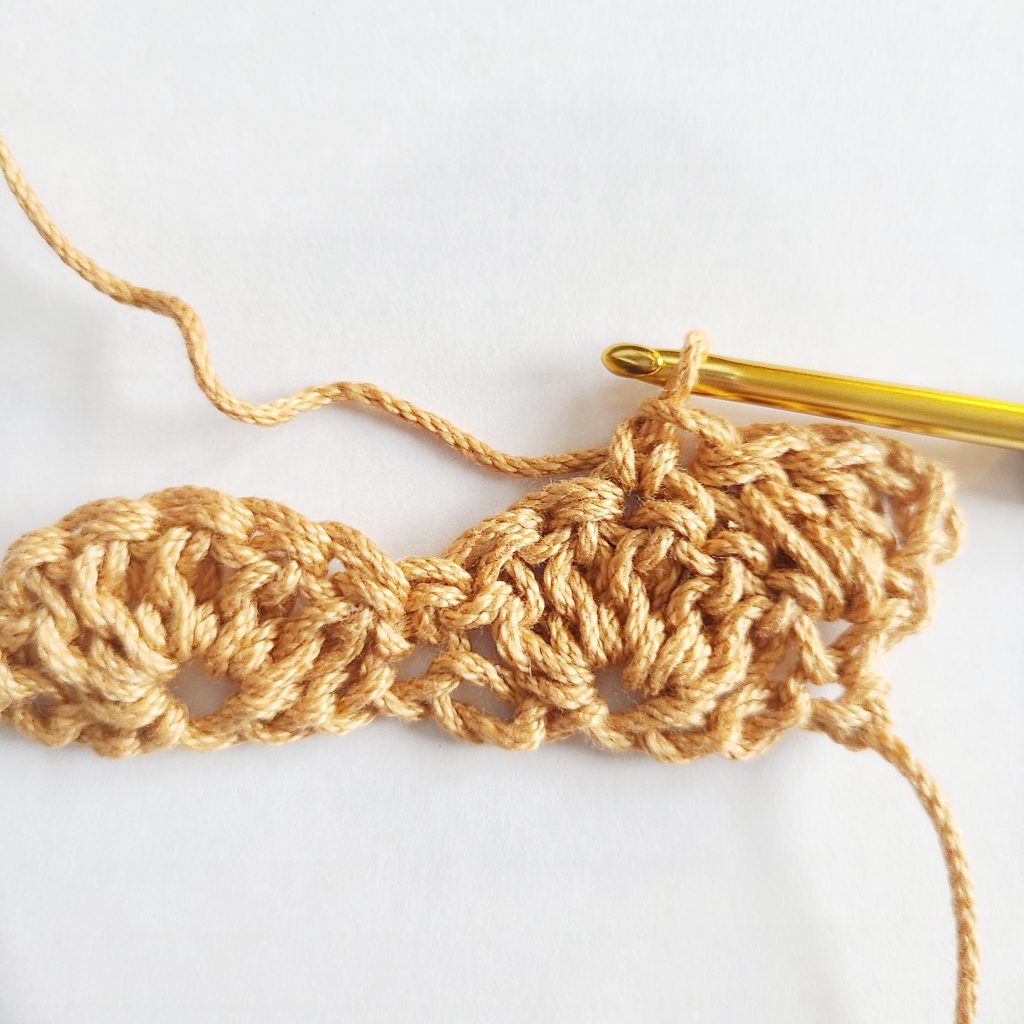
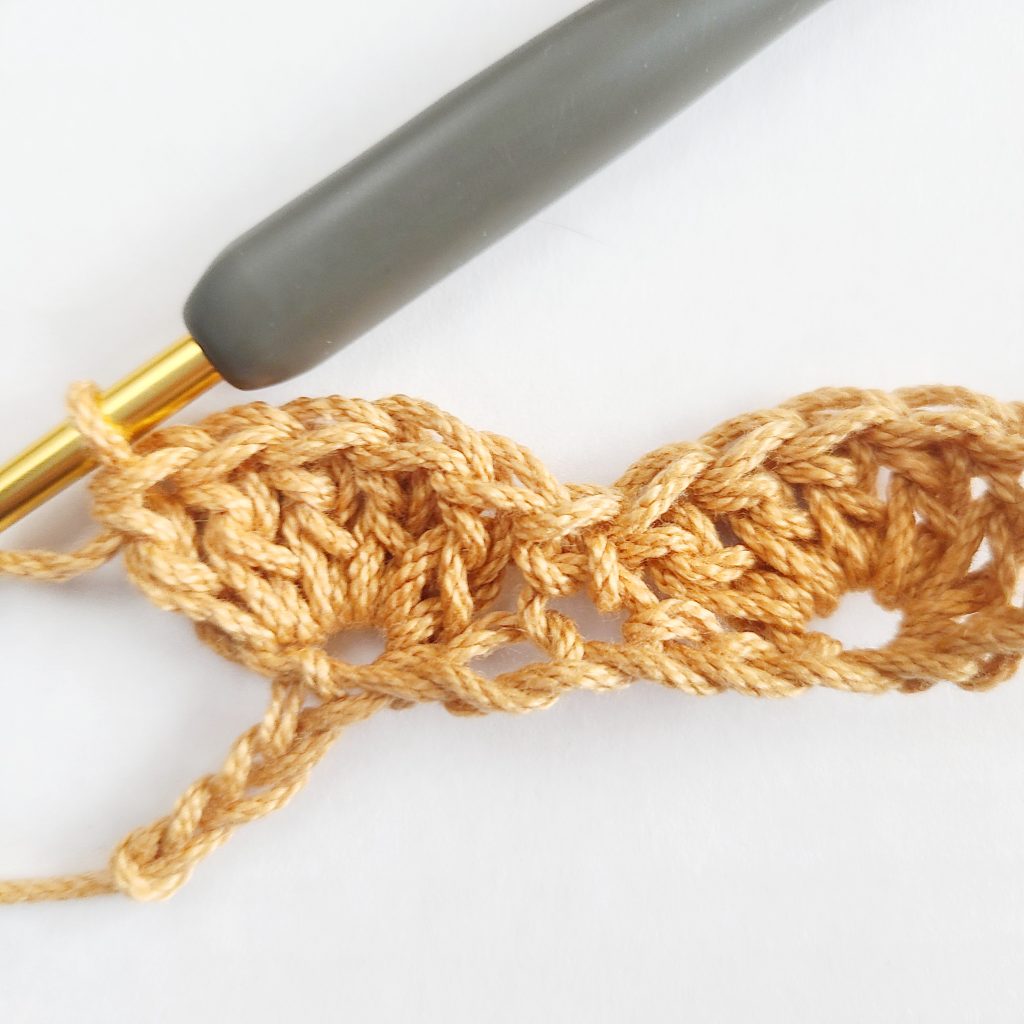
Step 17
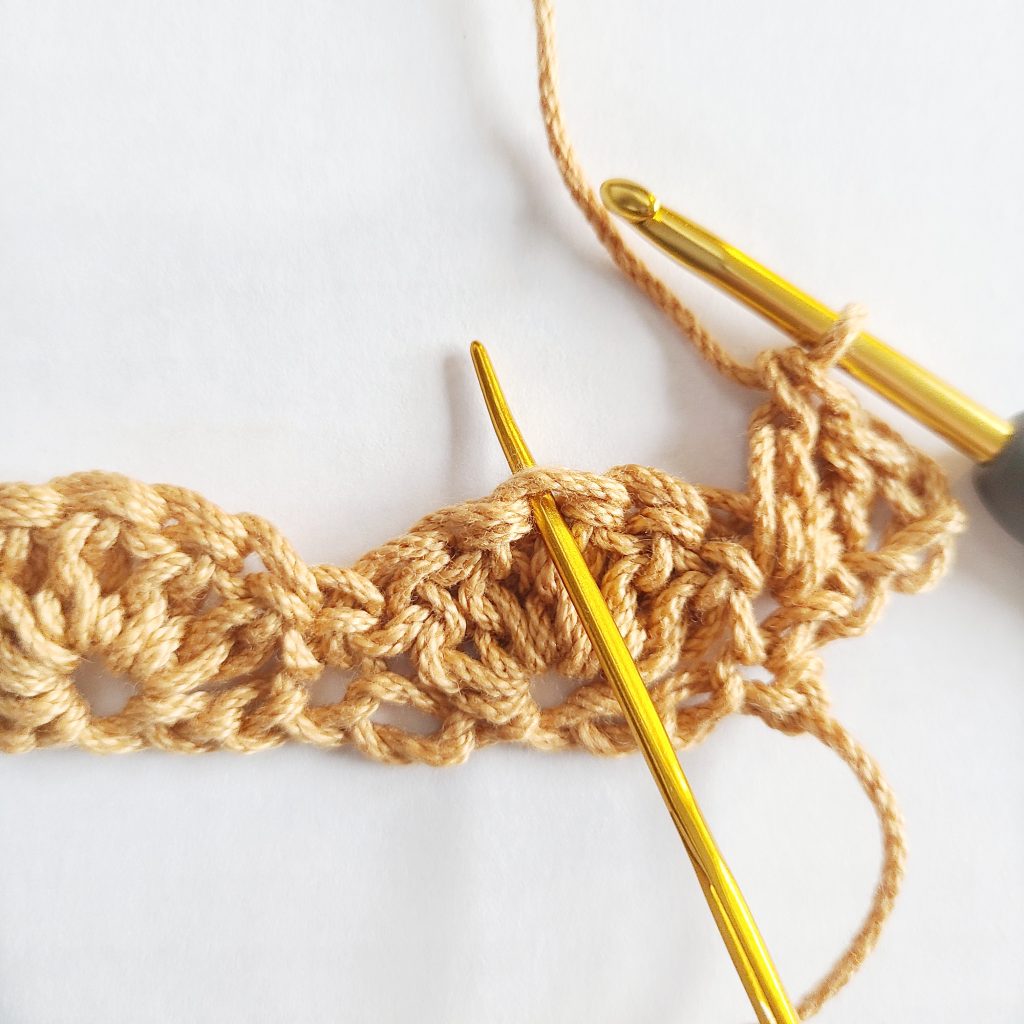
To start Row 3 ch 1 (does NOT count as a st), 1 sc into the first st.
Step 18
Sk the 2 sts, work 5 dcs (shell) into the next st.
Step 19
Sk the 2 sts, work a sc into the next st.

Step 20
Sk the 2 sts, work 5 dcs (shell) into the next st.
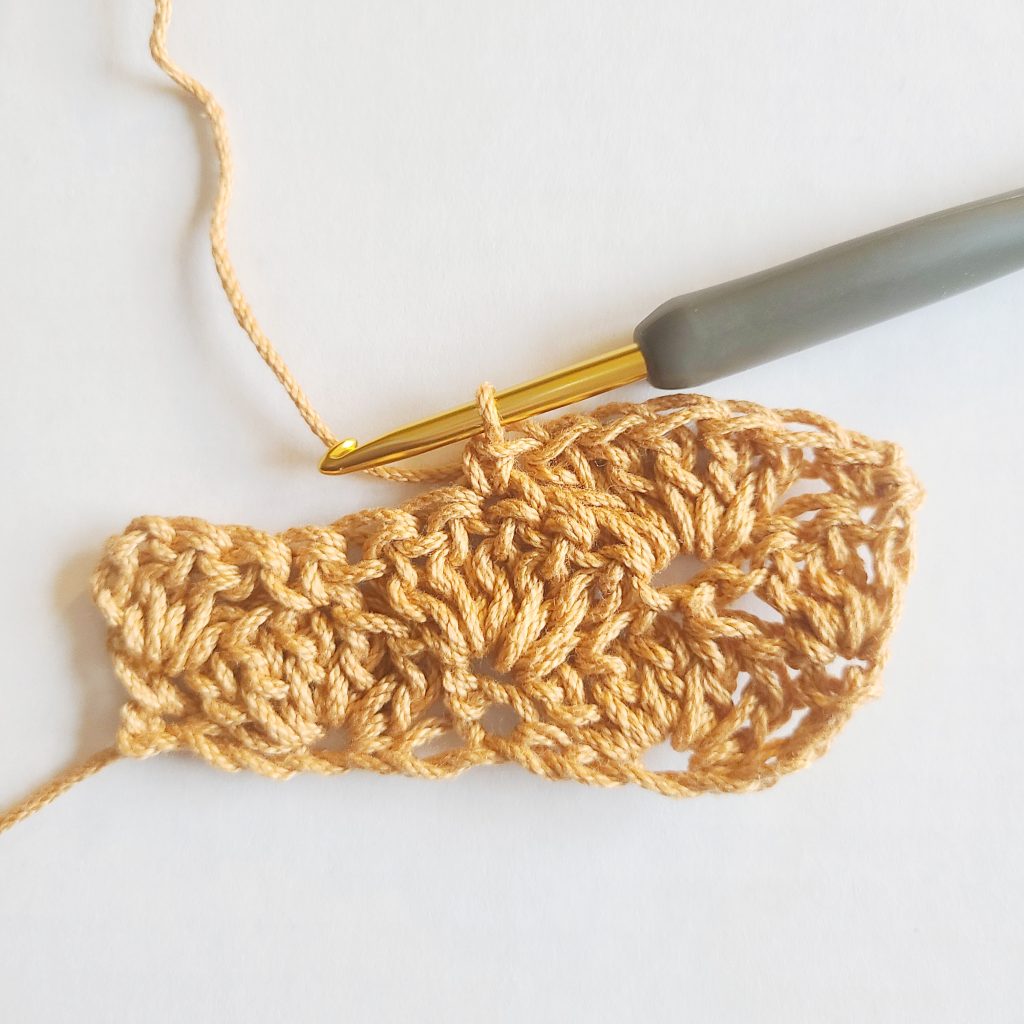
Step 21
Sk the 2 sts, work a sc into the top of the ch 3 from the row before. You are now finished with Row 3!
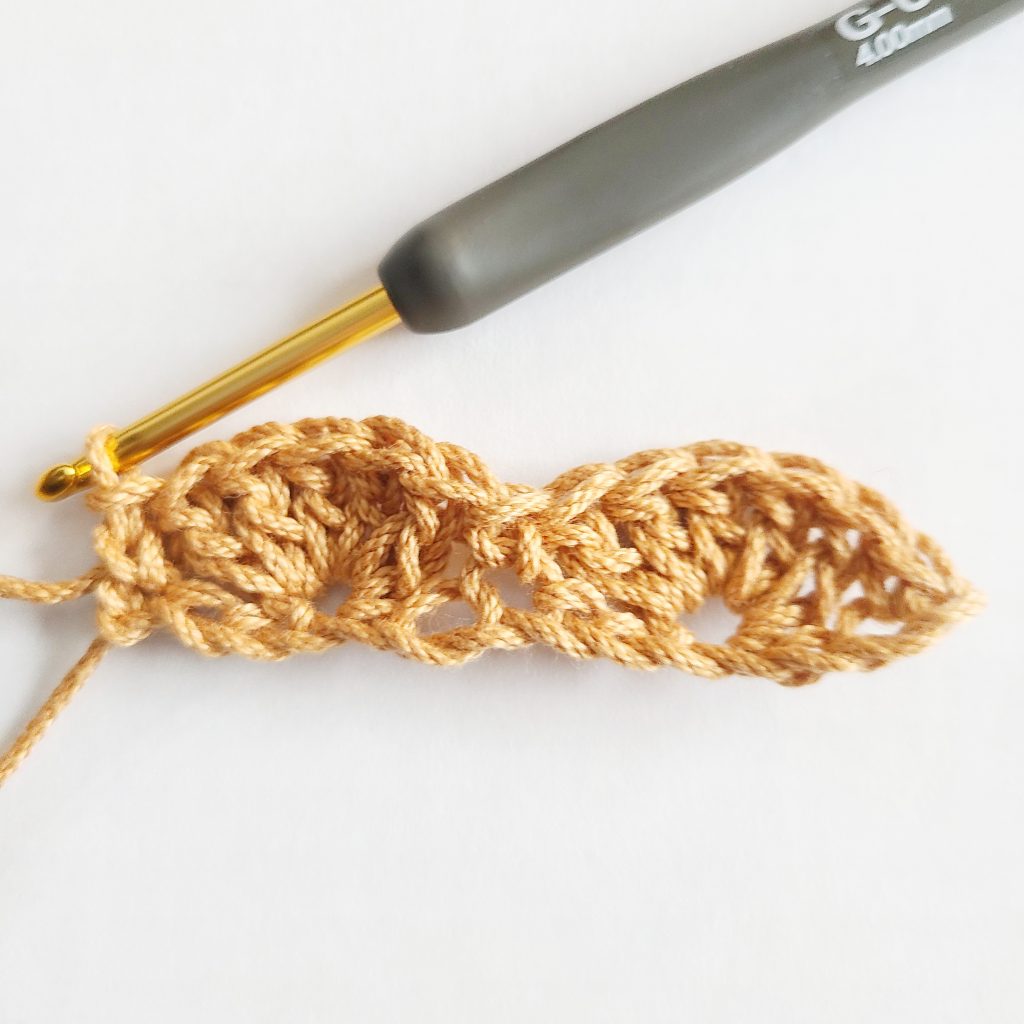
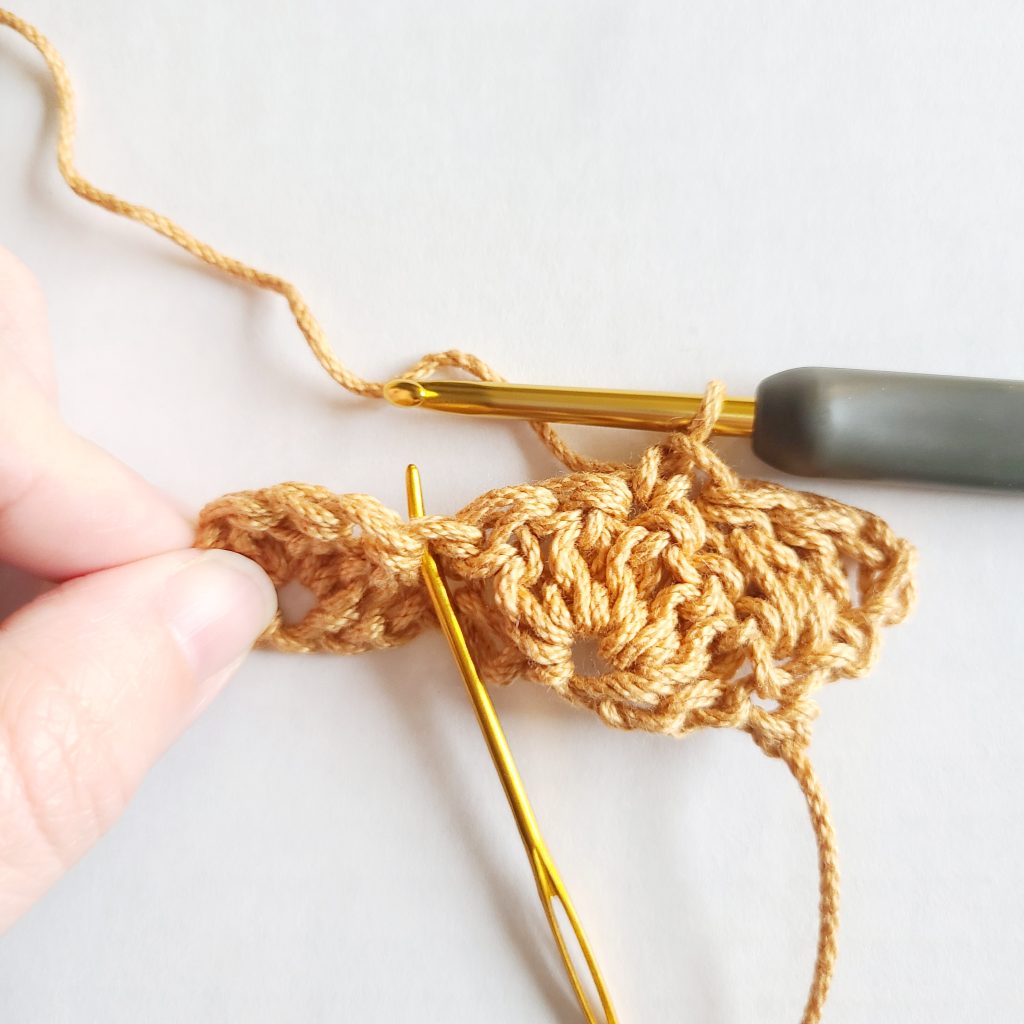
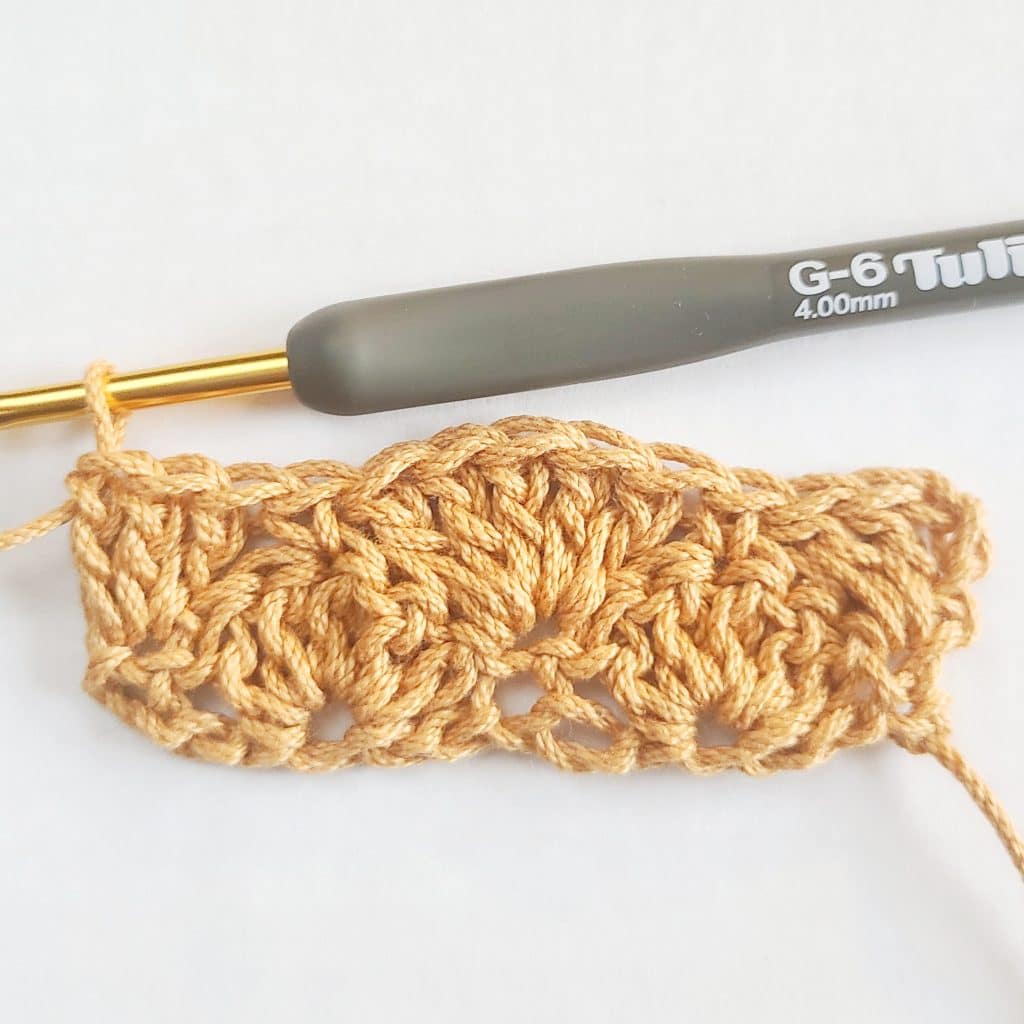
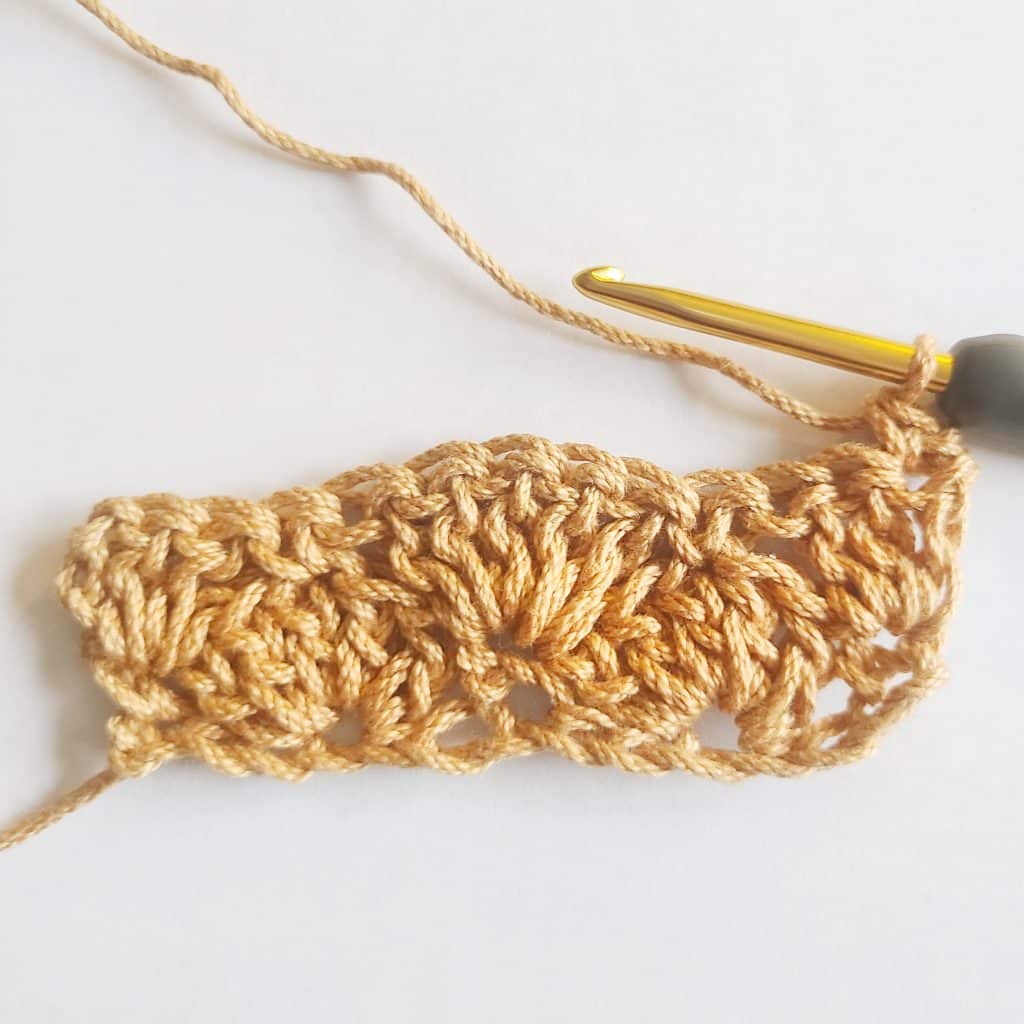
To continue, repeat rows 2 & 3 (steps 9 -21) for the remainder of the pattern.
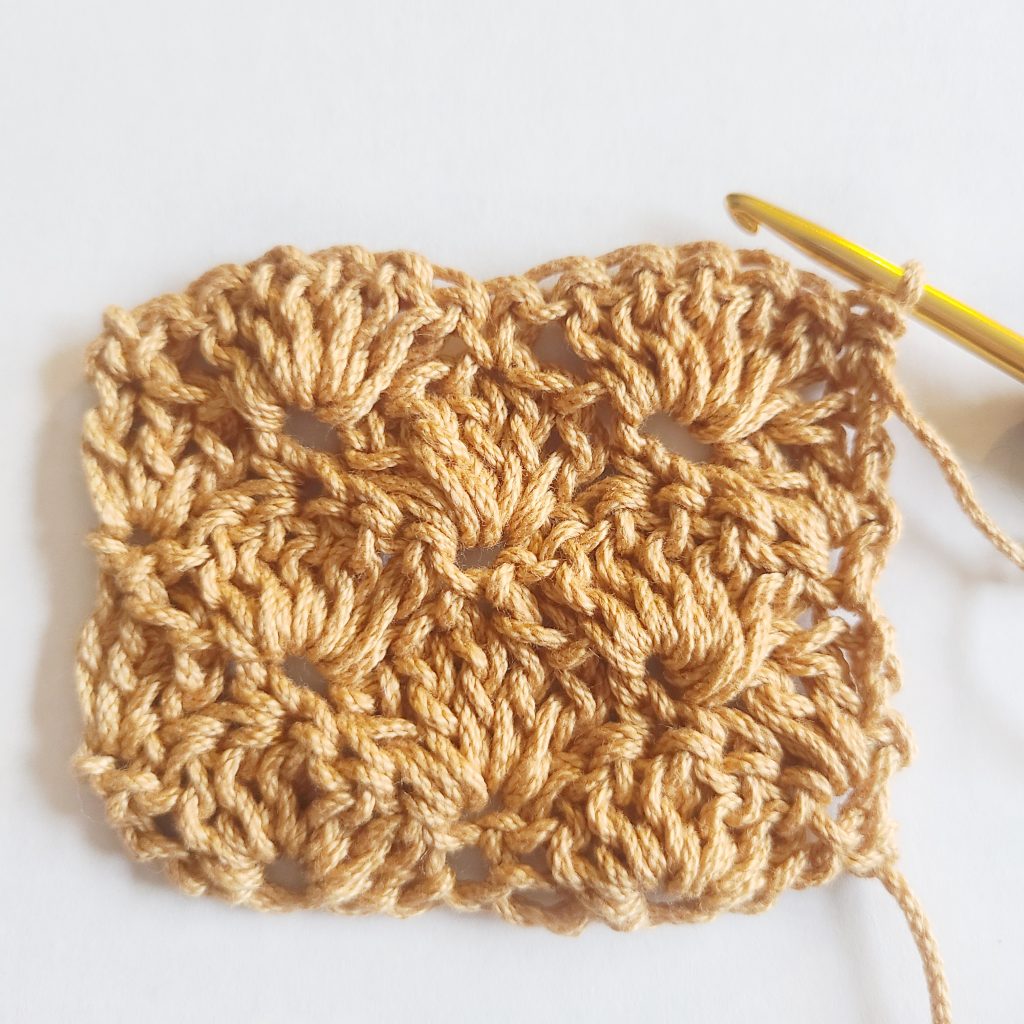
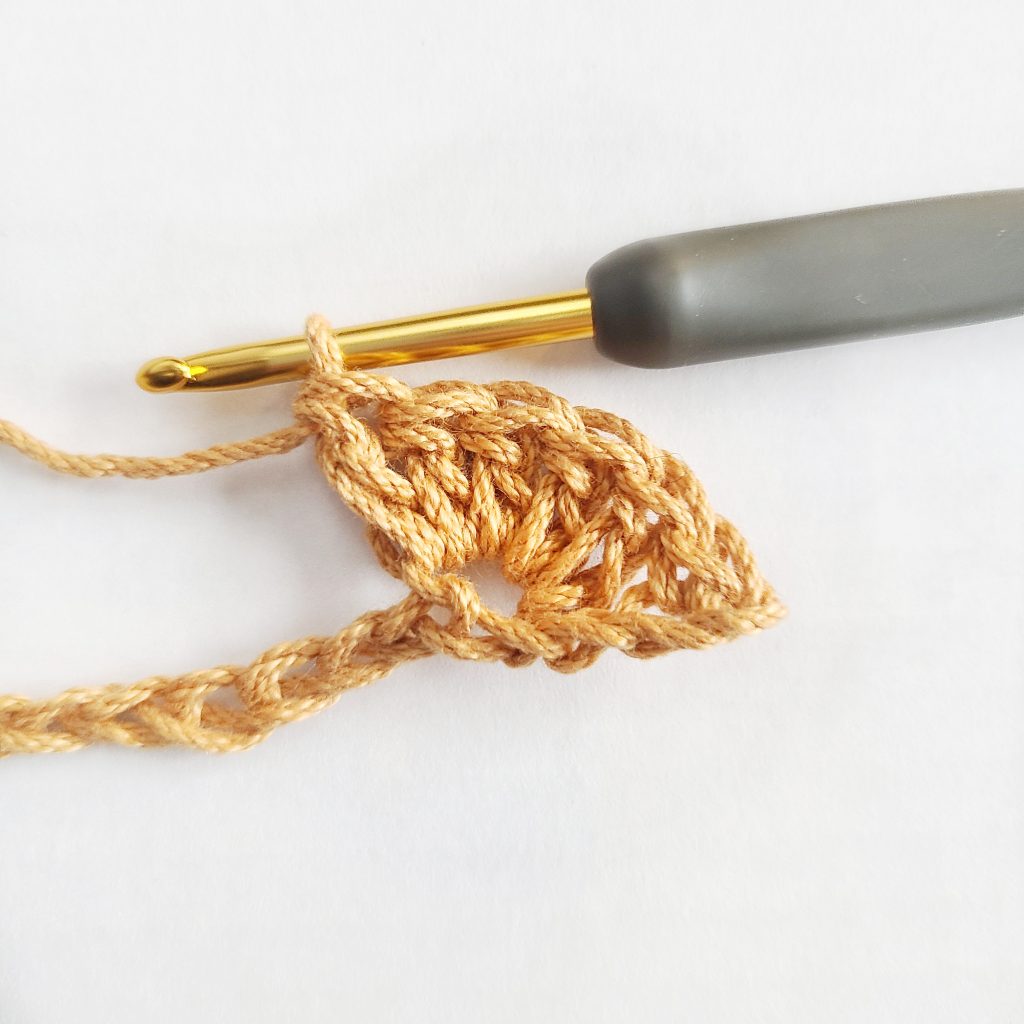
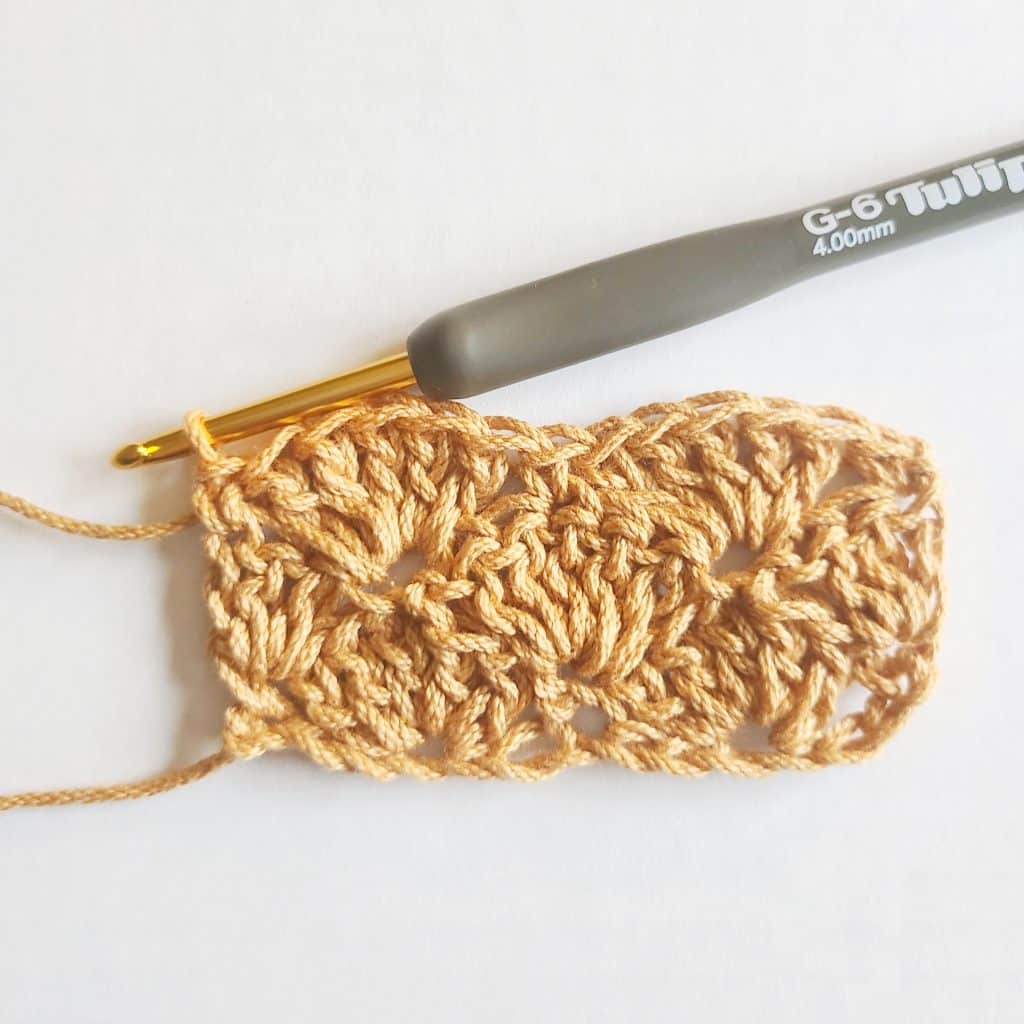
Completed Shell Stitch Rows
To continue, repeat rows 2 & 3 (steps 9 -21) for the remainder of the pattern.
Crochet Patterns Using the Shell Stitch
I included a pattern for a baby blanket using the shell stitch. I also found a few free crochet patterns from other designers you may enjoy that also use this stitch.
- Shell Stitch Rainbow Blanket: Easy Crochet
- Shell Stitch Scarf: Amanda Crochets
- Striped Shell Stitch Baby Blanket: The Stitchin’ Mommy
- Shell Stitch Border: Moogly
Common Questions About the Shell Stitch
What is a Cluster Stitch vs. a Shell Stitch?
A cluster is considered an upside shell stitch because you work individual stitches across and join them together at the top in a cluster that makes a shape that resembles an upside-down shell stitch. A shell stitch is made by working 3 or more stitches into the same space to create a fan or shell.
What is a Half Shell Stitch?
A half shell is what is created at the beginning and end of rows using the shell stitch in projects. These stitches are usually worked with 3 double crochets to give the look of half a shell stitch.
More Free Crochet Stitch Patterns
- Crochet Puff Stitch Tutorial with Photos
- Whip Stitch Crochet Seaming Technique
- Half Double Crochet Slip Stitch (hdc slst) for Beginners
- Single Crochet Increase Tutorial (sc inc)
- Creating Seams Using the Mattress Stitch
Save This Shell Stitch Tutorial to Make Later
Use the images below to save to Pinterest, so you can make the shell stitch whenever you are ready. Furthermore, don’t forget to follow along with Easy Crochet, so you’ll never miss a new free crochet pattern release!