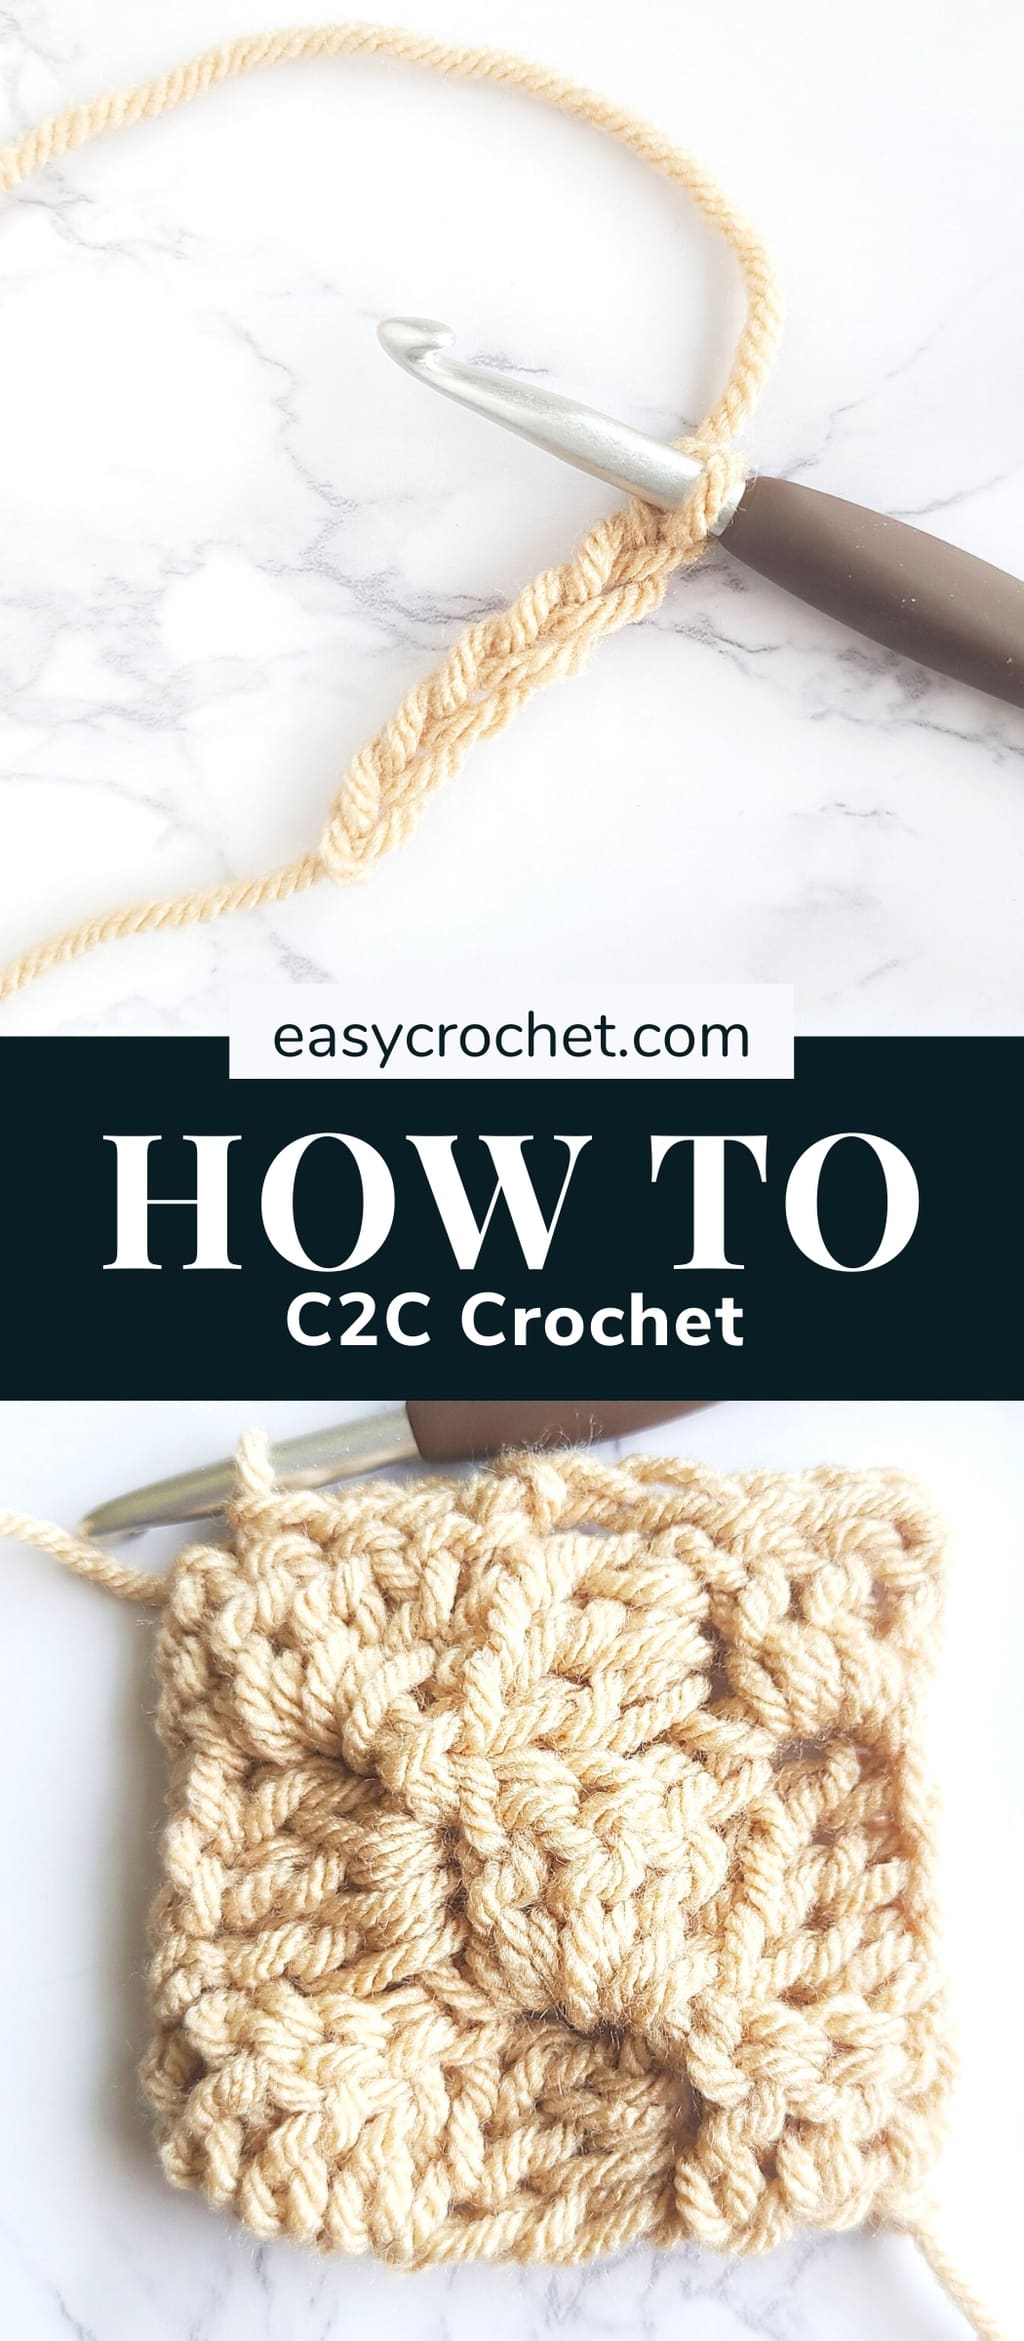
C2C Crochet (Corner to Corner) for Beginners: Video + Photos
If you are looking for a complete beginner corner-to-corner stitch guide, then you’ve come to the right place! In this guide, we’ll show you how to get started with Corner to Corner Crochet (C2C). C2C crochet is a beginner-friendly technique that uses basic crochet stitches to create textured patterns.
You can use C2C to make cozy afghans, colorful scarves, or cute baby blankets, and it’s great for any skill level of crocheter to try.
What’s in this Guide?
In this corner to corner crochet pattern guide, we’ll be walking you through the basics of C2C crochet, step by step.
We’ll cover everything from how to read a C2C graph, to how to change colors, how to increase, how to decrease and even how to weave in ends.
Plus, we’ll be including helpful videos and photos along the way to make the learning about the C2C stitch as easy and enjoyable as possible.
What is Corner-to-Corner Crochet?
Corner-to-corner, abbreviated as C2C is a type of crochet technique that is worked diagonally in blocks made up of three chains and three double crochets that are joined with a slip stitch (sl st).
Essentially, with the corner crochet technique, you create little blocks of squares that connect and are worked from corner to corner.
You can learn more about the C2C crochet stitch with the steps below.
- The blocks of crochet are slip stitched to three – chain spaces from the previous row.
- The increases are made until the width that is wanted is obtained.
- After this, the project is decreased back down.
- To estimate the number of C2C squares your project will need, you can use our C2C Blanket Calculator.
Tip: A C2C crochet pattern’s most prominent feature is a grid of squares or blocks (sometimes they are referred to as “tiles” as well).
This grid will help you identify where you are within the pattern and will let you know if there are any stitch or color changes that are needed.
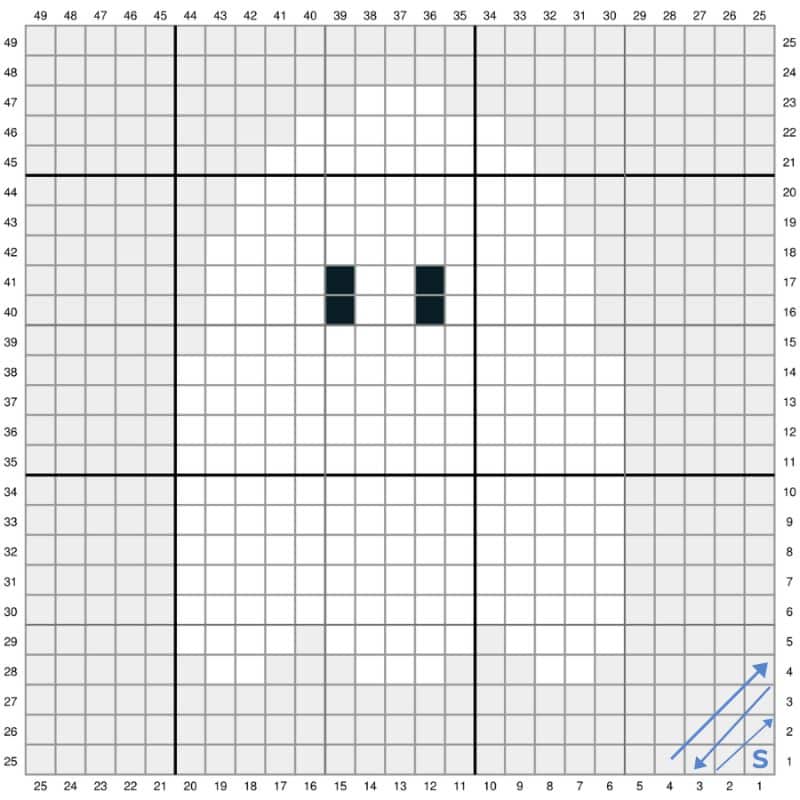
How to Read C2C Grids
These grids are commonly worked from the bottom-right corner to the top-left corner.
- Begin the first c2c tile in the lower right-hand corner of the graph, as indicated by the
numbers on the graph. - Working rows diagonally back and forth until the graph is completed.
C2C crochet patterns use grids this way because they are trying to create a specific image or shape in the middle of the pattern.
C2C graphs have numbers on all four sides of the grid. These numbers help you count the stitches and keep track of where you are within the pattern.
Keep in mind, knowing how to read c2c patterns is important and will make it easier to crochet blankets with images, scarves and more.
Creating Your own C2C Grid
The C2C grids are not created manually. While there are a handful of tools that take care of the hard work for the designer, our preferred one is StitchFiddle.
Stitch Fiddle accepts in an uploaded image and allows you to adjust its size and granularity.
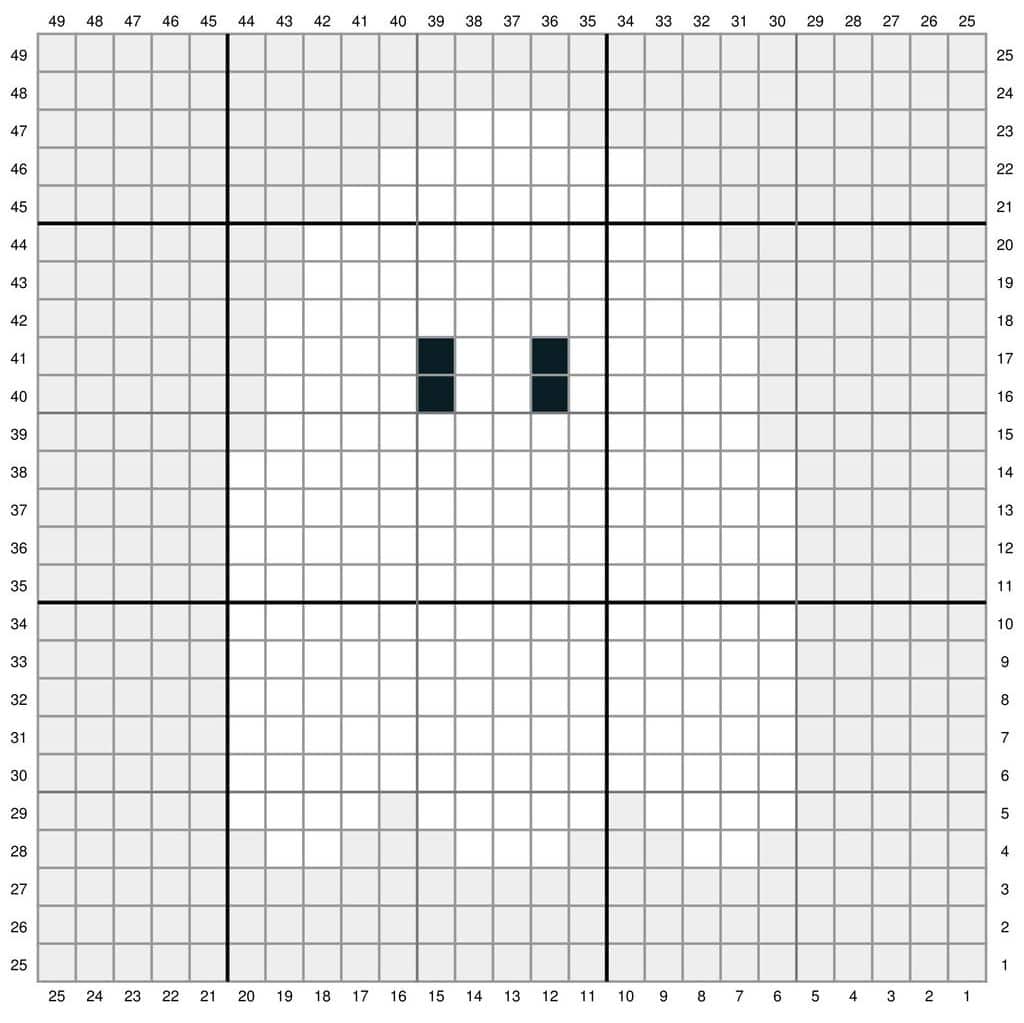
Note: The output of Stitch Fiddle is a grid like you see in the example grid above.
What Stitches are Used in Corner-to-Corner (C2C) Crochet Patterns?

The most common stitch used in C2C is the double crochet stitch. Occasionally, a C2C crochet pattern will be worked up with half double crochets too.
These are both basic stitches that are easy to learn and fast to work up. Learn more about each stitch below.
Half Double Crochet (hdc):
- Yo (yarn over) insert hook from front to back of the designated stitch, YO the hook and pick up a loop.
- Yo the hook and pull back through all three loops on the hook.
Double Crochet (dc):
- Wrap the yarn over (YO) the hook, insert the hook into the specified st.
- Yo the hook again, draw the yarn through the st, so there are 3 loops on the hook
- Yo the hook again draw it through 2 loops, so there are 2 loops on the hook
- Yo the hook, draw it through the final 2 loops.
Chain Stitch (ch):
A simple crochet stitch that often forms the foundation of what crochet stitches are worked into during projects.
- Make a slip knot.
- Insert hook into slip knot point first, bring yarn over the shaft of the hook from back to front and grab it with the throat of the hook.
- Draw hooked yarn through slip knot and onto the hook. This movement will make one chain stitch
- Repeat steps two and three until you have the desired number of stitches for a pattern. One loop will remain on the hook.
Slip Stitch (sl st):
A slip stitch (abbreviated as “sl st”) is a basic crochet stitch used to join a new yarn color, close a round, or join together squares in c2c.
- Insert hook into designated stitch
- Yo (yarn over) and pull back through the st and through the loop on the hook.
Note: More often than not, though, you will see most C2C patterns crocheted with double crochets because it works up faster.
If you are going for a more elaborate design in your corner to corner project then half double crochet can be used because the blocks are smaller, and it allows for details to show.
Common Corner-to-Corner (C2C) Questions and FAQ’s
Here are some common questions that you may have learning how to c2c crochet and working on a c2c project. If you have one that I didn’t cover, please let me know, so I can help you the best I can.
How Do I Change Colors in Corner-to-Corner Crochet?
To change colors in C2C crochet, you finish the last stitch of a row with the new color. It is a good idea to have a section of yarn in a twist or ball separate from the skein if the pattern calls for a change of color.
Separating it will make color changes much easier and less tangled. If needed, you can carry different color yarn strands over the multiple blocks and the yarn will be hidden by crocheting over the strands.
Steps to Change Color in C2C
- Finish the block of color you are working.
- Drop the yarn and pick up the new yarn color with your hook.
- Pull the new yarn through.
How Do I Keep Track of Squares and Diagonal Rows in my C2C Project?
To keep track of the diagonal row in your C2C stitch pattern, you will want to have the graph of the project you are working on in front of you as well as the written pattern. This way, it will make it easier to mark off each square as you crochet it.
You may also find that a stitch marker is great to help keep track of the number of squares as well as the beginning of each row too.
What Yarn is Best for C2C Crochet?
When it comes to choosing yarn for corner-to-corner (C2C) crochet, there are a few factors to consider such as fiber content, weight, and texture.
For corner-to-corner crochet, acrylic yarn is a good choice because it’s easy to use, affordable, and comes in many colors. However, some people prefer natural fibers like cotton or wool.
As for picking a yarn weight, a medium weight yarn (worsted weight) works well, but you can use a lighter or heavier weight yarn depending on the project.
Ultimately, the best yarn depends on your personal preference and project needs.
What Projects are Best for C2C / Corner to Corner Patterns?
Patterns that are square or rectangular work best, such as a crochet blanket, wraps, and pillow covers.
Below are a few of my favorite C2C crochet patterns I found online. Plus, as a bonus, they are all free crochet pattern too! I hope you enjoy these free patterns.
- Corner to Corner Heart Blanket – This corner to corner crochet blanket features a heart in the center, is the perfect size for a crochet blanket for a baby. Plus, it is simple to make.
- Halloween Ghost C2C Square Free Pattern – Easy Crochet
- Widcombe C2C Hat – HanJan Crochet
How do you Crochet a Border in C2C?
To crochet a border on a corner-to-corner (C2C) project, follow these simpler steps:
- Choose your border yarn and hook. You can use the same yarn and hook you used for the C2C project, or switch to a different yarn weight or color for contrast.
- Starting in any corner of your project, attach your border yarn with a slip stitch, ch 1.
- Work single crochet (sc) stitches evenly around the edge of your project, working 2 or 3 sc stitches in each corner stitch to turn the corners.
- When you reach the starting corner, slip stitch to the first sc stitch to join the round, ch 2.
- Work a row of half double crochet (hdc) stitches in the next round, making sure to work 2 or 3 hdc stitches in each corner stitch.
- For the final round, work a decorative edging such as a picot or crab stitch.
- Fasten off your yarn and weave in the ends.
The border you choose will depend on your personal preference and the style of your project. You can experiment with different stitch patterns, edgings, and colors to create a border that complements your C2C project.
How do you Avoid Gaps in c2c Crochet?
Gaps or overly large holes in a corner-to-corner (C2C) crochet project can occur when the tension of the yarn is inconsistent, or when the stitches are not worked tightly enough.
To avoid gaps in a C2C crochet project, here are some tips:
- Make sure your tension is consistent throughout your project. This means that each stitch should be the same size and tension as the previous stitch.
- When working the last stitch of each block or row, make sure to work it tightly to prevent gaps from forming between the blocks or rows.
- Use a smaller hook size than you would normally use for the yarn you are using. This can help to make your stitches tighter and prevent gaps from forming.
- Work with a thicker yarn. Thicker yarn can help to fill in any gaps and make the project more solid.
- Practice your tension on a small swatch before starting your project. This can help you to identify any tension issues before you start the main project.
- Use blocking to help even out the tension and eliminate any gaps. Wet blocking and steam blocking are two popular methods for blocking C2C crochet projects.
By following these tips, you can be sure that your C2C crochet project is free from gaps and has a clean finished look.
Can I Crochet a C2C Rectangle?
Yes! The traditional corner to corner pattern is used to work up a corner to corner rectangle until one side reaches the width of the shortest side you want your rectangle to be. Learn how to make a c2c rectangle.
What is the Advantage of C2C Crochet?
- It’s easy to learn: C2C crochet is a relatively simple technique that can be learned quickly, even by beginners. Once you understand the basic concept of increasing and decreasing along a diagonal, you can create a variety of patterns and designs.
- It’s versatile: C2C crochet can be used to create a wide range of projects, from blankets and afghans to scarves, bags, and more. You can also use C2C crochet to create images or patterns by changing yarn colors.
- It’s customizable: C2C crochet is easy to customize to suit your preferences. You can change the size of your project by adjusting the number of rows you work, or you can change the stitch pattern to create different textures.
- It’s fun: C2C crochet can be a fun and relaxing way to pass the time while creating something beautiful. It’s also a great way to use up yarn scraps and experiment with different color combinations to make unique crochet blankets, afghans and more!
Ready to learn how to Corner to Corner Crochet? If so, scroll on down to follow along with our step-by-step photo tutorial! Enjoy and happy crocheting!
Basic C2C Crochet Pattern
The pattern tutorial below will show you how to corner-to-corner crochet with the double crochet stitch. You will also find a video tutorial after the photo tutorial for extra help.
Skill Level: Intermediate
Materials
- Yarn (any weight) I used a #4 weight yarn
- Crochet hook size that corresponds to the yarn you are using. I used J-6 mm crochet hook.
- Scissors

Notes
- This pattern is written in standard US Terms.
Increasing a Corner-to-Corner (C2C) Crochet Project
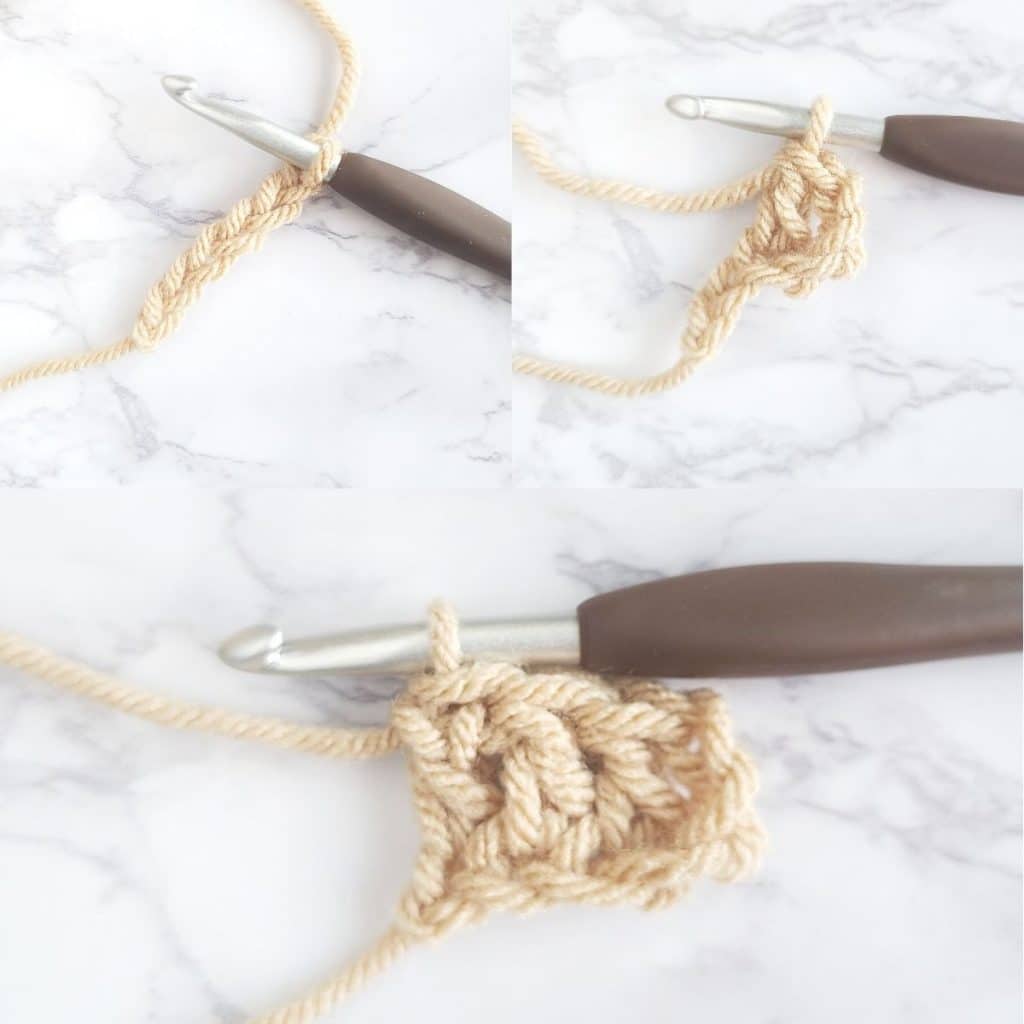
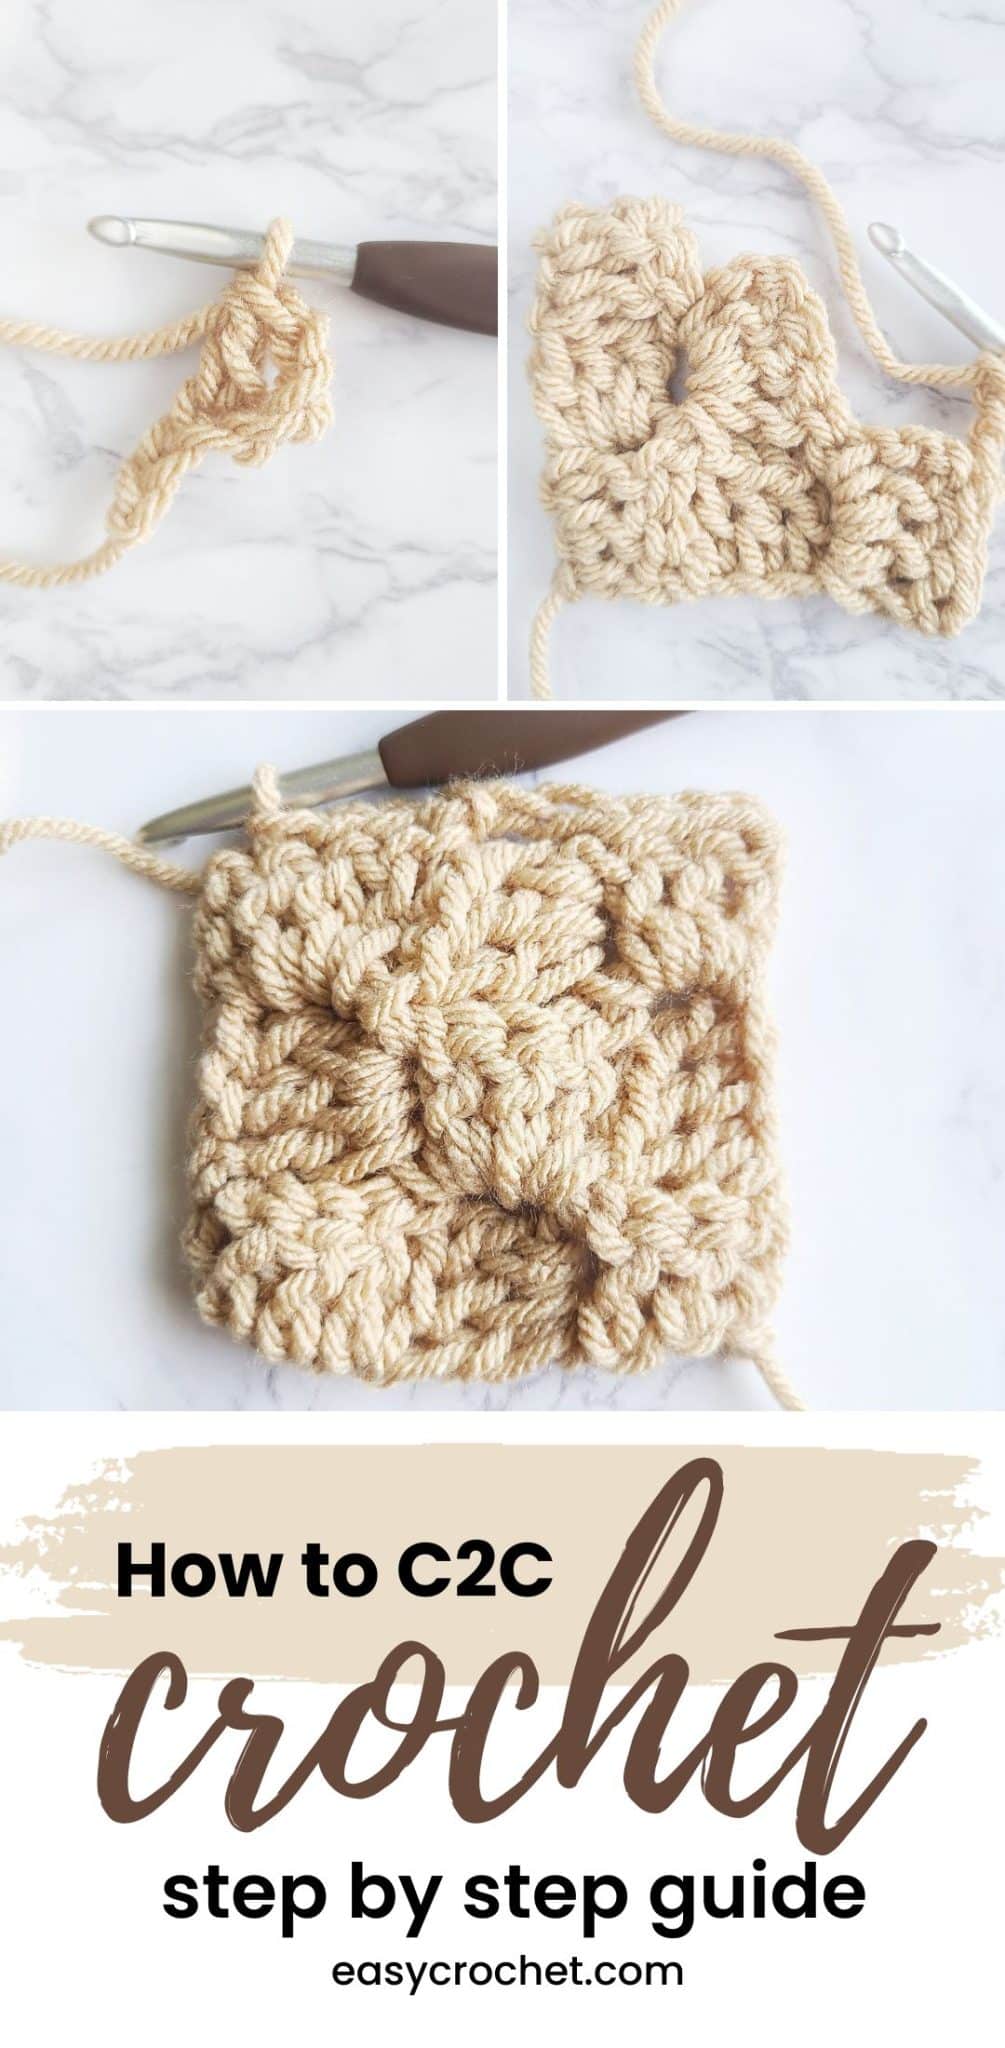
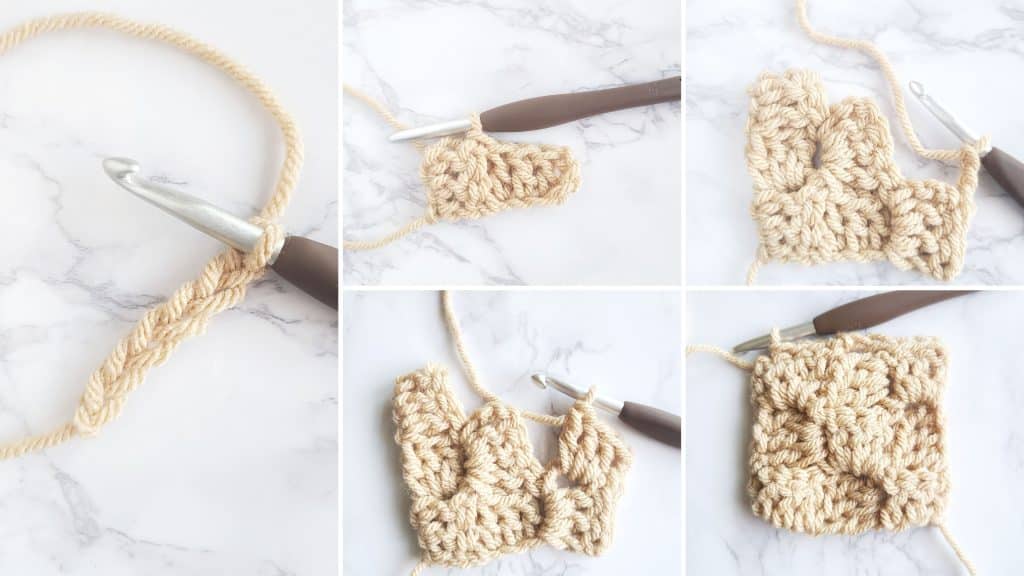
Step 1
Crochet six chain stitches. Work one double crochet in the fourth (4th) chain from the hook. Work one double crochet into each of the two remaining chains. You have finished one block and the first row of your C2C project!
Step 2
Turn the block to start row two. Chain six.
Step 3
Double crochet in the fourth chain from the hook. Work one double crochet into each of the two remaining chains.
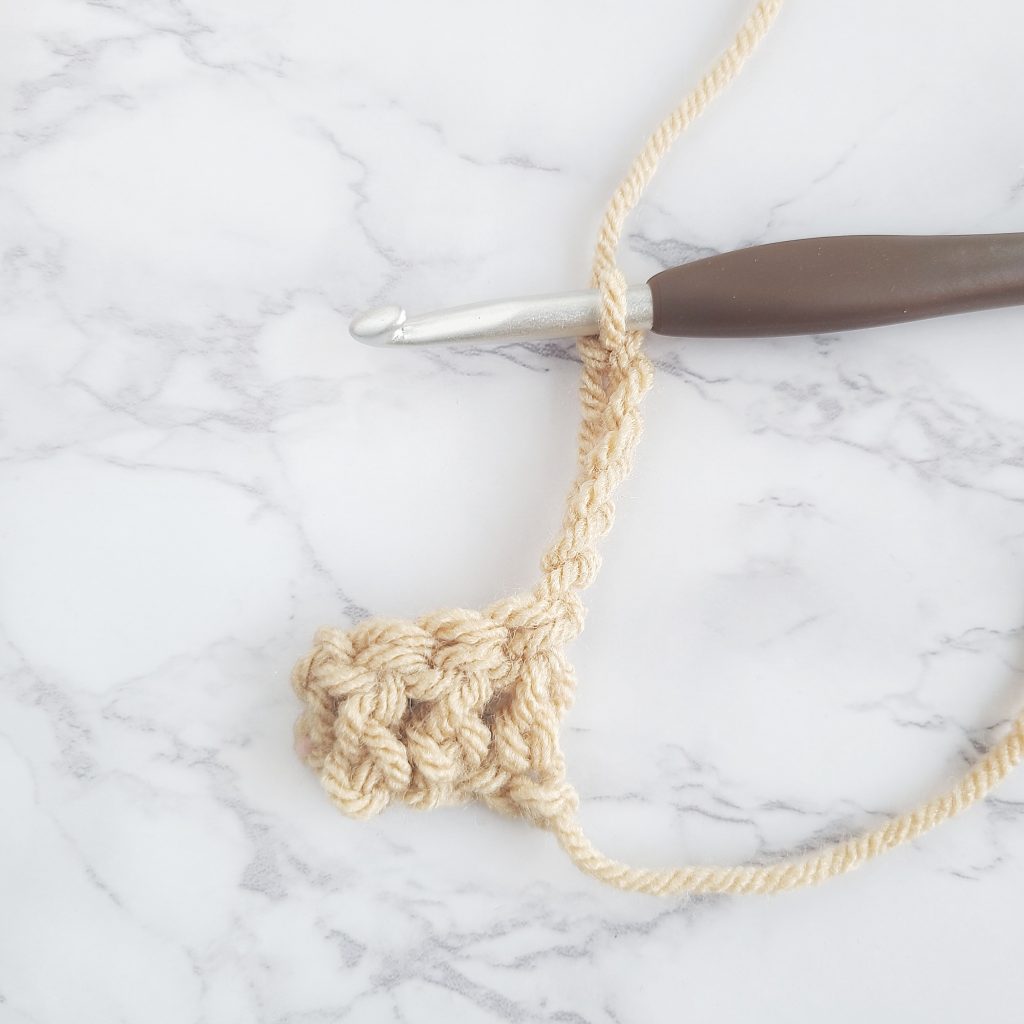
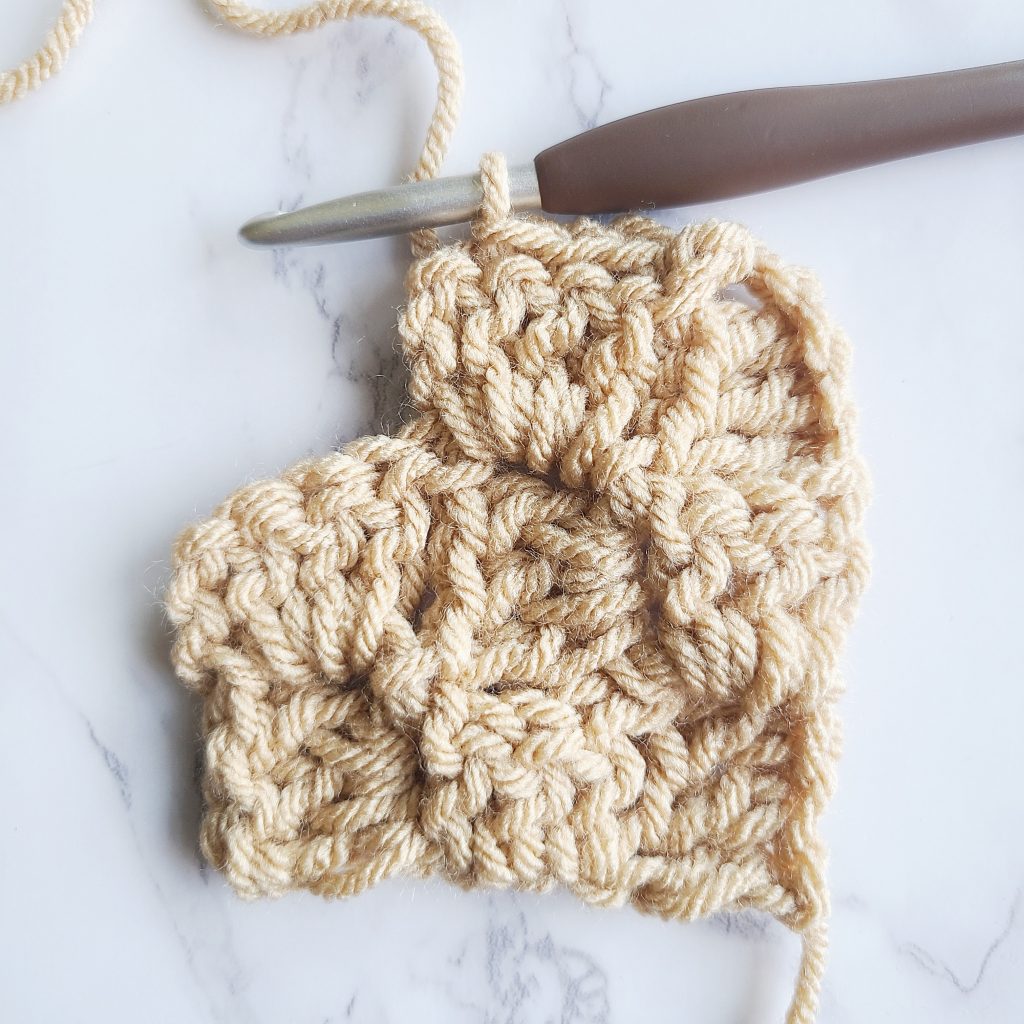
Step 4
Skip the next three double crochets from row 1 and slip stitch into the chain 3 space from the first row.
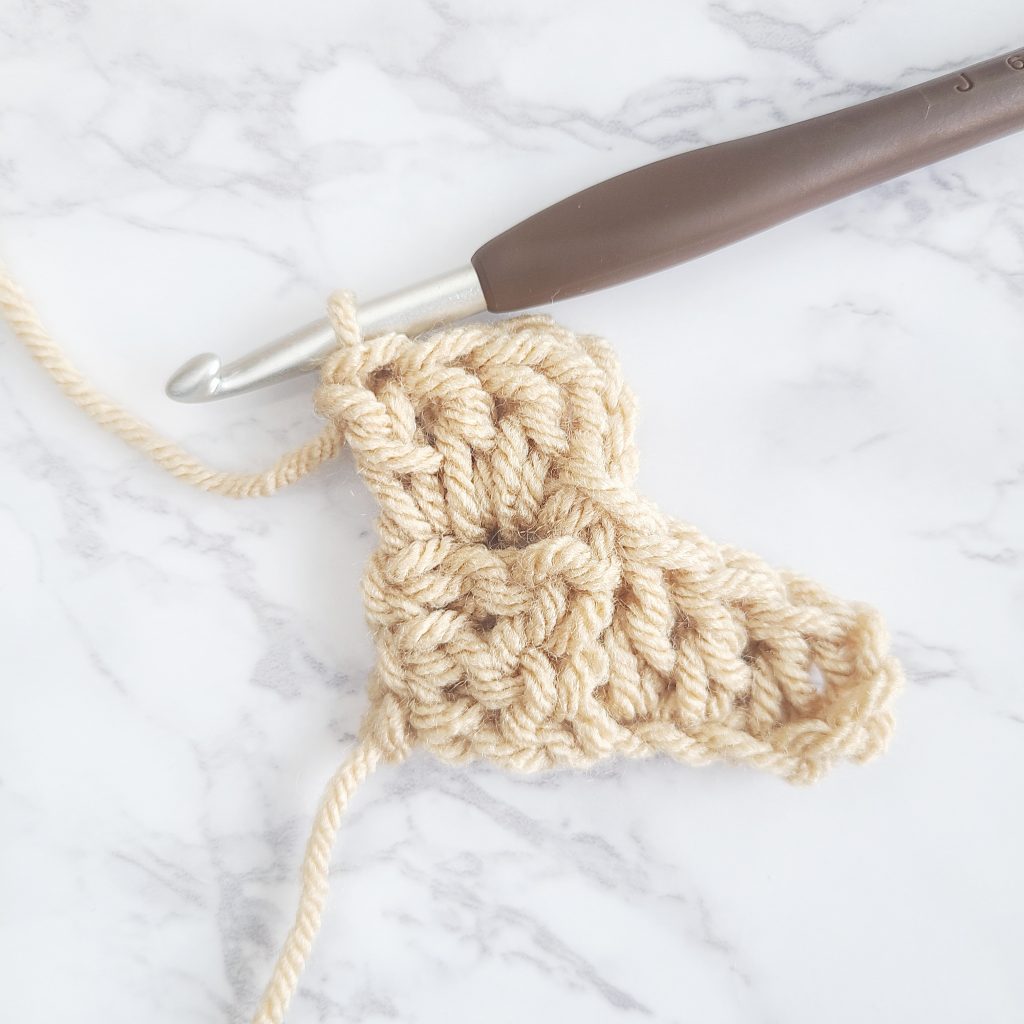
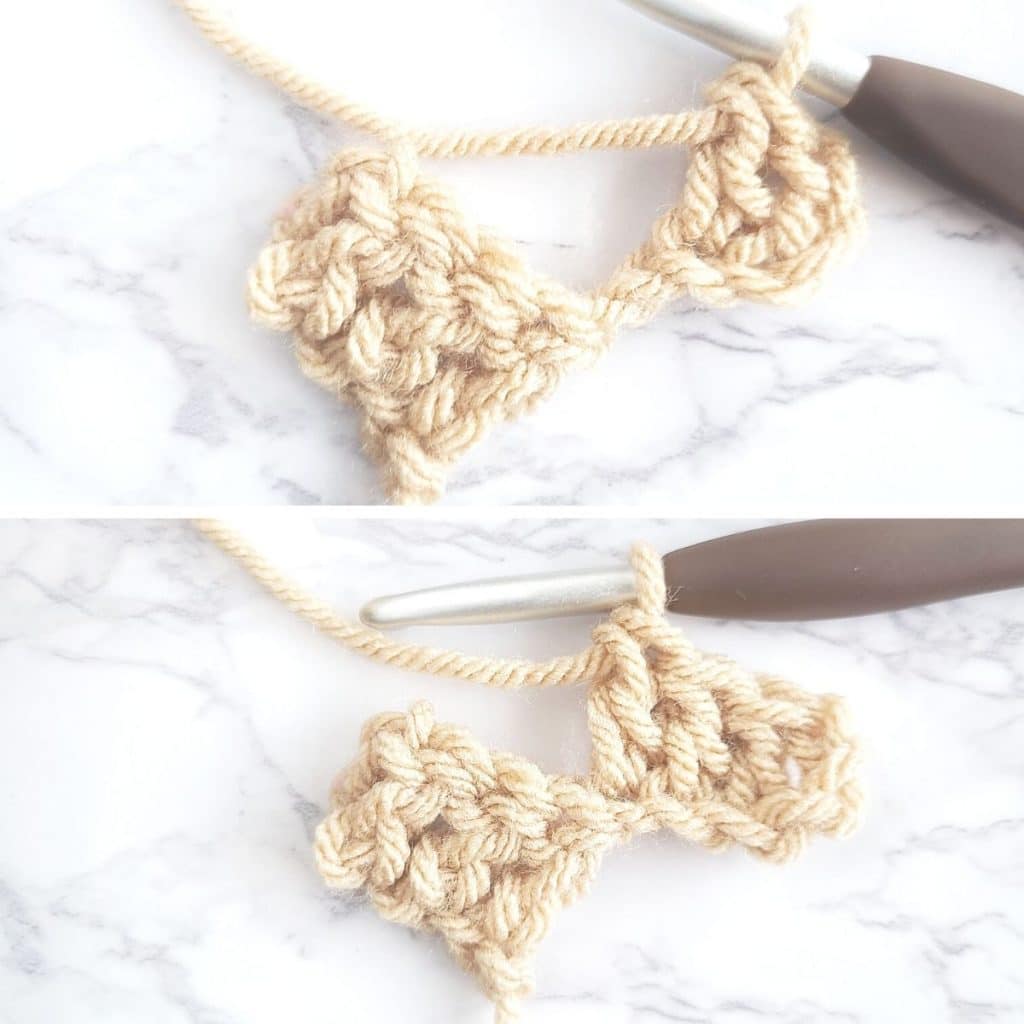
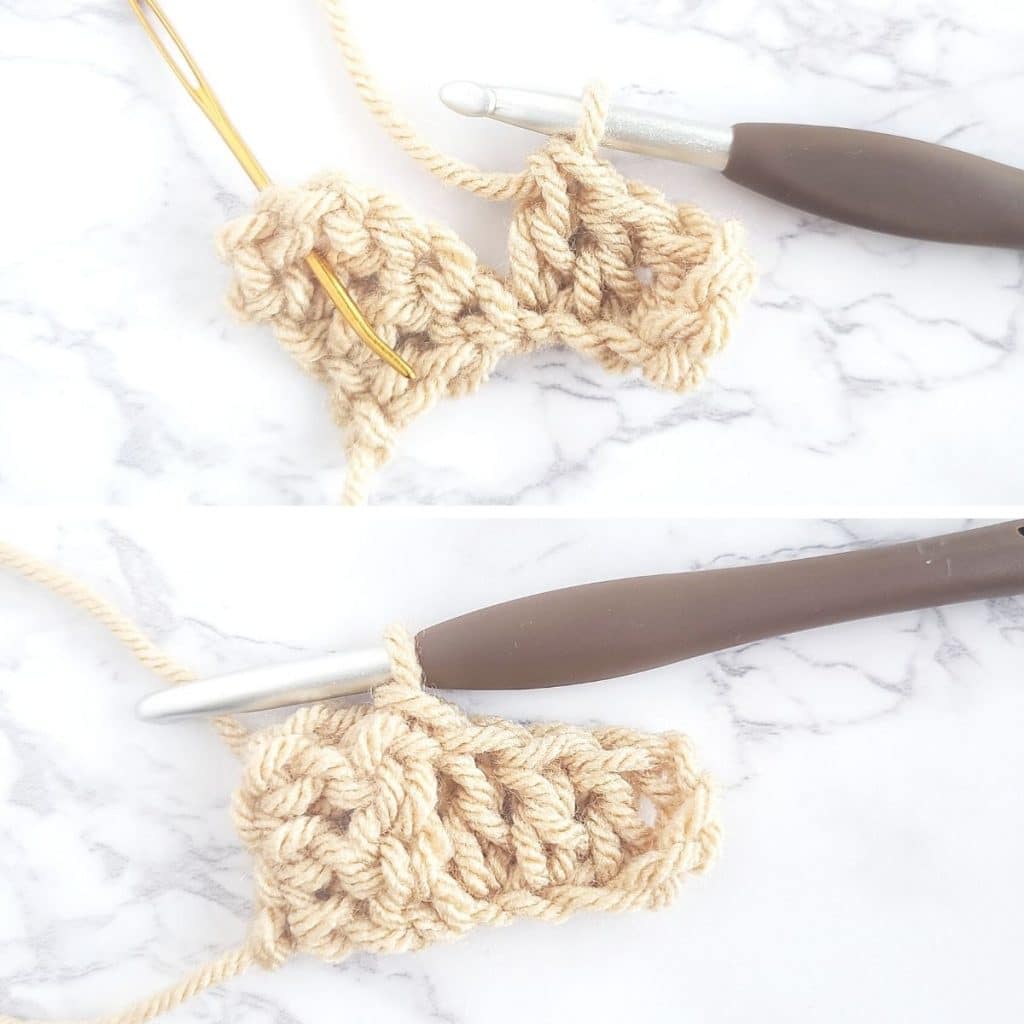
Step 5
Ch 3, next work into the chain 3 space and double crochet three times.
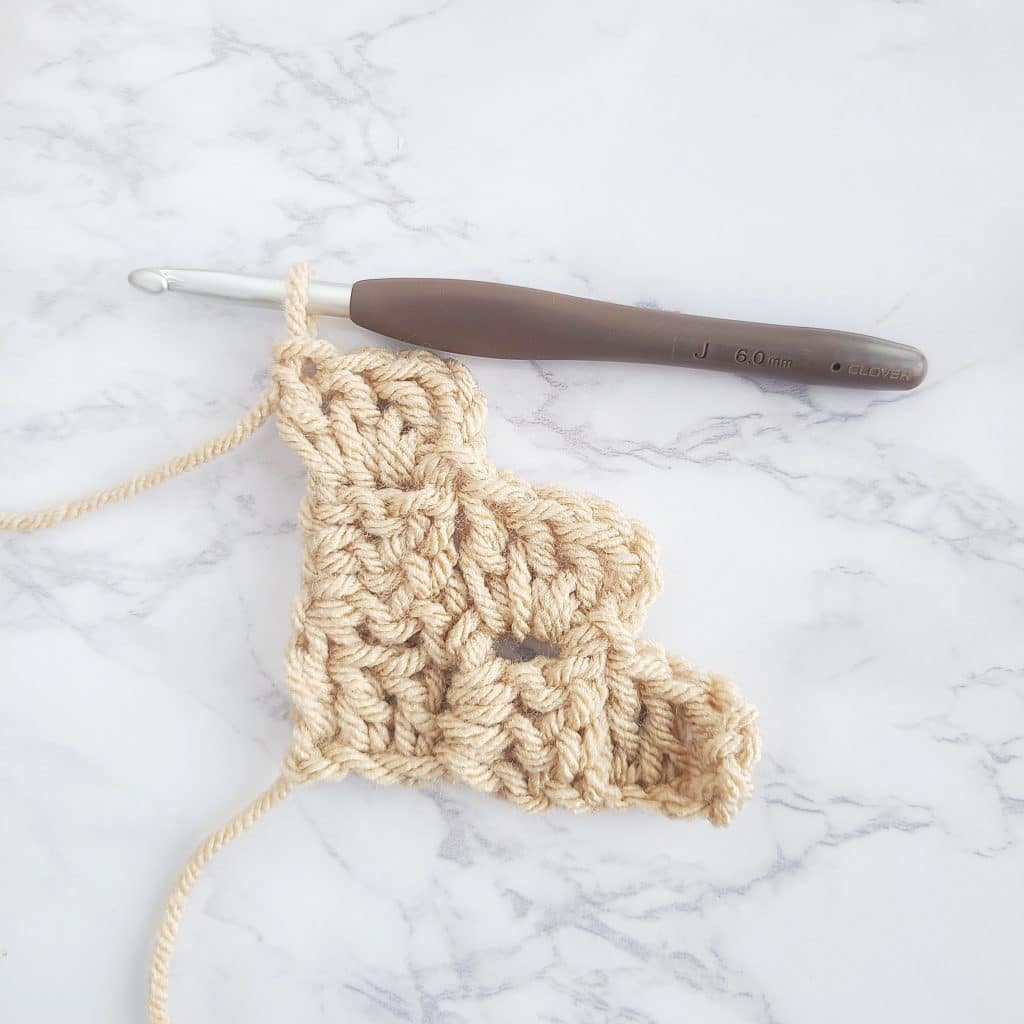
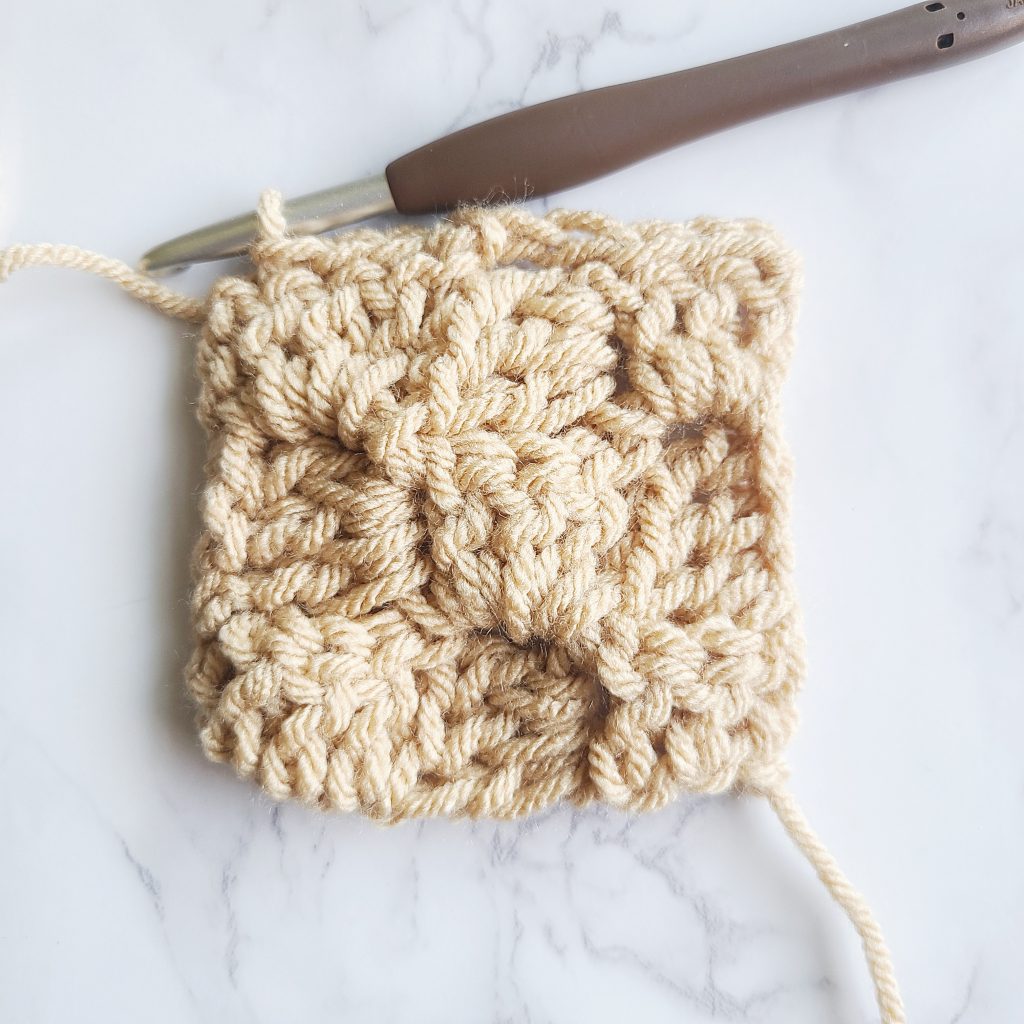
Step 6
Repeat step 2 when starting a new increase row, followed by steps 3 and 4 across the row to the end.
Decreasing a Corner-to-Corner (C2C) Crochet Project
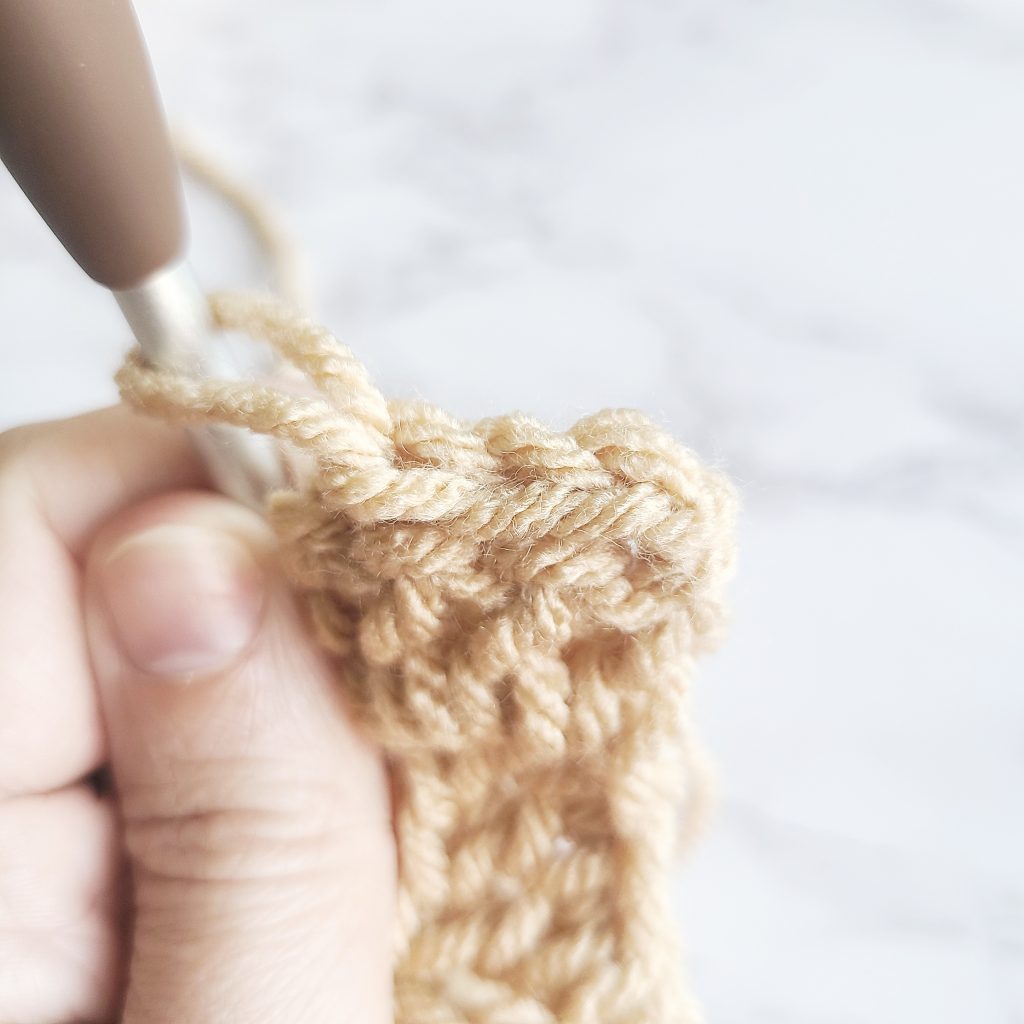
Step 1
When the pattern states to start a decrease (or decrease row) slip stitch across the three double crochet stitches that were just worked. This is usually the halfway point of the project.
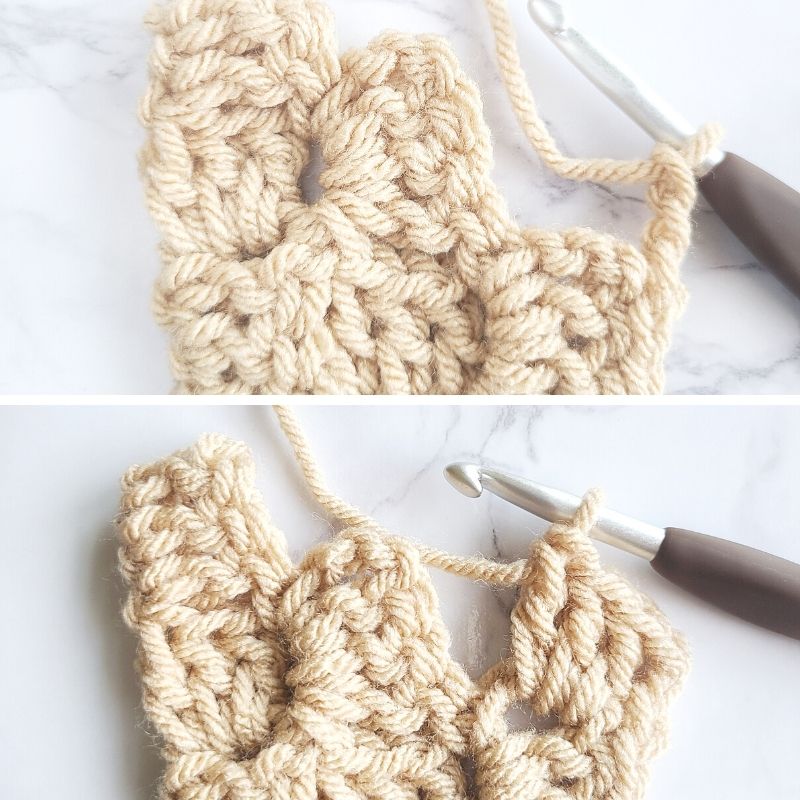
Step 2
Next, work 3 chain stitches, make three double crochet stitches in the chain space. Repeat steps 3 & 4 from the increase section across the row.
Step 3
At the end of the row, make a slip stitch into the last third chain space without making a block. Turn the work and slip stitch along the three double crochet stitches to start the next row.
Step 4
Finish with 3 slip stitches along the top of the last 3 double crochets of the last block, and you are done!
Corner to Corner Video Tutorial
Use the c2c video tutorial below to learn how to corner-corner crochet easy!
Thank you for the detailed instructions I’m a beginner to crochet and feellike i can do this c2c pattern
You are very welcome, Lorena!
Happy Crocheting!
Krista
Love the c2 c instructions. I am an experienced crocheter. Your instructions are the absolute easiest to understand. Thank you so much. I am a knitter but love crocheting baby blankets for charity.
Thank you so much, Anne, for your kind words and for taking the time to comment. 🙂
Happy Crocheting!
Krista
Hi. Love your descriptions. Very easy to follow! There appears to be a calculations error with your v2v calculator. For a baby blanket with my guage of 1.5cm x 1.5cm it gives me a result that will see my blanket with a 5.6m width! 🙂 I tried playing around with 2cm and the result is also completely wrong
Thanks for the heads-up on that! I have no idea how my calculations were so off. It’s been fixed now!