How to Count Rows When Knitting
When you first start knitting, it can be difficult to keep track of how many rows you have completed. This is especially true if your pattern is complex or if you are working on a large project.
If you’re a beginner knitter, you may be wondering how to count rows in knitting. Well, this article will definitely answer that for you!\
Two Easy Ways to Count Rows
There are two easy methods available to generically count the number of rows in your knitting project. The first involves the use of a knitting needle, and the other uses a specific tool called a row counter.
Counting Rows in Knitting with a Needle
To count rows in knitting, simply count the number of times the needle goes into the fabric. One row is complete when the needle has gone into the fabric and comes back out again.
If you’re using a pattern, it will likely tell you how many rows to knit for each section. For example, if the pattern says to knit 10 rows, that means you’ll need to repeat the process 10 times.
Once you get the hang of it, counting rows in knitting is easy! Just keep track of how many times the needle goes into the fabric, and you’ll be able to figure out how many rows you’ve completed.
Counting Rows in Knitting with a Row Counter

The second way to keep track of your rows is by using a row counter. This is a small device that attaches to your knitting needle and counts each row as you complete it. Row counters are very helpful, but they can be easy to lose track of.
Counting Rows Specific to the Stitch Being Used
Depending on the type of knitting stitch you are using, you’ll need to count your rows a little differently for each. Here, we describe how to do it with the five most common knit stitches.
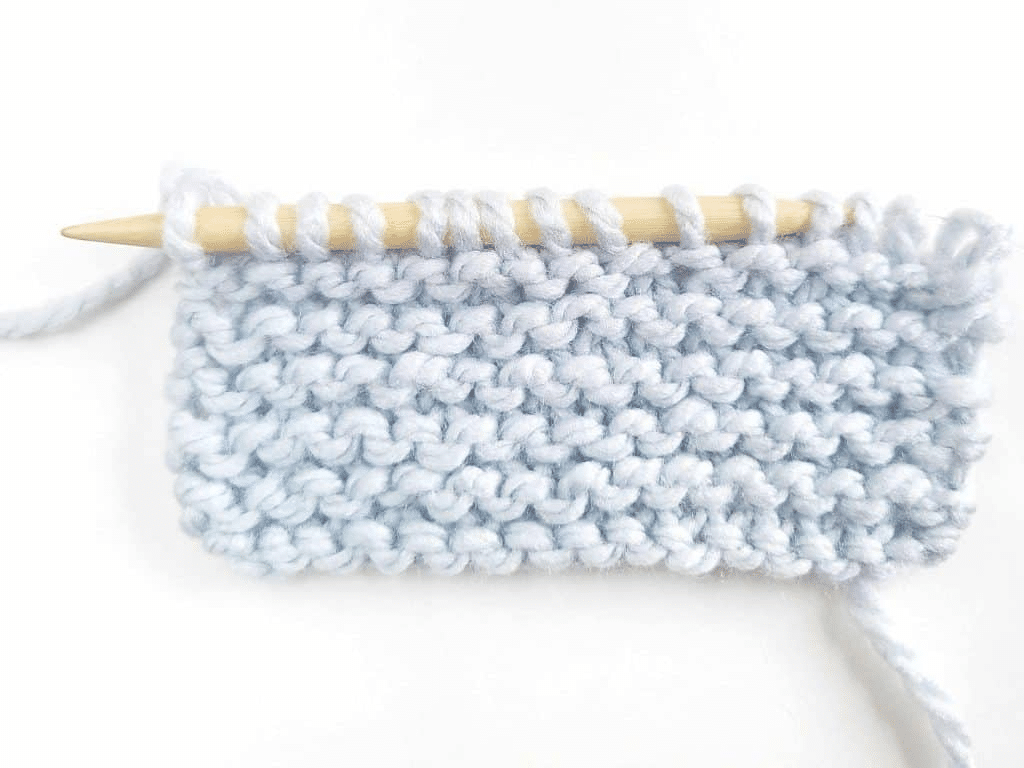
1. Garter Stitch
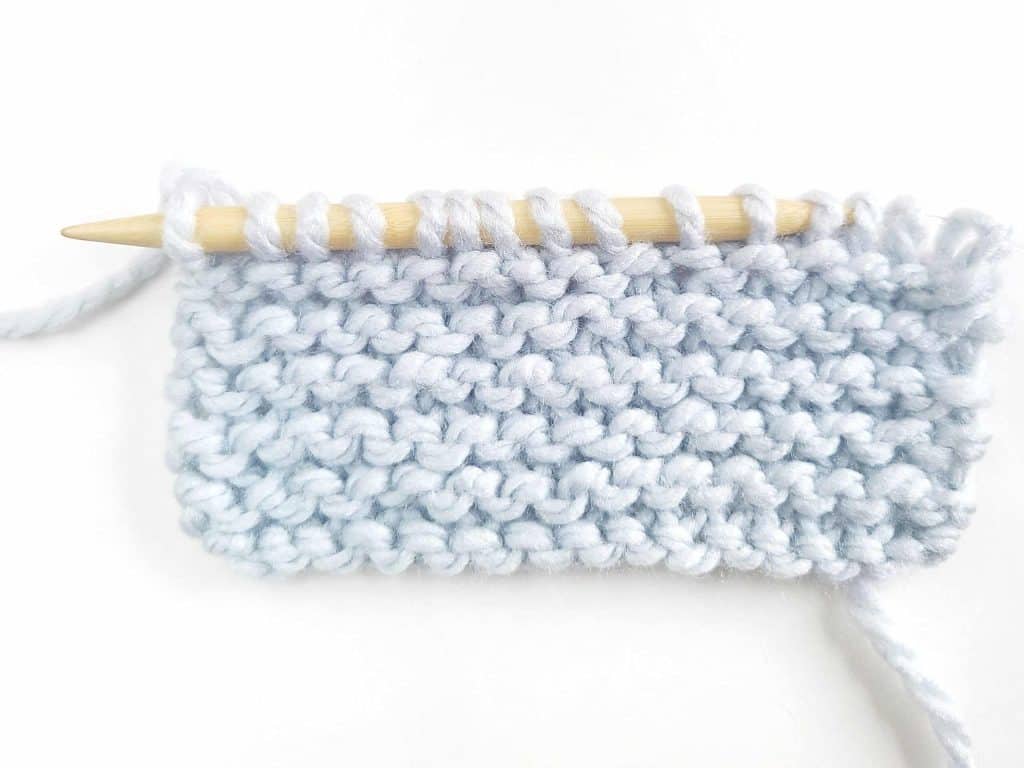
Counting rows in the garter stitch is easy once you know how. The first thing you have to do is identify the row you are currently on.
- To achieve this, look at the stitches on your needle.
- If they are all knit stitches, you are on a right-side row.
- If they are all purl stitches, you are on a wrong-side row.
- Once you have identified the row you are on, counting is simple. For a right-side row, count every knit stitch as one row.
- For a wrong-side row, count every purl stitch as one row.
There is an alternative way to count rows in the garter stitch, and it requires a little bit of easy math:
- Beginning with the Right-Side (RS) of your workpiece
- You see the ridges on your project, count them
- Multiply the number of ridges by 2
- This means that if you counted 5 ridges, you have knit 10 rows
2. Seed Stitch
The seed stitch may seem daunting. However, once you know how to count the rows, it’s not as difficult as it looks. Here’s a step-by-step guide on how to count rows in seed stitch:
- To begin, take a look at your work and find the V-shaped stitches. These will be your starting point.
- Count the number of V-shaped stitches in one row.
- This is the number of seed stitches in that row.
- Next, count the number of times the yarn wraps around the needle between each stitch.
- This is important because it tells you how many times you need to knit into each stitch.
- The number of wraps will be equal to the number of seed stitches in that row plus one.
3. Moss Stitch
Moss stitch is a basic knitting stitch that creates a textured, reversible fabric. It is often used for afghans, baby blankets, and scarves. The stitch is easy to knit and can be worked in any multiple of four stitches.
- To work moss stitch, you will alternate between two knit stitches and two purl stitches across the row.
- You will then repeat this pattern for the next row.
- To keep track of your rows, it is important to count each set of four stitches as one row.
- For example, if you are working on a moss stitch scarf that is 24 stitches wide, you will need to knit six sets of four stitches before you reach the end of the row.
- You will then turn your work and begin the next row by purling the first two stitches and knitting the next two stitches.
4. Stockinette Stitch
When working with stockinette stitch, it is important to be able to count your rows. This will help you keep track of your progress and ensure that your work is even. Here are some tips on how to count rows in stockinette stitch:
- To count the rows in stockinette stitch, simply look at the right side (RS) of your work.
- The stitches will appear as V-shaped loops. Each row will have one V-shaped loop for each stitch.
- So, if you are working with 10 stitches, you will have 10 V-shaped loops in each row.
- To keep track of your progress, it can be helpful to mark the first and last stitch of each row with a contrasting piece of yarn or a marker.
- This way, you will always know where you started and stopped counting.
5. Reverse Stockinette Stitch
If you’re a beginner knitter, you may be wondering how to count rows in reverse stockinette stitch. Here’s a quick and easy guide to help you get started.
- To count rows in reverse stockinette stitch, simply look at the right side (RS) of your work and count the number of visible ridges.
- One ridge equals one row. So, if you see four ridges, that means you’ve knit four rows.
- It’s important to note that when you’re counting rows in reverse stockinette stitch, you’ll only be able to see the odd-numbered rows on the right side of your work.
- The even-numbered rows will be hidden on the wrong side.
- However, don’t let this confuse you – just count the visible ridges, and you’ll be fine!
Knit Row Counting Tips
If you’re a beginner knitter, counting rows can seem daunting. But with a few simple tips, you’ll be counting like a pro in no time! Here are some tips for counting rows in knitting:
1. Use a row counter: This is probably the easiest way to keep track of your rows. Simply click the row counter every time you complete a row.
2. Use a stitch marker: Another simple way to count rows is to place a stitch marker at the beginning of each row. Then, once you’ve completed the row, simply move the marker up to the next row.
3. Use a piece of scrap yarn: This method is similar to using a stitch marker, but can be even easier to keep track of. Simply tie a piece of scrap yarn around your work at the beginning of each row.