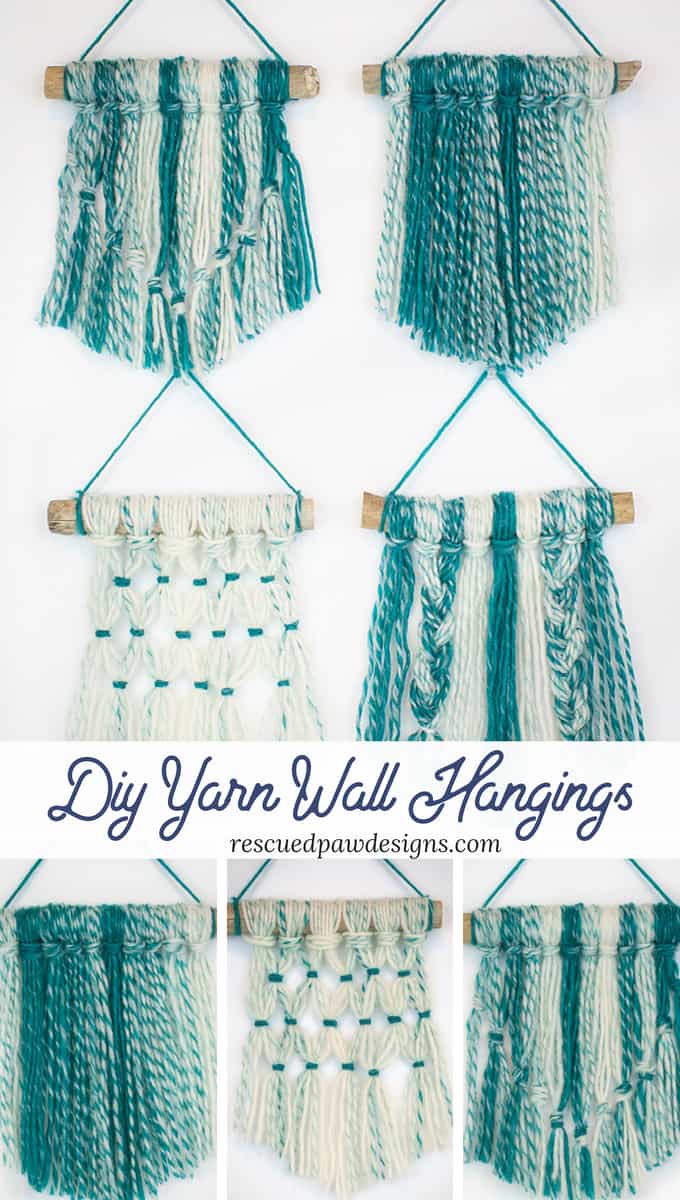
30 Minute DIY Yarn Wall Hangings
Hi There! I am so excited to introduce Lindsey from Winding Road Crochet! She has so generously shared not only 1 but 4 ideas for DIY Yarn Wall Hangings as part of the Easy Crochet Guest Designer program! (Learn more “Here“)
Be sure to stop on over at her blog and say hello after checking out these gorgeous creations. – Krista
I can’t wait for you to make these wall hangings!
Happy Yarn Crafting!
Hello, everyone! I am Lindsey from Winding Road Crochet. You will always find me with a hook in hand, a kid on my lap, and my head full of crafty ideas.
If you are a yarn enthusiast like me, then I am sure you have had a number of the trendy yarn wall hangings popping up on your Pinterest feed. These clean, modern wall hangings or the natural, rustic, bohemian-inspired wall hangings have been a popular trend for a while. There is no better way to add texture, color, and beauty to your home than a yarn wall hanging.
But these wall hangings can be pricey. They can be DIYed, but it can take time and a hefty number of types of yarn. Never fear, I have four yarn wall hangings you can create in under half an hour and with less than one skein of yarn. Let’s get started!
DIY YARN WALL HANGINGS
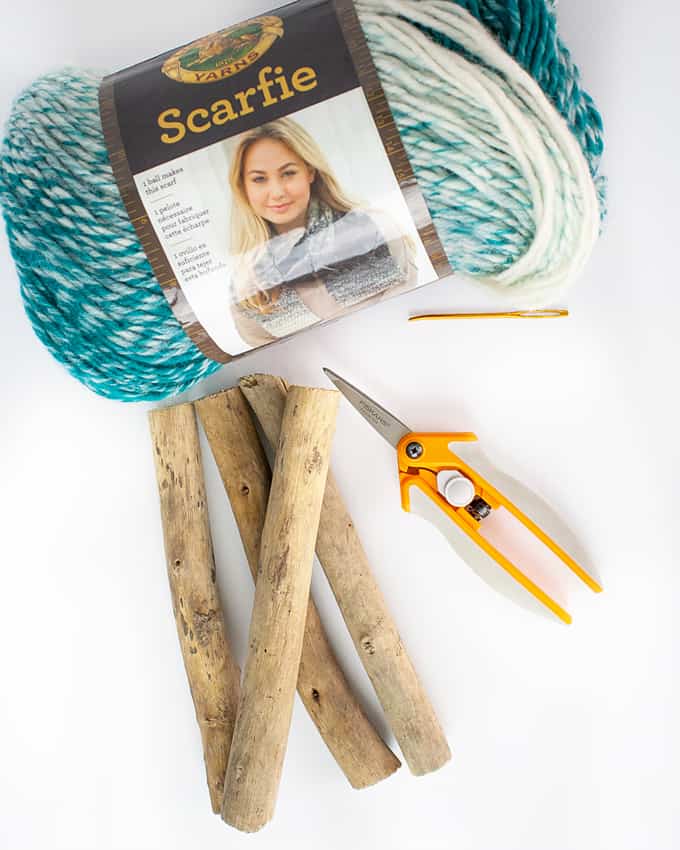
Step 1: Gather Your Supplies
The trick to creating a beautiful wall hanging with very little supplies is to use a self-striping yarn to provide many coordinating colors with only one skein of yarn. I choose to use Lion Brand’s Scarfie in a monochromatic scheme but any self-striping yarn will work.
For my base, I picked up some 10-inch pieces of driftwood at my local Joann store. Now just grab a pair of scissors, a needle, and a big book and you will have everything you need.
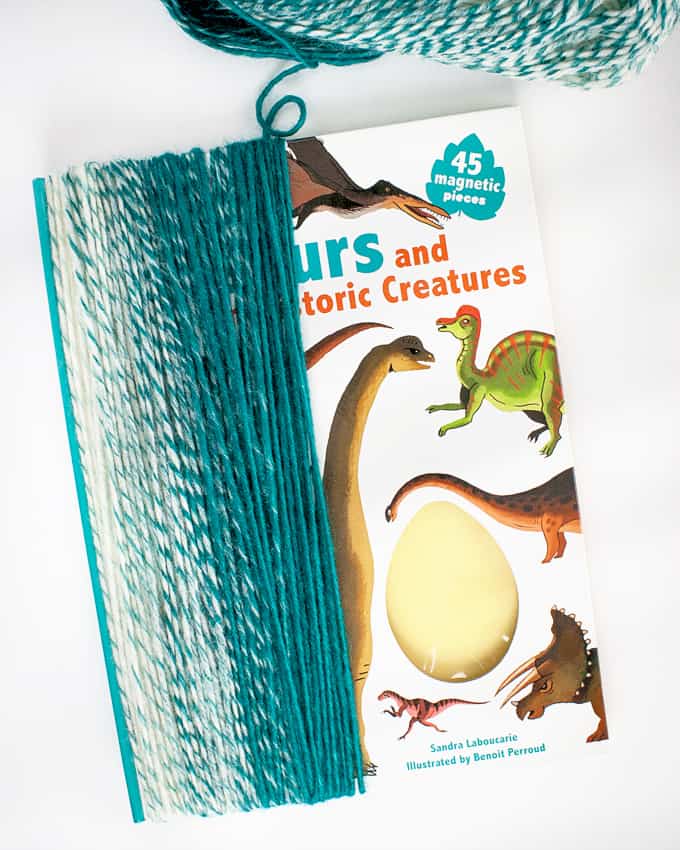
Step 2: Cut Your Yarn
We are going to need quite a few strands of yarn and the easiest way I have found is to wrap the yarn around a book and cut one end. I used my son’s big dinosaur book.
The bigger the book, the longer the strands and the taller your wall hanging. My book is 14 inches tall, giving me 28-inch strands. I cut 140 strands for my four wall hangings.
Step 3: Put it All Together
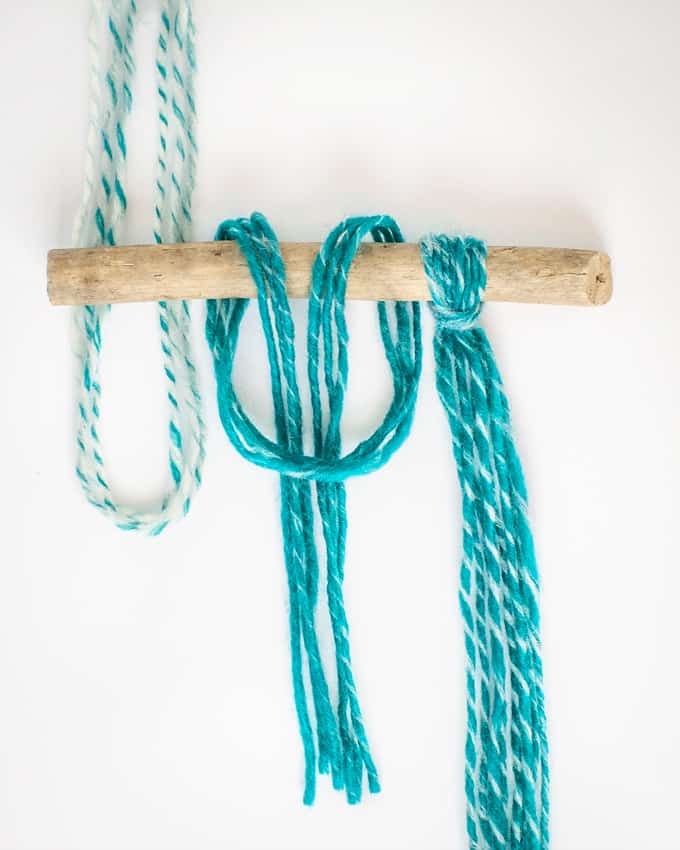
Now we need to get all the strands on our driftwood. Take four strands of yarn and fold them in half creating a loop. Place that loop under the piece of driftwood and going around the driftwood, pull the ends of the yarn through the loop.
Repeat this 5 to 10 more times for each piece of driftwood. The more strands you add the fuller your wall hanging will look.
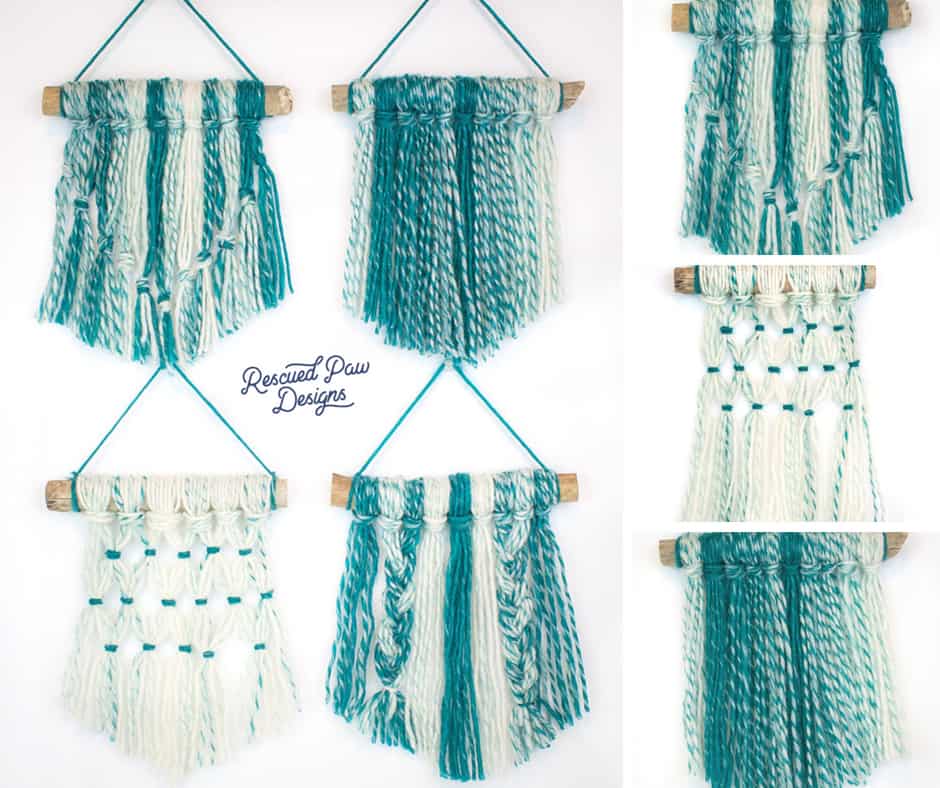
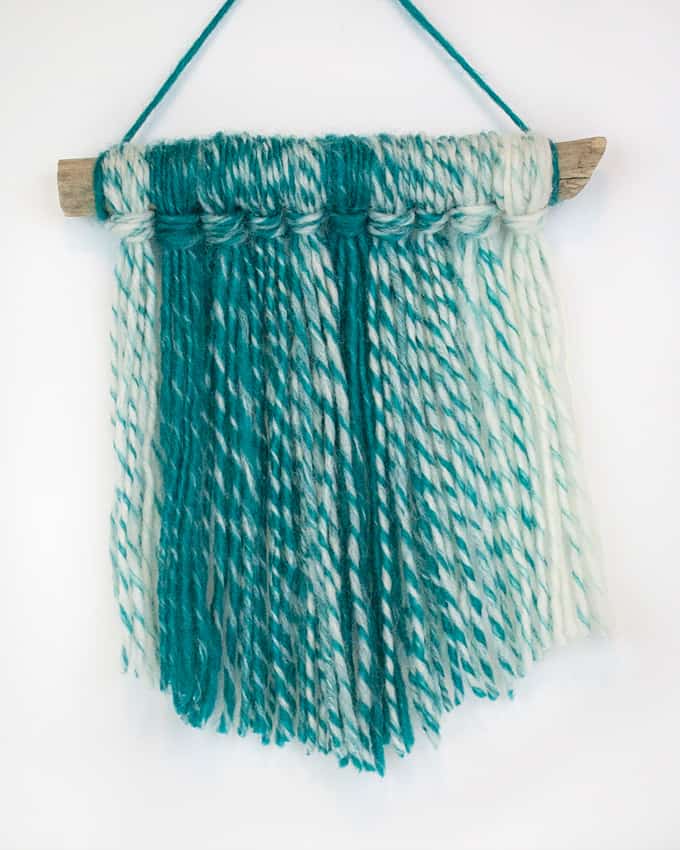
Your finished wall hanging when following the first 3 steps!
Want To Add Some Texture?
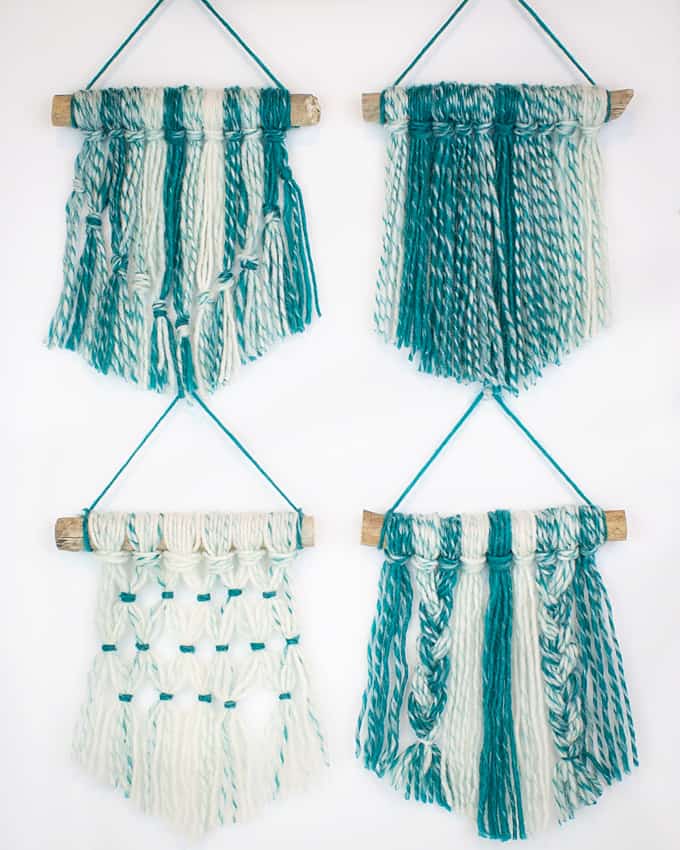
For a clean and modern looking wall hanging you can just leave your yarn hanging straight as I did in my first wall hanging. If you want to add a little more textural detail follow the tips below.
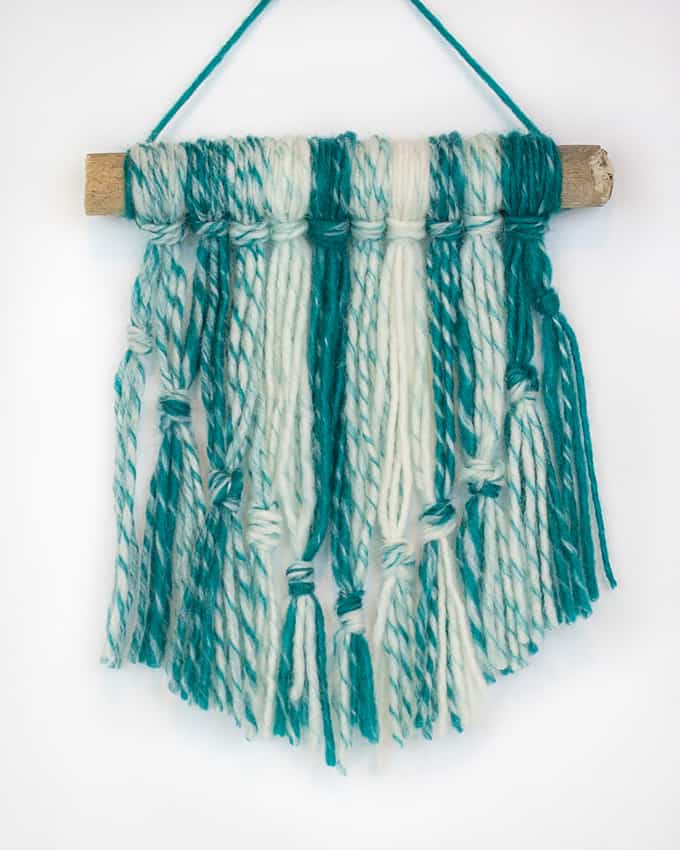
Knots
In my second wall hanging, I took a few strands and tied a knot for a simple macrame look. I created my knots in a ‘V’ shape.
Braids
In my third wall hanging, I braided a few of the yarn strands. Braids add more movement to your wall hanging and weave the colors of your yarn together in interesting ways.
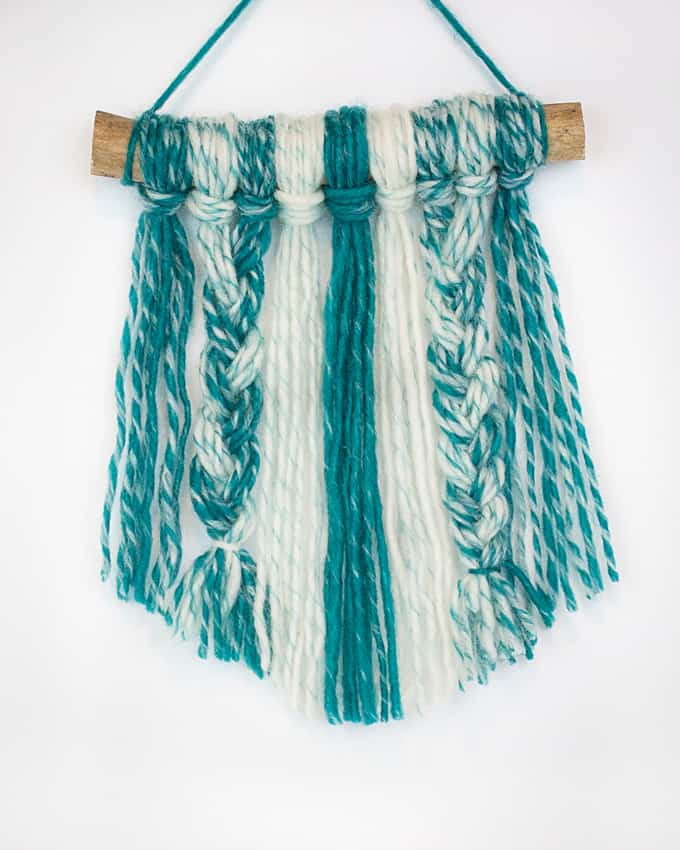
Faux Macrame
Macrame wall hangings are beautiful but sometimes the knots can get a little confusing. Create a faux macrame effect by using yarn to ‘knot’ strands together. I wrapped a piece of yarn twice around a group of strands and knotted it in the back. I then used a yarn needle to tuck the ends of my piece of yarn behind the knot and trimmed the excess.
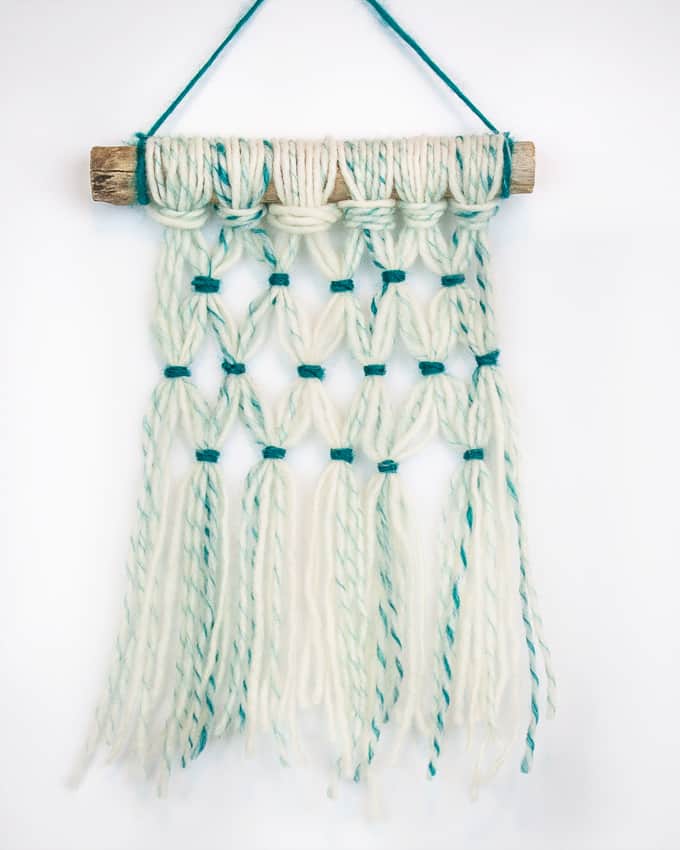
After adding your desired textural elements, you are almost finished with your wall hanging.
Step 5: The Final Touches
To finish up, take a strand of yarn about 8 inches long and tie it around each side of your driftwood on the outsides of the yarn strands. This will give you something to hang your piece by. Then use a very sharp pair of scissors and trim up the bottom of the hangings. You can leave the bottom straight, asymmetrical, or cut a point like my examples. A nice clean cut will give the piece a more modern appeal, while a less precise line will give the wall hanging a natural bohemian look.
YOU ARE DONE WITH YOUR YARN WALL HANGING!
Now you have a wonderful group of wall hangings to compliment any room in your home. Make a variety of these wall hanging to decorate your home quick and easy.
Krista here again! I hope you enjoyed Lindsey’s yarn creations! If you are interested in being a guest blogger too “Click Here” to learn more.
Happy Crafting!

Lindsey is the heart and soul behind the blog Winding Road Crochet where she shares crafts and crochet patterns that fill her family’s closets, toy chests, and home. When not crocheting, She is busy hiking, road-tripping and exploring Arizona with her husband and two children. Stop on over to meet Lindsey at windingroadcrochet.com or on Instagram @windingroadcrochet.
Bellissimi!!!
Thank you! She did a fantastic job on these! 🙂
-Krista